All control throws are measured at the control surfaces widest point and each is measured from
neutral. Begin with the ‘Normal’ throws and safe centre of gravity position. Experienced flyers can
increase the throws to the ‘Highly Aerobatic’ once they are happy flying the model.
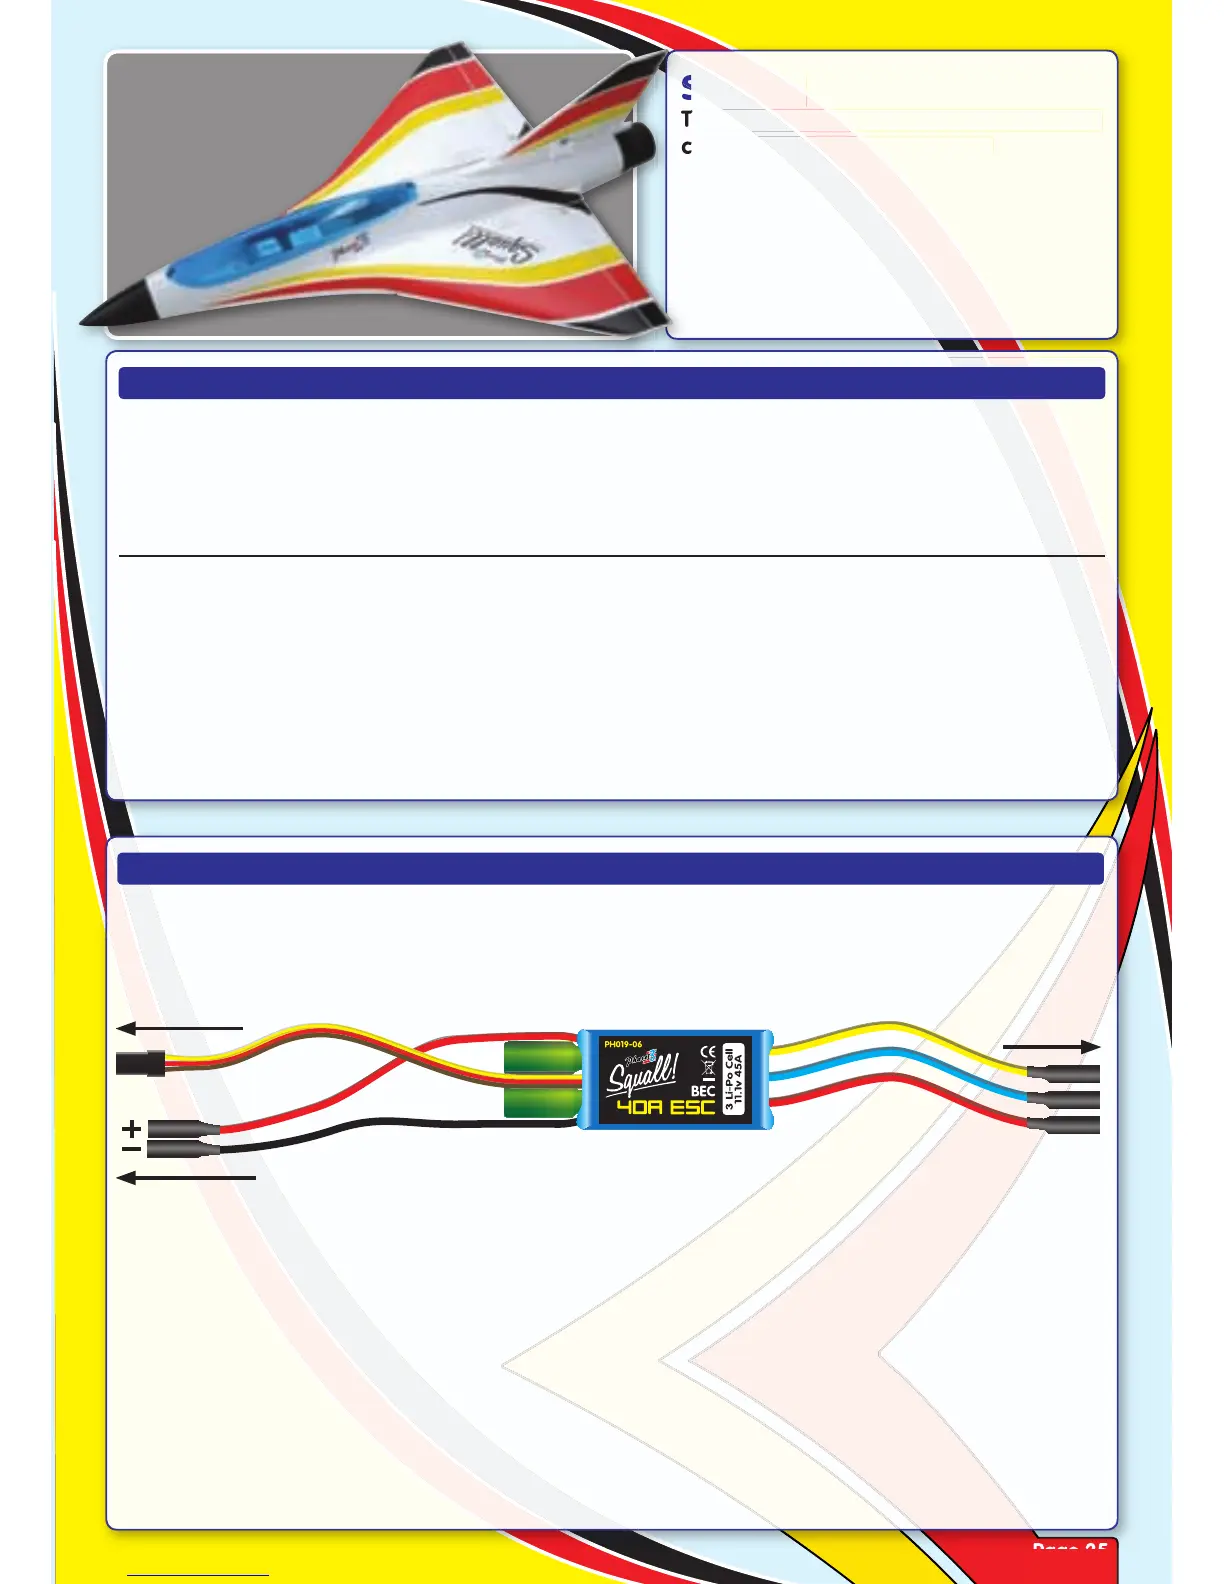
SETTING UP THE ESC
The Squall! is supplied with an electronic speed controller (ESC) that is very simple to set up. It is
connected as shown in the diagram here.
If you are using a Futaba transmitter, reverse the throttle channel. If you are using a JR transmitter,
leave the throttle channel in its normal position. If your are using a different transmitter, refer to the
user’s guide provided with your radio control system. In all cases, set the throttle ATV (Adjustable
Travel Volume) set at 120% on full throttle.
With the throttle control stick at its LOW position, switch on the transmitter. Connect a fully-charged
LiPO battery. There is no separate switch, so connecting the Li-PO battery will turn on the airborne
radio components and begin the motor arming process.
The ESC emits three short ‘beeps’ to confirm that it is armed. Now slowly move the throttle control
stick and the fan will spin.
Elevator 12mm Up/Down ....................20% Expo
Aileron 12mm Up/Down ....................20% Expo
Rudder 10mm Left/Right ....................20% Expo
Safe CG is 60mm from leading edge of the outer
wing panel.
Elevator 22mm Up/Down ...................40% Expo
Aileron 22mm Up/Down ...................40% Expo
Rudder 16mm Left/Right ....................25% Expo
Aerobatic CG is up to 70mm from leading edge
of the outer wing panel.
NORMAL THROWS: HIGHLY AEROBATIC THROWS:
Do not attempt to test fly the model with the Highly Aerobatic throws or CG position!
To Motor
To Flight Battery
To Receiver
Throttle Channel
 Loading...