2. Enter Service Alignment Mode (refer to Service Alignment Mode section).
3. Apply a center cross or crosshatch pattern to the antenna/cable input terminal.
4. Select the White Tone sub-menu by pressing the Menu Up/Down keys on the remote control so that White
Tone is highlighted.
5. Use the Menu Left/Right keys to enter the White Tone sub-menu.
6. Use Menu Up/Down keys to toggle between the options. Be sure to record the values of all options (Normal
Red/Green/Blue, Delta Cool Red/Green/Blue, and Delta Warm Red/Green/Blue).
7. Use the Menu Up/Down keys to select Normal Green, and use the Menu Left key to set Normal Green to
minimum.
8. Loosen the yoke clamp screw, pull the yoke back, and remove the three yoke wedges.
9. Slide the yoke all the way forward so that it rests against the bell of the CRT.
10 Tighten the yoke clamp screw so that the yoke does not drop away from the bell of the CRT.
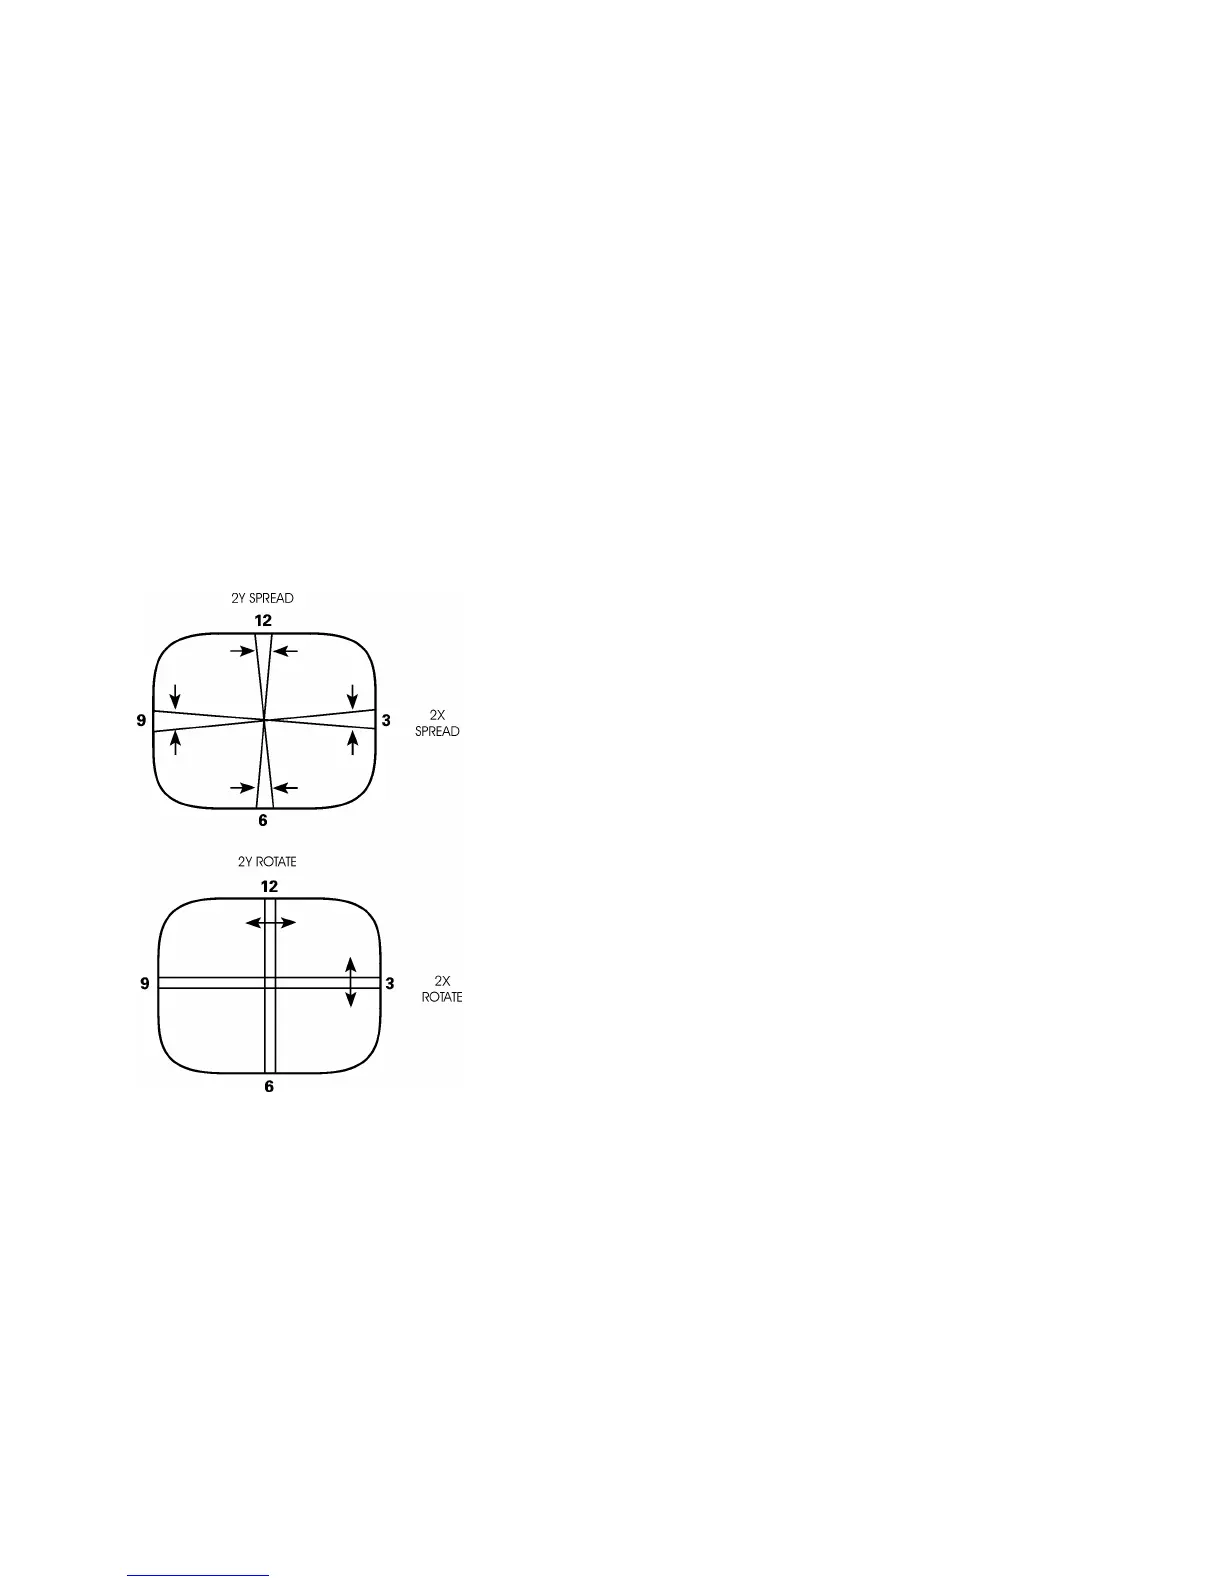
11. Slowly spread, and if necessary, rotate the 2-Y pole purity rings so that the red and blue lines are at least
parallel and preferably coincide at the 6:00 and 12:00 positions as shown in the following linked graphic "2Y
Spread and 2X Rotate".
12. Proceed to the Color Purity Adjustment.
 Loading...