This document serves as a quick start guide for Philips televisions, covering models 32PHG5813/77, 32PHG5833/77, and 43PFG5813/77. It provides instructions for initial setup, connecting various external devices, and basic troubleshooting.
Initial Setup and Assembly
The manual begins with an overview of the components included in the TV package. For models 32PHG5813/77 and 32PHG5833/77 (referred to as "5813" in the diagrams), the package includes the TV display, two stand components, and four screws for assembly. For model 43PFG5813/77 (referred to as "5833"), the package includes the TV display, two stand components, and four screws.
The assembly process for the "5813" models is detailed in steps 1 through 9.
- Unpacking the Stand Components: The stand components and screws are found in a separate box.
- Preparing the TV for Stand Installation: Two people are required to carefully lift the TV out of its packaging. It is crucial to handle the TV by its edges and avoid touching the screen directly to prevent damage.
- Placing the TV: The TV should be placed face down on a soft, flat surface, such as a blanket or the foam packaging, to protect the screen during stand attachment. Again, two people are recommended for this step. The diagram shows a warning against placing the TV on a hard or uneven surface that could scratch or crack the screen.
- Attaching the Stand (Left Side): The left stand component is inserted into the corresponding slot on the back of the TV. The diagram indicates a correct and incorrect way to insert the stand, emphasizing proper alignment.
- Securing the Stand (Left Side): Once inserted, the left stand component is secured with two screws. The diagram shows the correct orientation for the stand.
- Attaching the Stand (Right Side): The right stand component is inserted into its slot. The diagram shows the correct orientation for the stand, with an "R" (Right) indicator.
- Securing the Stand (Right Side): The right stand component is secured with two screws. The diagram shows the correct orientation for the stand.
- Lifting the TV: With the stand components securely attached, two people should carefully lift the TV to an upright position.
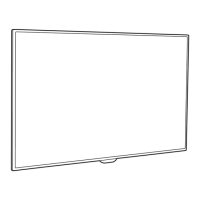
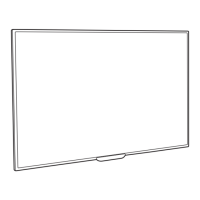
- Final Placement: The TV can now be placed on a stable, flat surface. The diagram shows the TV correctly positioned on its stand.
The assembly process for the "5833" model is detailed in steps 1 through 11.
- Unpacking the Stand Components: The stand components and screws are found in a separate box.
- Preparing the TV for Stand Installation: Two people are required to carefully lift the TV out of its packaging. It is crucial to handle the TV by its edges and avoid touching the screen directly to prevent damage.
- Placing the TV: The TV should be placed face down on a soft, flat surface, such as a blanket or the foam packaging, to protect the screen during stand attachment. Again, two people are recommended for this step. The diagram shows a warning against placing the TV on a hard or uneven surface that could scratch or crack the screen.
- Attaching the Stand (Left Side): The left stand component is inserted into the corresponding slot on the back of the TV. The diagram indicates a correct and incorrect way to insert the stand, emphasizing proper alignment.
- Securing the Stand (Left Side): Once inserted, the left stand component is secured with two screws. The diagram shows the correct orientation for the stand.
- Attaching the Stand (Right Side): The right stand component is inserted into its slot. The diagram shows the correct orientation for the stand, with an "R" (Right) indicator.
- Securing the Stand (Right Side): The right stand component is secured with two screws. The diagram shows the correct orientation for the stand.
- Lifting the TV: With the stand components securely attached, two people should carefully lift the TV to an upright position.
- Final Placement: The TV can now be placed on a stable, flat surface. The diagram shows the TV correctly positioned on its stand.
Connecting External Devices
The manual provides clear diagrams for connecting various external devices to the TV.
- Power Connection: The TV is connected to a power outlet using the provided power cable. The diagram shows the AC IN port on the TV and the plug connecting to a wall socket.
- TV Antenna: To receive broadcast channels, a 75 Ω coaxial cable is connected from the TV antenna or cable TV wall outlet to the "TV ANTENNA" port on the TV.
- Home Theater System (HDMI ARC): A home theater system can be connected to the TV using an HDMI cable. For optimal audio, connect to the "HDMI 2 ARC" port on the TV and ensure the home theater system also supports ARC (Audio Return Channel). This allows audio to be sent from the TV to the home theater system via the HDMI cable.
- DVD Player (HDMI): A DVD player can be connected to the TV using an HDMI cable. The manual indicates "HDMI 1, 2" as available ports for this connection.
- MHL (Mobile High-Definition Link): For devices supporting MHL, connect an MHL cable to the "HDMI 1 MHL" port on the TV. This allows compatible mobile devices to display content on the TV and receive power simultaneously.
- Network - Wireless: The TV supports wireless network connectivity. The diagram shows the TV connecting to a router wirelessly.
- Network - Wired: For a wired network connection, an Ethernet cable is connected from the router to the "NETWORK" port on the TV.
- Computer (HDMI): A computer can be connected to the TV using an HDMI cable, utilizing "HDMI 1, 2" ports.
- Video Player (YPbPr, L/R): Older video players with component video (YPbPr) and analog audio (L/R) outputs can be connected to the TV. The YPbPr cables (green, blue, red) are connected to the corresponding "Y/Pb/Pr" ports, and the L/R audio cables (white, red) are connected to the "L/R" audio input ports.
- Video Player (CVBS, L/R): Video players with composite video (CVBS) and analog audio (L/R) outputs can be connected. The CVBS cable (yellow) is connected to the "CVBS/Y" port, and the L/R audio cables (white, red) are connected to the "L/R" audio input ports.
- Photo Camera (USB): A digital camera can be connected to the TV via a USB cable to view photos. The USB cable is plugged into the "USB" port on the TV.
- Digital Audio System (HDMI ARC): Similar to a home theater system, a digital audio system can be connected to the "HDMI 2 ARC" port for audio output from the TV.
- Digital Audio System (Optical): For digital audio output, an optical cable is connected from the "DIGITAL AUDIO OUT" port on the TV to the corresponding input on a digital audio system.
- USB Flash Drive: A USB flash drive can be inserted into the "USB" port on the TV to play media files.
- Headphones: Headphones can be connected to the headphone jack on the TV for private listening.
The manual provides VESA mounting information for each TV model:
- 32PHG5813: VESA (x) 100 mm M6, with a maximum screw length of 80 cm.
- 32PHG5833: VESA (x, y) 100x100 mm M4, with a maximum screw length of 80 cm.
- 43PFG5813: VESA (x, y) 200x200 mm M6, with a maximum screw length of 108 cm.
These specifications are crucial for selecting the correct wall mount and screws.
Remote Control and Basic Operation
The manual includes instructions for installing batteries in the remote control:
- Open Battery Compartment: Slide down the battery cover on the back of the remote control.
- Insert Batteries: Insert two AAA LR03 1.5V batteries, ensuring correct polarity (+ and - ends match the indicators inside the compartment).
- Close Battery Compartment: Slide the battery cover back into place until it clicks.
Basic remote control usage and TV interaction are also illustrated:
- Remote Control Range: The diagram shows the optimal range and angle for using the remote control, indicating that direct line of sight to the TV's IR sensor is important. Obstructions or excessive distance can interfere with the signal.
- On-TV Controls: The TV also has physical controls, typically a joystick or a set of buttons, for basic functions like power, volume, and channel selection. The diagram shows the location of these controls, usually on the back or bottom of the TV. The joystick allows navigation (up, down, left, right) and confirmation (press in for OK).
- On-Screen Menu Navigation: The remote control's navigation buttons (up, down, left, right) and "OK" button are used to navigate the TV's on-screen menus. The diagram shows the remote control's navigation cluster and corresponding on-screen menu elements for volume, source, and settings.
Troubleshooting and Support
The manual highlights resources for troubleshooting and support:
- Help Menu: The TV has a built-in "Help" menu accessible via the remote control. This menu provides information and solutions to common issues. The diagram shows how to access the help menu by pressing a dedicated "Help" button or navigating through the settings.
- Online Support: For further assistance, users are directed to the Philips TV support website: www.philips.com/TVsupport. This website offers comprehensive support, including FAQs, troubleshooting guides, and software updates. The diagram illustrates searching for information on the website.
Maintenance Features
While not explicitly detailed as "maintenance features," the instructions for handling the TV during setup imply best practices for care:
- Careful Handling: Always use two people to lift and move the TV, especially when taking it out of the box or placing it on a surface.
- Screen Protection: When placing the TV face down, always use a soft, clean surface (like a blanket or the foam packaging) to prevent scratches or damage to the screen. Avoid placing it on hard or abrasive surfaces.
- Proper Stand Assembly: Ensure the stand components are correctly aligned and securely fastened with all screws to guarantee stability and prevent the TV from tipping over.
- Remote Control Battery Replacement: Regularly check and replace the remote control batteries when they are low to ensure uninterrupted operation. Use the specified battery type (AAA LR03 1.5V) and observe correct polarity.
This quick start guide provides essential information for setting up and using Philips TVs, emphasizing safety, proper assembly, and connectivity options, along with resources for further support.