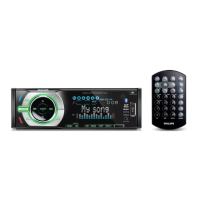
Overview of parts 1
These are the supplied parts needed to connect
and install this unit.
a
In-car audio system and sleeve
b Fr
ont panel
c Standard connector
d Trim plate
e Rubber cushion
f Disassembly tools
g
Screws (4 pieces)
Connect wires
Caution
• Ensure that all loose leads are insulated with
electrical tape.
ISO connectors 2 3
1 Pull out the ISO connectors from the car
dashboard and connect them to the bigger
end of the supplied standard connector.
2 Connect the other end of supplied standard
connector to the unit.
3 Do the other connections, if applicable.
Without ISO connectors 3 4 5
1 Cut off the bigger end of the supplied
standard connector.
2 Check the car’s wiring carefully, then connect
them to the standard connector.
3 Connect the supplied standard connector to
the unit.
4 Do the other connections, if applicable.
Connector Connect to
1 Black wire A metal surface of the car
First connect the black
ground (earth) lead, then
connect the yellow and red
power supply leads.
2 Yellow wire The +12V car battery which
is live at all times .
3 Blue wire Motor/electric antenna relay
control lead/Amplifi er relay
control lead
4 Red wire The +12V power terminal
which is live in the accessory
(ACC) position of the
ignition switch
If there is no accessory
position, connect to the
+12V car battery terminal
that is always live. Be sure
to connect the black ground
(earth) lead to a metal
surface of the car fi rst.
5 Green and
green/black
wires
Left speaker (Rear)
6 White and
white/black
wires
Left speaker (Front)
7 Gray and
gray/black
wires
Right speaker (Front)
8 Purple and
purple/black
wires
Right speaker (Rear)
Mount in the dashboard 6
1 If the car does not have an on-board drive
or navigation computer, disconnect the
negative terminal of the car battery.
If you disconnect the car battery in •
a car that has an on-board drive or
navigation computer, the computer may
lose its memory.
If the car battery is not disconnected, •
to avoid short-circuit, ensure that bare
wires do not touch each other.

 Loading...