INSTALLATION INSTRUCTIONS
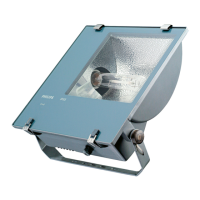
F Series Floodlight
© 2016 Philips Lighting Holding B.V. All rights reserved.
www.philips.com/luminaires
Part Number 443561002550 Rev. F
Page 2 of 7
FIXTURE and BALLAST
ASSEMBLY
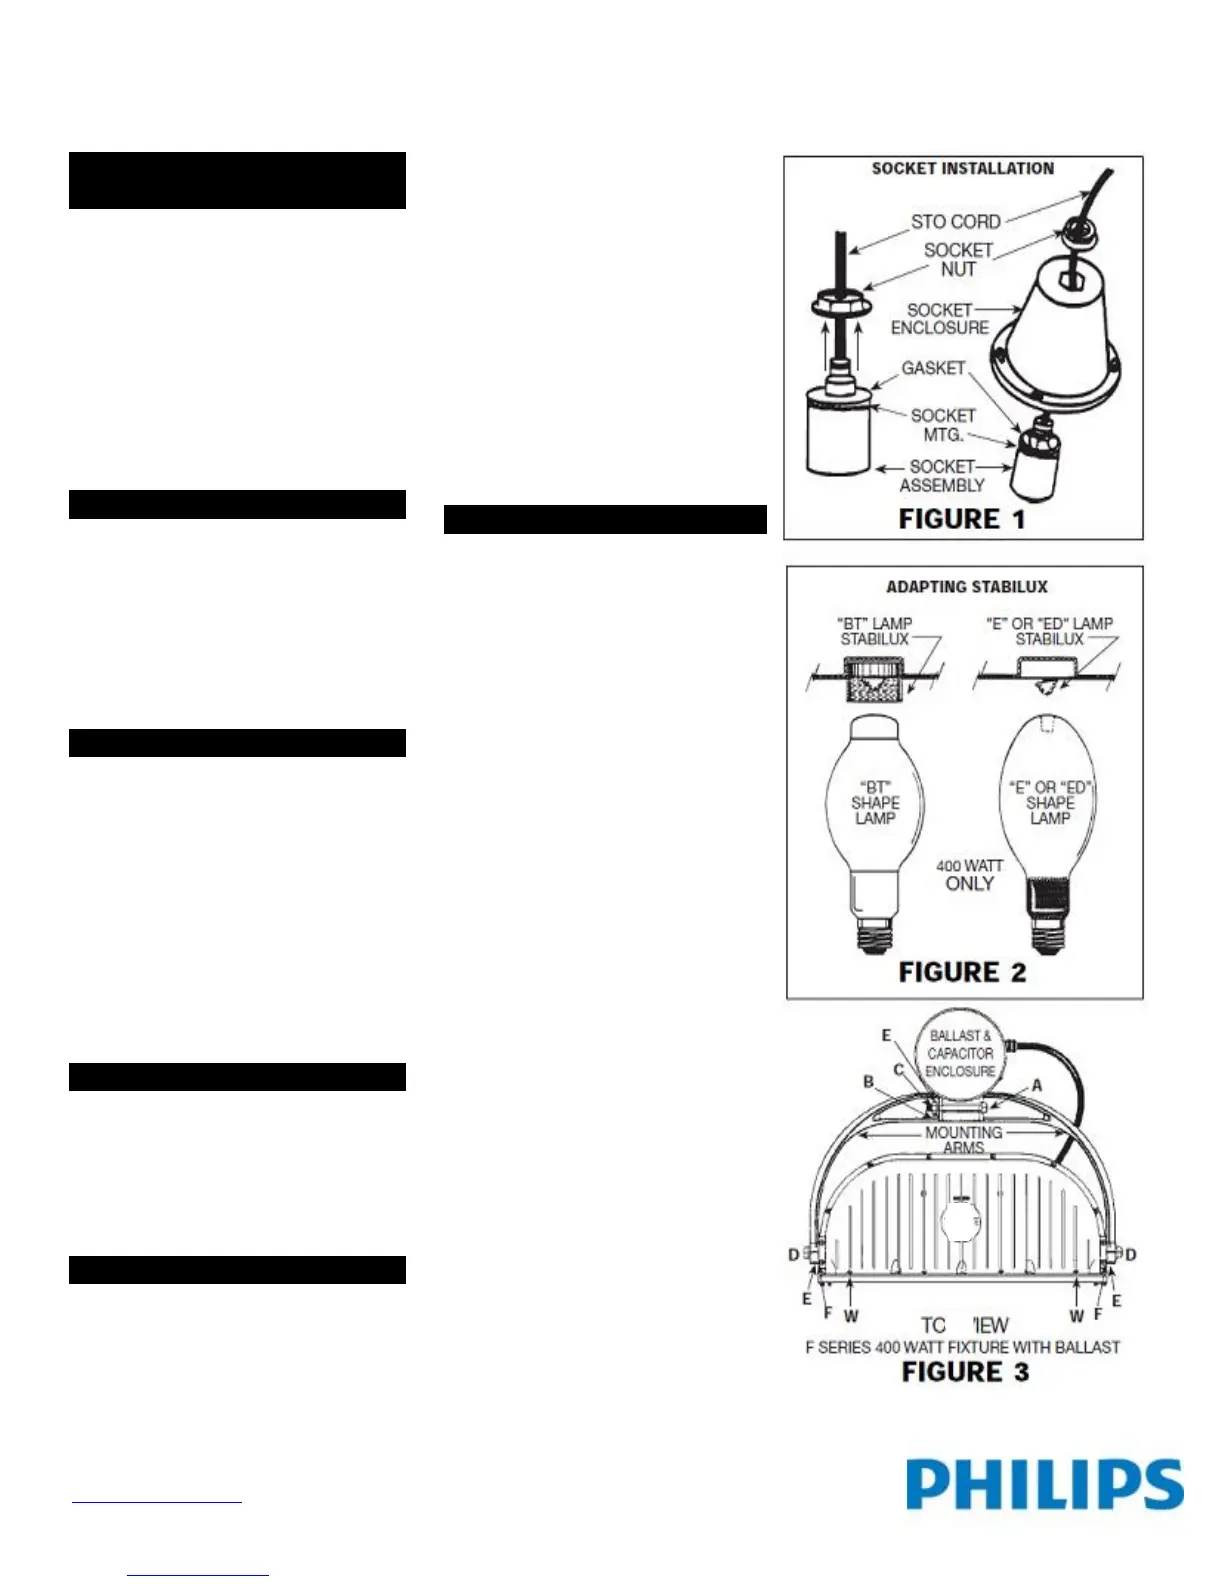
STEP 1
Loosen the socket nut and remove from
the socket/cord assembly. Remove socket
housing from the fixture. Pull the S.O.
cord through the socket housing.
CAUTION: Make sure the
weatherproof gasket is between the
socket and inside of socket housing as
shown in FIGURE 1.
Install the socket nut and tighten to
15 ft-lbs. to assure a good weatherproof
seal.
LAMPING
STEP 2
Prior to installing lamp into socket,
check to make sure it is the correct type
and wattage.
CAUTION: Observe lamp
manufacturer’s recommendations and
restrictions on lamp operation,
particularly regarding ballast type
and burning position.
STABILUX LAMP SOCKET
STEP 3
This floodlight has a stabilux lamp
socket that grips the top of the lamp
which holds the lamp in alignment and
offers protection against breakage when
the fixture is subjected to vibration.
Before installing lamp into the fixture
you will need to determine the correct
stabilux holder required for the particular
lamp purchased. This determination is
dependent on the lamp shape. “BT”,
“ED” or “E” shaped (See FIGURE 2).
BT SHAPED LAMPS
Install lamp into socket. Attach socket
housing to the fixture, making sure end
of lamp securely engages the fiberglass
tape-lined stabilux (split collar). Be sure
socket housing gasket is seated properly,
and then tighten the screws securely.
E OR ED SHAPED LAMPS
This lamp shape is primarily found in
400 watt size lamps. The “BT” stabilux
collar must be removed before installing
an “E” or “ED” shaped lamp. This is
accomplished by compressing the “BT”
(split collar) by hand and removing
from the fixture. Inside the stabilux
cavity of the fixture there is a “E” lamp
stabilux (found on 400 watt floodlights
only). Bend the “E” stabilux (fiberglass
tape-covered cone) down into the
fixture. Install lamp into socket. Attach
socket housing to the fixture, making
sure the “E” stabilux cone firmly
engages the lamp dimple. Be sure the
socket housing gasket is seated
properly, and then tighten the screws
securely.
BALLAST ASSEMBLY
STEP 4
Attach fixture mounting arms to ballast
enclosure/mastfitter assembly with the
4-1/2” long machine bolt, 1/2” flat
washer, 1/2” split-lock washer, and
1/2 – 13 hex head nut (provided in
fixture hardware kits). Arms should be
set in their proper aiming position.
Tighten the 1/2 – 13 hex head nut
slightly (See FIGURE 3)
STEP 5
Mount fixture head to mounting arms.
Install star washers, and attach the two
1-1/2” long machine bolts and 1/2”
split-lock washers (provided in fixture
hardware kit). Fixture at this stage may
be set at the proper vertical aiming
angle by using the degree markings on
the mounting ears. (Aiming angle may
also be set after the fixture and ballast
assembly are mounted to the pole or 2-
3/8” OD vertical tenon). If proper
aiming angle has been set, tighten the
two 1-1/2” long machine bolts
securely, then tighten the 1/2 – 13 hex
head nut on mastfitter to 25 ft-lbs (See
FIGURE 4).
 Loading...