FC8760/01
4-10
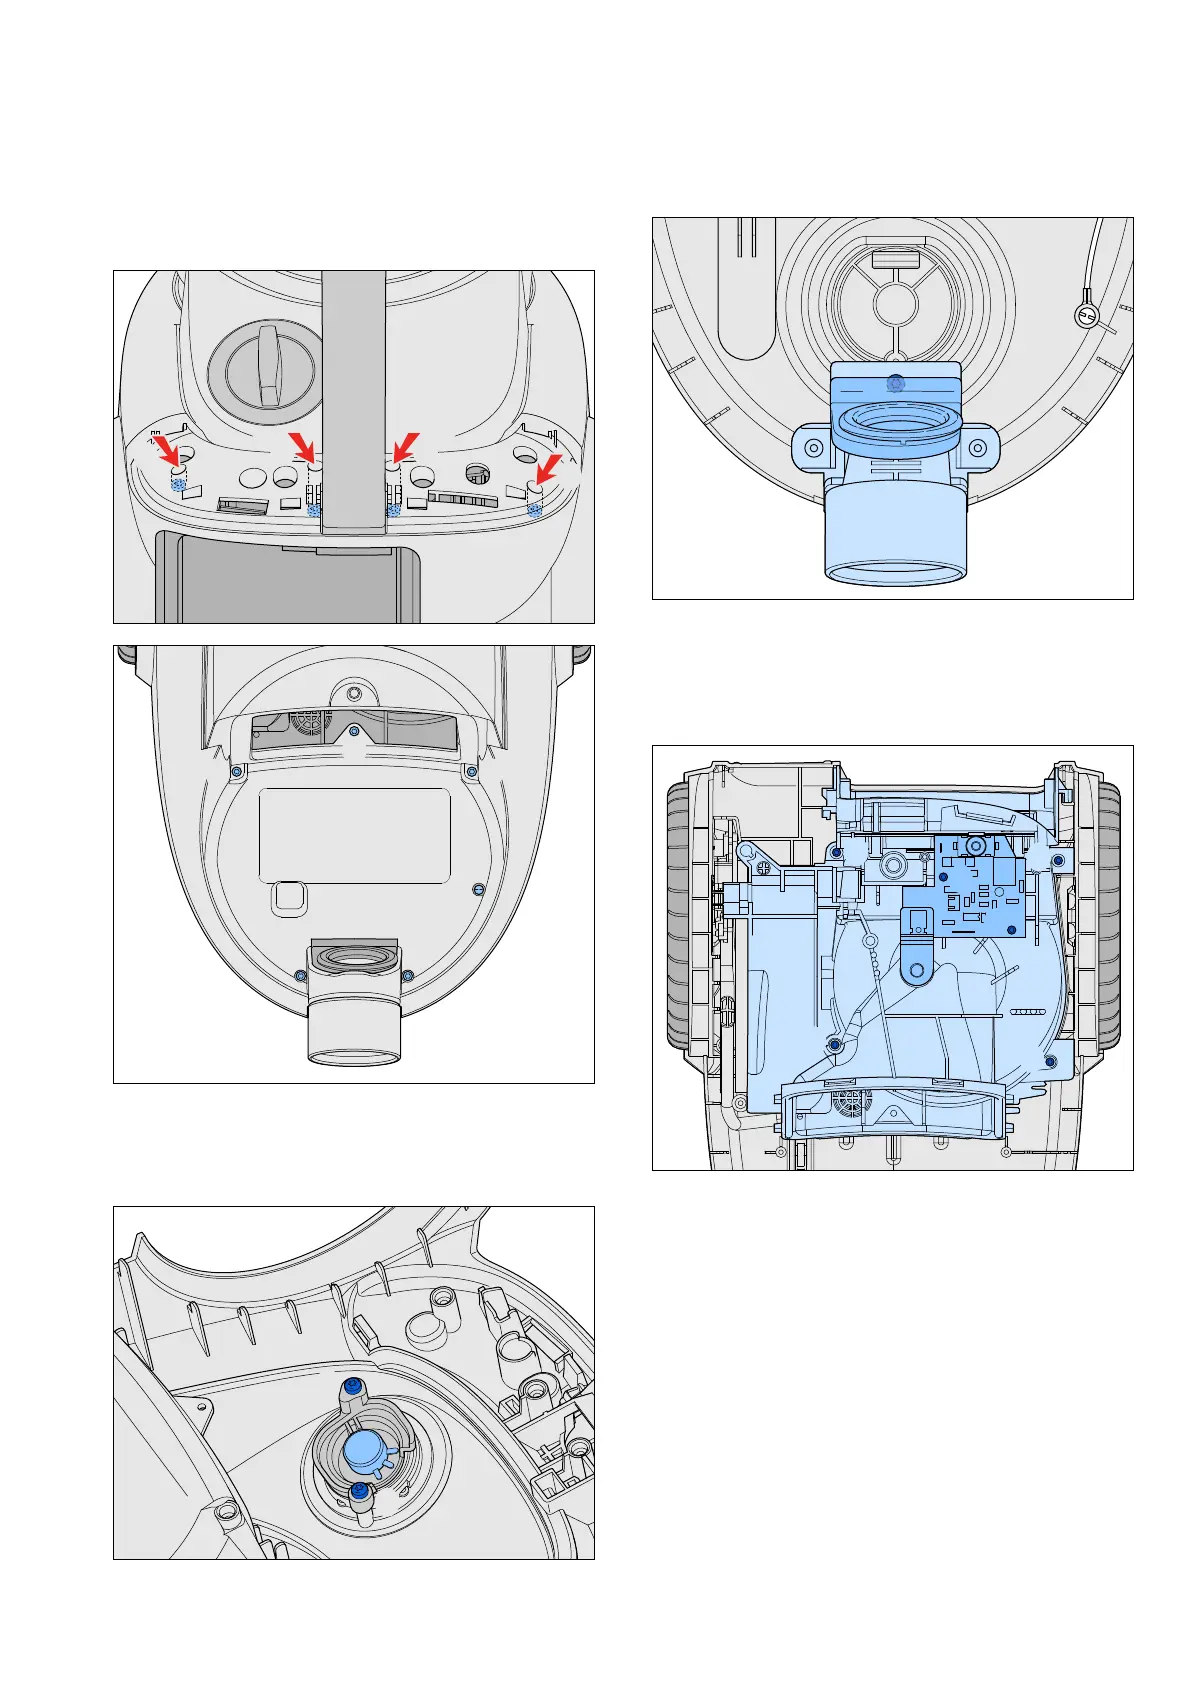
• After removing the two buttons remove the 4 screws B
at the back and the 5 screws C at the front of the upper
housing (see pictures).
• Screw D at the front does not need to be removed, this
screw is for ESD and is located in the lower housing.
B
B B
B
D
C
C
C
CC
• To replace the potmeter (9) situated at the bottom
of the upper housing, remove knob (7) on top of the
upperhousing and remove the 2 scews E at the bottom
of the upper housing (see picture).
E
E
• After removing the upperhousing, Hose connection (10)
and Bucket inlet sealing (13) are accessible. To replace
the hose connection screw F has to be removed.
F
• To replace Cordwinder (24) or Motor (31) Motor
housing (28) has to be removed, this can be done by
removing the 4 screws G (see picture).
Remark:
A special long screw driver is needed!
H
H
G
G
G
G
• To replace the PCB (9) remove the 2 short screws H.
DISASSEMBLY- AND RE-ASSEMBLY ADVISE