FC9910/01/B
When the built-in diagnostics leads to the need to check the
appliance internally, please follow below steps to bring the
appliance to a service position.
- Before opening the appliance, first remove the dustbin cover
(3) and dustbin assembly (5-8).
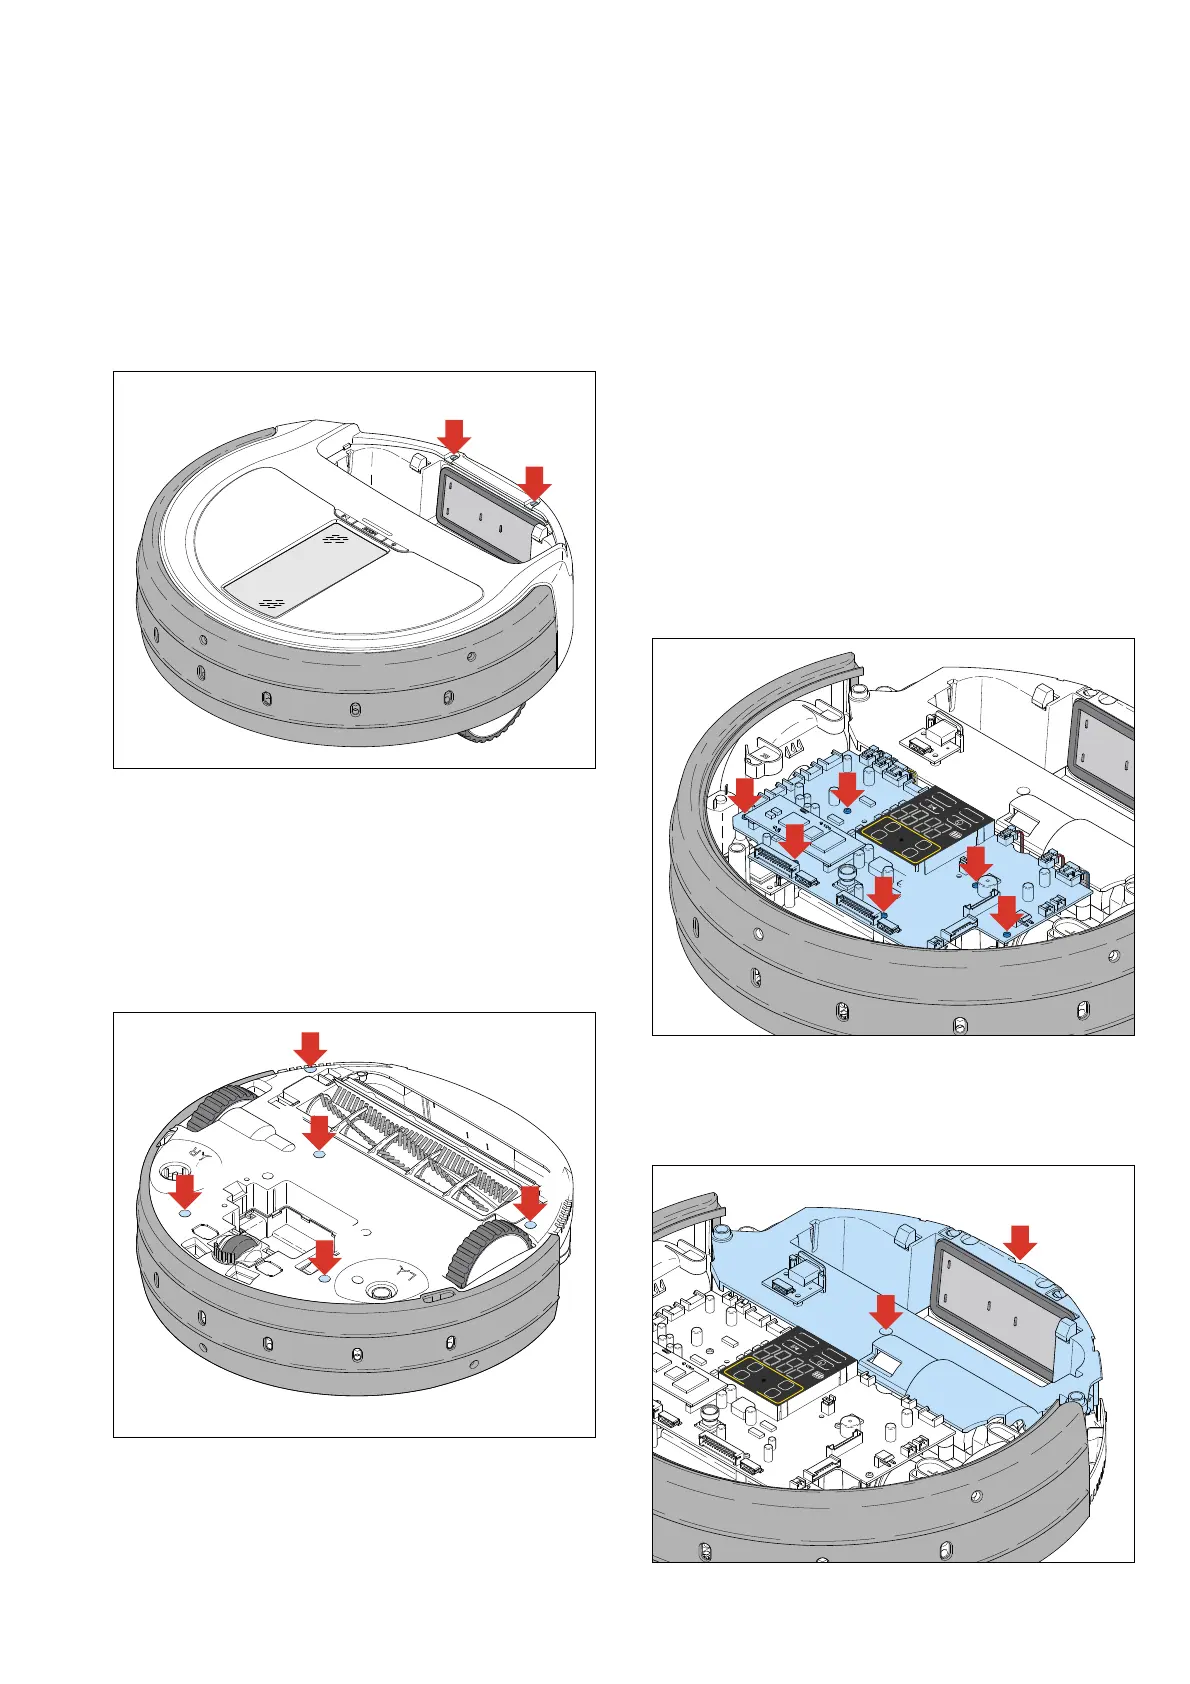
- Remove the two screws (A) in the top cover, see picture
below:
A
A
- Turn the appliance upside down on a clean protective mat
or sheet to prevent scratches to the top cover.
- Switch the appliance off with the main switch at the bottom
of the appliance.
- Remove the battery (12)!
- Remove the side brushes (11).
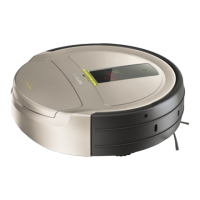
- Remove the 5 screws (B) as indicated in below picture
(one screw is located underneath the QC sticker):
B
B
B
B
B
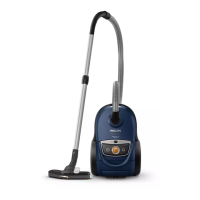
- Turn the appliance around again and remove the upper
cover (18), take care of unplugging the button interface
cable (20) from the main board! Do not forget to reconnect
the interface cable to the main board when re-assembling
the upper housing!
Note: When there is no need to disassemble the bumper assy,
please leave it in place as the wiring routing is quite
complex, and would result in unnecessary time spent, as
all mechanical components can be reached when only
the main PCB is removed.
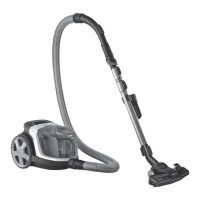
- Undo all connectors from the main board, apart from the
connectors connecting to the bumper assy (J7, J11, J14 and
J202). Unscrew the 6 screws (C) indicated in the picture
below. You can now flip the main PCB (25) over, to the
front, and access all internal components. Please mind the
main PCB when servicing any part of the appliance, as it is
a sensitive piece of electronics.
CARPET
AUTO
SPOT
CLIMB
AM
PM
MODE
? INFO
TURBO
C
6x
- When access to the Roller Brush motor (31) or Vacuum
motor (26) is required, please remove the two screws (D)
holding the Cover Middle assy (23) in place. And remove
the Cover Middle assy, see picture below.
CARPET
AUTO
SPOT
CLIMB
AM
PM
MODE
? INFO
TURBO
D
D
DISASSEMBLY- AND RE-ASSEMBLY ADVISE
2-17