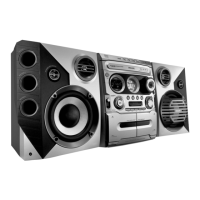
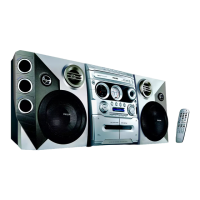
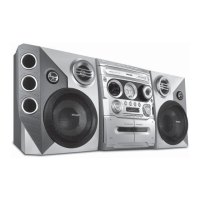
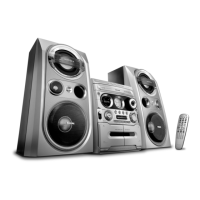
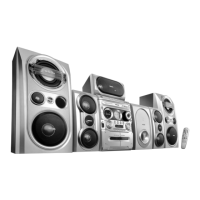
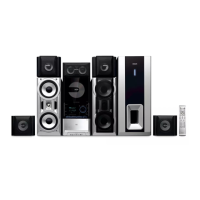
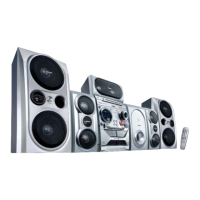
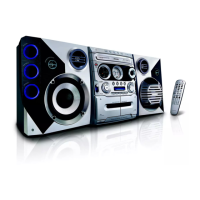
Functional Overview
Controls on the system
1
ECO POWER/ STANDBY ON
– to switch the system on, to Eco Power or
Standby mode.
2
DISPLAY SCREEN
– to view the current status of the system.
3
SOURCE
– to select the following:
DISC (DISC 1•2•3)
– to select disc tray 1, 2 or 3
TUNER (BAND)
– to select waveband: FM or MW.
TA PE (TAPE 1-2)
– to select tape deck 1 or 2.
AUX•GAME
– to select a connected external source: TV/CDR,
AUX (auxiliary) or Gameport mode.
4
PREV / PRESET / NEXT O P
(TITLE – / +)
for DISC .................... to select previous/next title,
chapter or track during
playback.
for TUNER ............... to select a preset radio
station.
for CLOCK .............. to set the hour.
5
SEARCH•TUNING 1 / ¡
(ALBUM – / +)
for DISC .................... to search backward/forward.
to select previous/next
album in MP3/WMA stop
mode (with MENU ON).
for TAPE ..................... to rewind or fast forward.
for TUNER ............... to tune to a lower or higher
radio frequency.
for CLOCK .............. to set the minute.
6
MIC VOL./ MIC IN
– to adjust the mixing level for karaoke or
microphone recording.
– to connect microphone jack.
7
38 (PLAY/PAUSE)
for DISC .................... to start or interrupt pla
yback.
for TAPE ..................... to start playback.
for PLUG&PLAY ... (on the system only
) to initiate
plug & play mode.
8
DEMO•STOP 7
for DISC .................... to stop playback or to clear a
programme.
for DEMO ................ (in Standby or ECO power
mode) to activate/deactivate
demonstration.
for PLUG&PLAY ... (on the system only) to exit
plug&play mode.
9
MAX SOUND
– to activate or deactivate MAX sound.
0
DISPLAY
– to display disc information during disc playback.
!
CLOCK
– to view or to set clock.
@
TIMER
– to view or to set timer.
#
TA PE DECK 1/ 2
$
0 OPEN
– to open the tape deck door.
%
AUTO REPLAY
–to select continuous playback in either AUTO
PLAY or ONCE mode only.
^
RECORD
– to start recording on tape deck 2.
&
VIDEO
– use a video cable to connect to your game
console’s video output
AUDIO L./ AUDIO R.
– use an audio cable to connect to your game
console’s left/right audio output.
*
SOUND
- to select various sound effect.
SURROUND
- to select various surround sound effect.
AUDIO
- to select the preferred language for audio
- to select AUDIO channel in karaoke mode.
MIX IT
- to mix the game sound with your favorite
music from one of the music sources (DISC,
TUNER, TAPE1/2 or AUX)
GAME
- to select different type of equaliser setting for
Gameport (SPEED, PUNCH or BLAST).
GAME SOUND
- to adjust the game’s output volume level.
(
;
– to connect headphones.
)
VOLUME
– to increase or decrease the volume.
¡
SENSOR
– point the remote control towards this sensor.
™
INTERACTIVE VU METER
– to show the VU (v
olume unit) meter in music or
volume mode depending on the display mode
selected.
£
DISC TRAYS
OPEN•CLOSE
– to open or close the disc tray.
DISC1/ DISC2/ DISC3
– to select a disc tray for playback.
§
DISC CHANGE
–to change disc(s).
Functional Overview
Remote control
Notes:
–First, select the source you wish to control by
pressing one of the source select keys on the
remote control (DISC or TUNER, for example).
– Then select the desired function (
¡
,
O
or
P
for example).
1
SOURCE
– to select the relevant active mode: DISC1/2/3,
TUNER, TAPE1/2 or AUX/GAME.
– TUNER: toggles between FM and MW band.
–AUX/GAME: toggles between AUX and
GAMEPORT mode.
2
DISC MENU (disc mode only)
– to enter or exit the disc contents menu.
3
SYSTEM MENU (disc mode only)
– to enter or exit the system menu bar.
4
1 / ¡ / 5 / 4
– to select movement direction in disc contents
menu/system menu bar.
– to tuner mode, to tune to lower or higher radio
frequency. (1 / ¡)
§
1
@
#
$
%
4
5
^
&
)
£
™
¡
(
*
2
5
8
!
•
0
9
7
6
4
3
27
25
24
24
25
 Loading...