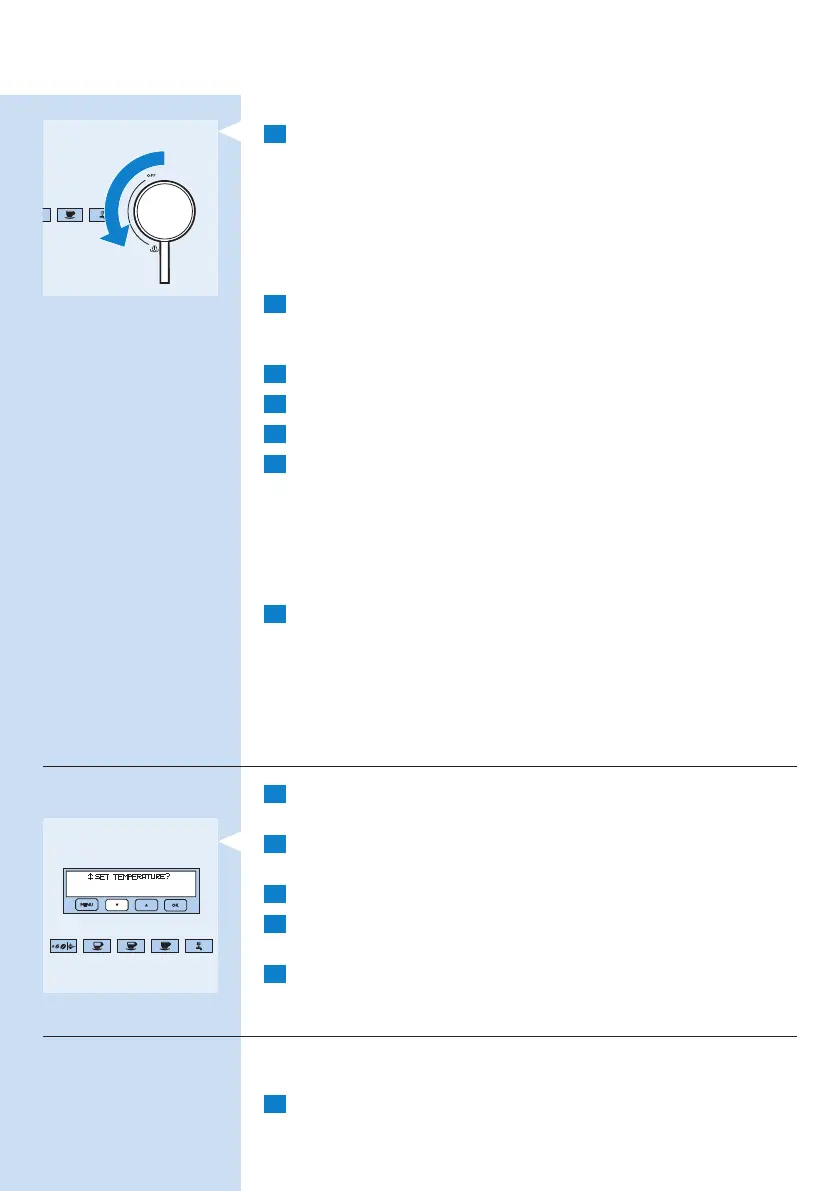
6 Turn the steam knob to ‘ON’.
, Descalercomesoutofthesteampipeandowsintothebowl
below. The message ‘DESCALING’ is shown on the display.
, During the descaling program, the appliance pauses a few times to
remove scale deposits from the inside of the espresso maker.
, After about 35 minutes, the message ‘DESCALE DONE - Push OK
when ready’ appears on the display.
, Then the message ‘CLOSE STEAM KNOB!’ appears on the display.
7 Turn the steam knob to ‘OFF’.
You now have to ush the appliance to remove descaler residues from the
inside of the appliance. Proceed as follows:
8 Emptythewatertank,rinseitandllitwithfreshwater.
9 Reinsert the water tank.
10 Empty the full bowl and then put it back under the steam pipe.
11 Turn the steam knob to ‘ON’.
, Hotwatercomesoutofthesteampipeandowsintothebowl
below. The message ‘FLUSHING...’ is shown on the display.
, The message ‘FLUSHING - Push OK when ready’ appears on the
display.
, When the water tank is empty, the message ‘FLUSHING DONE’
appears on the display.
12 Turn the steam knob to ‘OFF’.
The descaling program is now nished and the appliance is ready to brew
coffee again.
Note: If the descaling program is interrupted before completion, the appliance
continues to display the message ‘PLEASE DESCALE!’ and you have to start the
program from the beginning again.
Setting coffee temperature
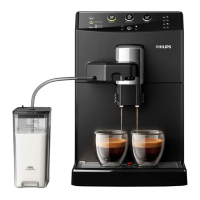
1 Press the MENU button.
, The button lights up.
2 Press the ^ button until the message ‘SET TEMPERATURE?’ appears
on the display.
3 Press the OK button.
4 Press the ^or % button until the desired coffee temperature is
displayed (low, medium or high).
5 PresstheOKbuttontoconrmthetemperatureselected.
, The appliance automatically exits the MENU mode.
Setting auto-on time
This function allows you to set a time at which the appliance automatically
switches on.
1 Make sure the clock on the appliance is set as described (see section
‘Setting current time’ in this chapter).
ENGLISH18