2-1 2-1
DISMANTLING INSTRUCTIONS
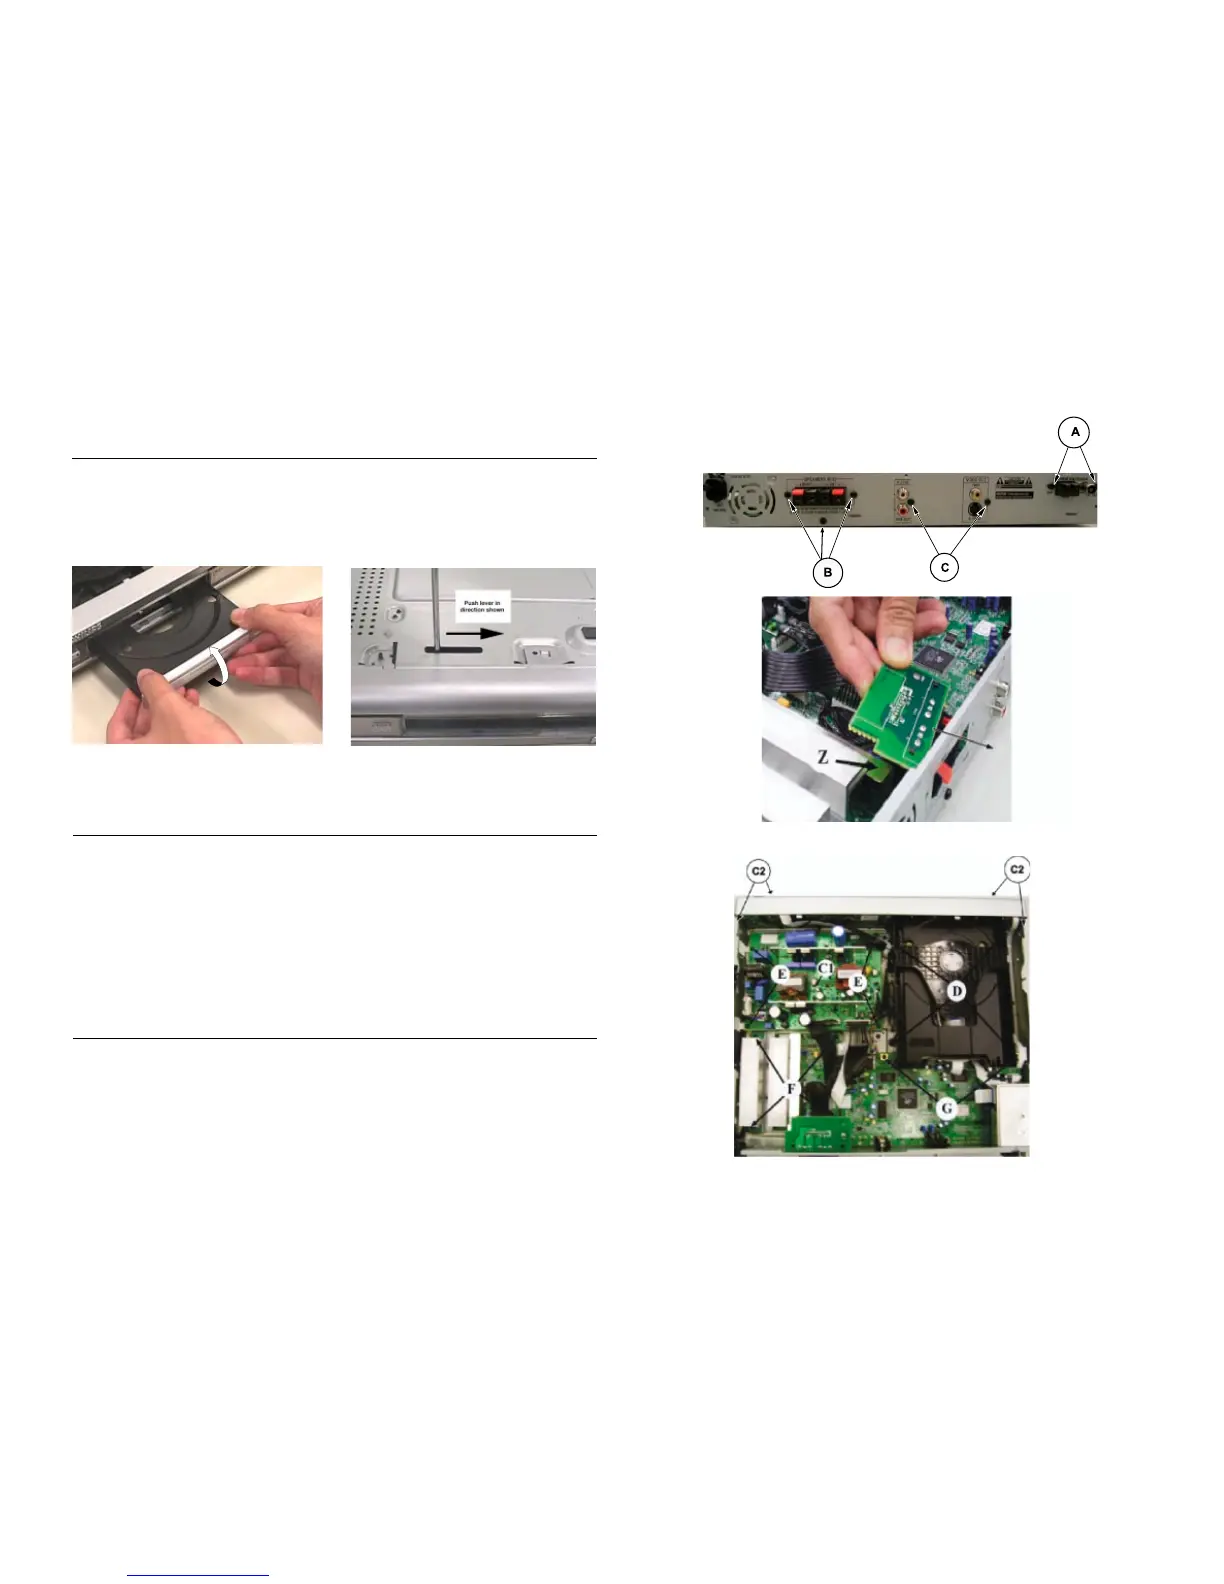
Dismantling of the Front Panel assembly
1) Open the Tray and remove the tray cover assembly and
remove it as shown in figure 1.
Note: The Tray can be manually open by inserting a
minus screw driver (approximately 9mm) and push
lever in the direction shown in figure 2.
Dismantling of the Tuner Module, Loader Mechanism & Mono AV board
1) Loosen 2 screws A (pos 281) to remove the Tuner Module
as per figure 3.
2) With the tray cover assembly already removed, loosen 4
screws D (pos 278) to remove the Loader Mechanism as
per figure 4.
3) Loosen 2 screws C (pos 283 & 286) on the rear and 2
screws G (see figure 3 and 4) to remove the Mono AV
board.
1) Loosen 4 screws E (pos 280) and 1 catch C1 to remove
the PSU board as per figure 4.
2) Loosen 2 screws B (pos 281) to remove the Speaker
Connector board as per figure 3.
Remove the Speaker Connector board try to prevent
being block by Z as per figure 5.
3) Loosen 4 screws F (pos 279) to remove the Amplifier
board as per figure 4.
Dismantling of the PSU, Speaker Connector and Amplifier boards
2) Loosen the 5 screws to dismantle the Top Cover
- 2 screws on each side (pos 293)
- 3 screws on the Rear Panel (pos 288).
3) Uncatch 4 catches C2 (2x on side & 2x on the bottom) to
slide the Front Panel assembly as per figure 4.
Figure 1
Figure 2
Figure 3
Speaker Connector
Figure 4