Do you have a question about the Philips TW-RQ1050 and is the answer not in the manual?
Details important safety instructions including danger, warning, and caution notices for shaver usage.
Confirms the shaver meets IEC safety regulations and EMF standards.
Provides voltage transformation details (100-240V to <24V) and noise level (64 dB [A]).
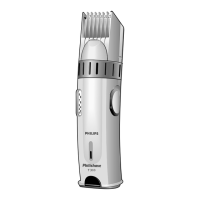
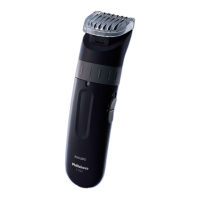
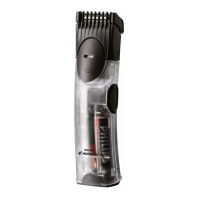
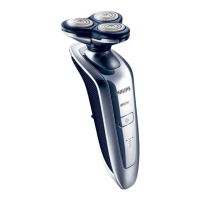
Identifies key components labeled A-K in the shaver overview diagram.
Explains that different shaver models have distinct displays, referencing figures for specific types.
Details the approximate 1-hour charging time and automatic display switch-off after 5 hours when in the Power Pod.
Describes specific charging indicators (plug symbol, arrowheads, battery symbol) for RQ1090, RQ1062/RQ1060, and RQ1052/RQ1050.
Explains how to identify a fully charged battery for different shaver models.
Describes how the shaver indicates a low battery status for various models, including color and flashing signals.
Explains how remaining battery capacity is shown on the display for specific shaver models.
Advises cleaning after every use and notes the tap symbol reminder for cleaning.
Recommends replacing the shaving unit every two years for optimal performance.
Explains the shaving unit symbol flash and beep as reminders to replace the unit.
Details how to activate and deactivate the travel lock feature to prevent accidental switching on.
Describes indicators for blocked heads and instructs on cleaning or replacing the shaving unit.
Explains that 5 minutes of charging provides enough energy for one shave.
Provides step-by-step instructions for performing a quick charge using the Power Pod and adapter.
Instructions on how to switch on, shave with, and switch off the shaver.
Advises on shaving movements and notes skin may need 2-3 weeks to adjust to the Philips system.
Details how to slide out, use, and retract the trimmer for grooming sideburns and moustache.
Instructs on how to reattach the shaving unit after trimming, ensuring it clicks into place.
Warns against abrasive cleaners and advises caution with hot water during cleaning.
Step-by-step guide to cleaning the shaving unit by rinsing under hot water.
Describes thorough cleaning using running shaver with soap or alcohol.
Instructions for cleaning the shaving unit using the supplied brush.
Details cleaning the trimmer with the supplied brush after each use.
Suggests lubricating trimmer teeth with sewing machine oil every six months for optimal performance.
Explains two ways to store the shaver: in the Power Pod or with the protection cap on the shaving unit.
Details when and how to replace the shaving unit, including using original parts.
Lists available replacement parts, including adapter, shaving unit, and cleaning spray.
Advises against household waste and recommends official collection points for recycling appliances.
Provides detailed steps for removing the shaver battery, emphasizing it should be empty.
Directs users to the Philips website or Consumer Care Centre for service and information.
Clarifies that shaving heads are not covered by the international guarantee due to wear.
Addresses poor shaving performance by suggesting cleaning or replacing the shaving unit.
Troubleshoots why the shaver won't turn on, citing empty battery, travel lock, or blocked heads.
Explains that improper placement in the Power Pod can prevent full charging.
| Brand | Philips |
|---|---|
| Model | TW-RQ1050 |
| Category | Electric Shaver |
| Language | English |