EasyManua.ls Logo

Philips WelcomeEye Touch DES9700VDP - 531001 User Manual

Philips WelcomeEye Touch DES9700VDP - 531001
240 pages
Go to English
To Next Page IconTo Next Page
Page #1 background imageLoading...
Page #1 background image
WelcomeEye Connect
DES9900VDP - 531002
WelcomeEye Touch
DES9700VDP - 531001
DES9700VDP - 531001
09/2017
Scan me
to  nd out about our products
Flashez-moi
pour découvrir nos produits
FR -Notice téléchargeable sur philips.com
GB - Downloadable instructions at phillips.com
D - Anleitung kann auf philips.com heruntergeladen werden
NL - De handleiding kan gedownload worden op philips.com
PL - Instrukcja do pobrania na philips.com
IT- Il manuale è disponibile anche su www.philips.com.
ES - Manual que puede descargar en philips.com
PT - Manual de instruções disponível no site philips.com
Notice d’utilisation / User manual

Table of Contents

Question and Answer IconNeed help?

Do you have a question about the Philips WelcomeEye Touch DES9700VDP - 531001 and is the answer not in the manual?

Philips WelcomeEye Touch DES9700VDP - 531001 Specifications

General IconGeneral
DisplayColor
Resolution800 x 480 pixels
CameraYes
Camera SensorCMOS
Door OpenerYes
Gate OpenerYes
Number of Monitors1
Number of Door Stations1
Night VisionYes
Image MemoryYes
SD Card SlotYes
ModelWelcomeEye Touch DES9700VDP - 531001
Screen Size7 inch
Screen TypeTouchscreen
Connectivity2-Wire

Summary

1. Safety Instructions

2. Contents of the Kit

3. General Information

4. Nomenclature

5. Product Installation

1. Wiring

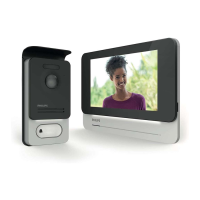
Details connecting the videophone, intercom panel, and camera, specifying wire types and lengths.

Connecting a Gate Motor

Explains how to connect the intercom to an automatic gate opener's push button control.

Connecting a Strike Plate or Electric Lock

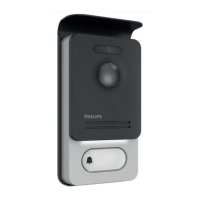
Details the connection of a strike plate or electric lock to the intercom panel.

2. Configuring the Intercom

Configuring the Intercom Number

Sets the intercom number for the system, assigning it as intercom no. 1 or no. 2.

Configuring the Number of Families

Configures the system for single-family or two-family use via a switch setting.

Intercom Volume Settings

Adjusts the intercom volume using a Phillips head screwdriver on the volume control.

Configuring the RFID Function

Details programming, adding, and removing user and administrator RFID badges for access.

3. Installing the Monitor

4. Installing the Intercom Panel

5. Installing a Camera (Optional)

6. Monitor Interface

A. Monitoring Function and Response to a Call

Describes how to view visitors, answer calls, and control locks/gates.

B. Intercom Function

Details the intercom functionality, including exiting and calling other monitors.

C. Settings

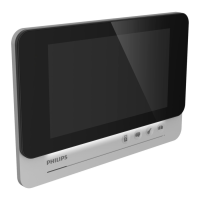
Explains navigation through the monitor's settings menu pages.

D. Photo Album

Provides access to view and manage recorded photos of visitors.

E. Video Album

Allows access to view and manage recorded video clips of visitors.

6. System Configuration Options

7. Audio Settings

Configures ringtone choices for different calls and adjusts volume levels.

8. Image Settings

Allows adjustment of image brightness, contrast, and color settings.

9. Wi-Fi Network Management

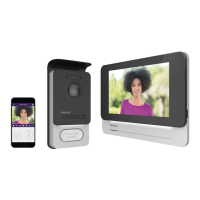
Manages Wi-Fi activation, notification timing, and network reset.

10. Time and Date Settings

11. Reset Menu

7. User Manual

8. Smartphone Application

9. Technical Characteristics

10. Accessories

11. FAQ

14. FCC/CE Warning

15. Declaration of Conformity

12. Technical Assistance - Warranty

13. Safety Precautions

Related product manuals