In-oce whitening treatment
1 Pumice teeth just prior to whitening.
2 Remove the light guide from the packaging
and place it on the LED Accelerator.
3 Switch on the LED Accelerator using
the power button located on the side of
the power pack. When the light guide
is attached, the display reads 'Guide
Status–Guide Attached' followed by 'X of X
Sessions'.
4 Place the surgical suction tip on the high
vacuum suction.
5 Place the Zoom! protective eyewear on the
patient.
Note: The retractor provided is necessary
to ensure proper positioning of the LED
Accelerator head and additional protection
from light.
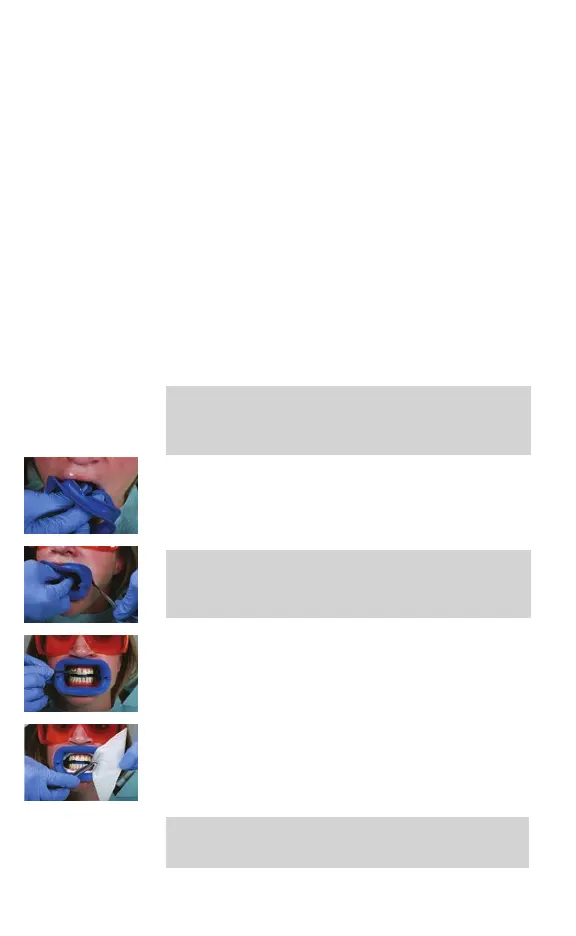
6 Insert the retractor at an angle, retracting
one side at a time using a dental mirror to
assist in placement.
Note: The retractor has been specically
engineered to work with the Philips Zoom!
WhiteSpeed Light-Accelerated Whitening
System. Do not substitute.
7 Take a retracted 'before' photo using a
matched shade tab.
8 Fully recline the patient.
9 Place cotton rolls in the center of the upper
and lower vestibules. If the cotton rolls are
too large, unfold the gauze and twist it like a
cotton roll.
Note: Do not substitute gauze. The gauze
provided has been tested and proven to
provide superior protection.
12 English