THERMOMARK X1.1
4-10
PHOENIX CONTACT 103180_00_ia
4.1.11 Adjusting the Cutter After Cleaning
.
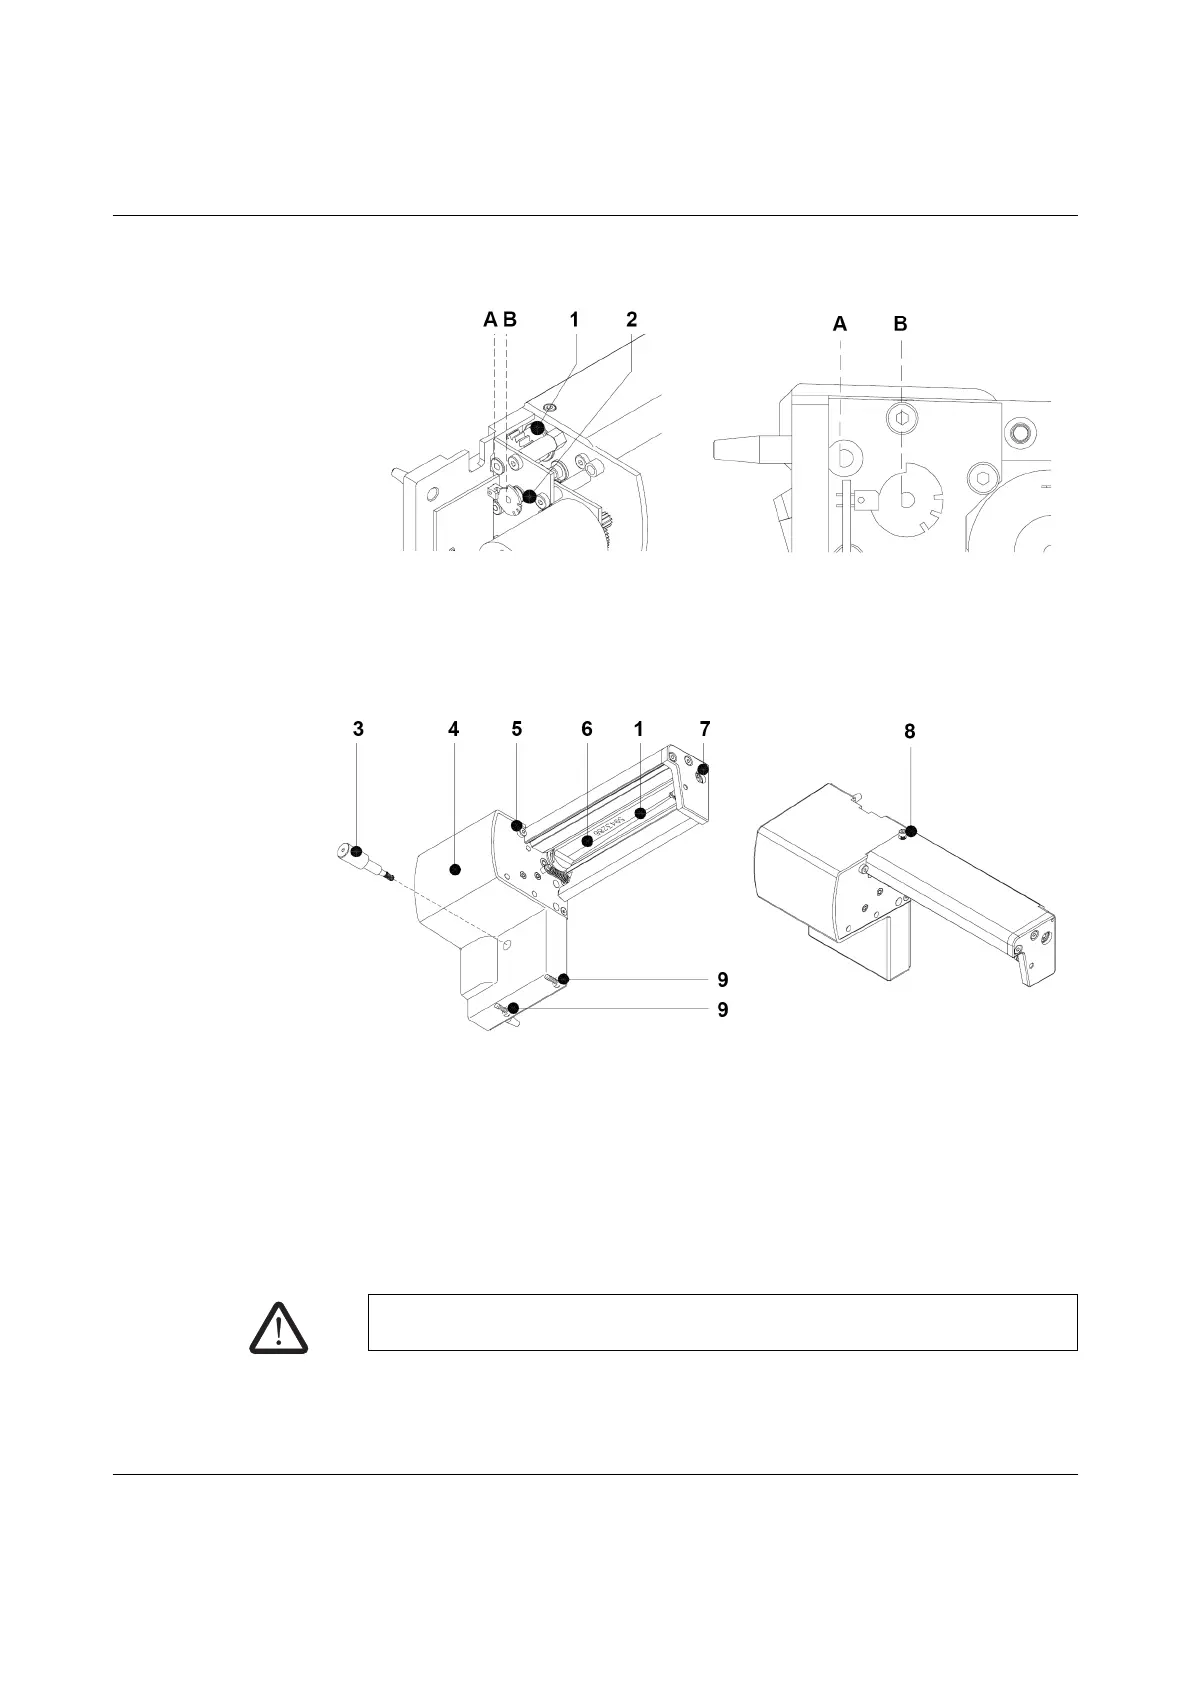
Figure 4-7 Position of the circular blade axle in relation to the clock wheel axle
If you have removed the circular blade's screw in order to clean the blade, the circular
blade (1) and the clock wheel (2) must be realigned with one another in order to ensure
that the cutter works correctly.
Figure 4-8 Aligning the circular blade with the clock wheel
• Completely remove screws (3), (5) and (9, on the rear of the cutter) and remove the
enclosing guard (4).
• Remove screw (8) so that it protrudes from the cutter's profile by approximately 5 mm.
• Use a Philips screwdriver (with a blade width of 7 mm) to turn the cutter's axle (7) so
that the circular blade's label (6) faces down.
• When viewed in cross section, a flat surface can be seen on both axles (A, B). These
two surfaces (A, B) are now aligned, or will be aligned after precisely one or two more
complete turns, and point toward the rear of the cutter.
• Retighten screw (8) and screw on the enclosing guard.
Excessive tightening of screw (8) may damage its thread.
 Loading...