©2009 Phoenix Controls. Specifications subject to change without notice. Rev. 11/11 MKT-0244 MPC-1673 PROGRAMMABLE CONTROL MODULE: LONMARK 7
• Maintain a consistent color code or polarity all the way through the wiring system.
• Power supply and signal isolation on I/O devices vary from manufacturer to manufacturer. Verify the wiring device
manufacturer’s recommendations for isolating power and signal common connections and maintain polarity.
• Local and national electrical codes take precedence.
• Strip 0.25" (6.4 mm) of insulation from each conductor, twist the strands, insert the conductor fully into the terminal block, and
tighten the terminal.
• Test the wire connection by pulling on each conductor.
• See “Phoenix Recommended Cables” on page 9 for approved cable manufacturers and wire types.
Power Connections
• The PCM may be powered by either 24 Vac or 24 Vdc. When locating the device, consider the location of the transformers/
power supplies, cable runs, and connected load to ensure proper operating voltage.
NOTE: PCM200 is 24 Vac only.
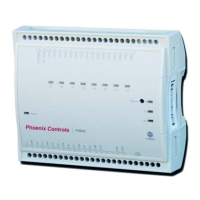
• Power connections are on the top left side of the control module (see Figure 6 for wiring configuration).
• An external fuse is recommended to protect the outputs and other equipment powered by the transformer.
• To calculate the required transformer power:
• Add the power requirements of all of the controllers and peripheral devices.
• Add the largest starting power of the group.
• Multiply this value by 1.3.
• This value is the required transformer power.
Note: Failure to maintain proper polarity may cause damage to the control module.
Input and Output Connections
• The PCM supports a wide variety of universal inputs and analog and digital outputs.
• Signal input types are either jumper or software selectable; then defined and scaled using the PCM plug-in.
• Two terminations are provided for each input (+ and -). If a shield is used, it should be connected to the signal common (-)
terminal.
• Power for inputs must be externally supplied. The PCM will not provide a power source for 4-20 mA input devices.
• Input connections are on the left side of the control module.
• Output connections are on the right side of the control module.
See Figure 6 for wiring configuration.
Note: Multiple power sources may be present. Insure that all power is removed before handling bare conductors.
 Loading...