Procedure for taking acoustic measurements:
1. Within the Menu screen, enter Settings.
Adjust the source to “Mic” by selecting this
eld and scrolling up or down.
2. Select the ‘octave’ settings you wish to use
for your calculations. Users can select from
1/3 octave resolution (for a total of 31 bands)
and 1/6 octave resolution (for a total of 61
bands).
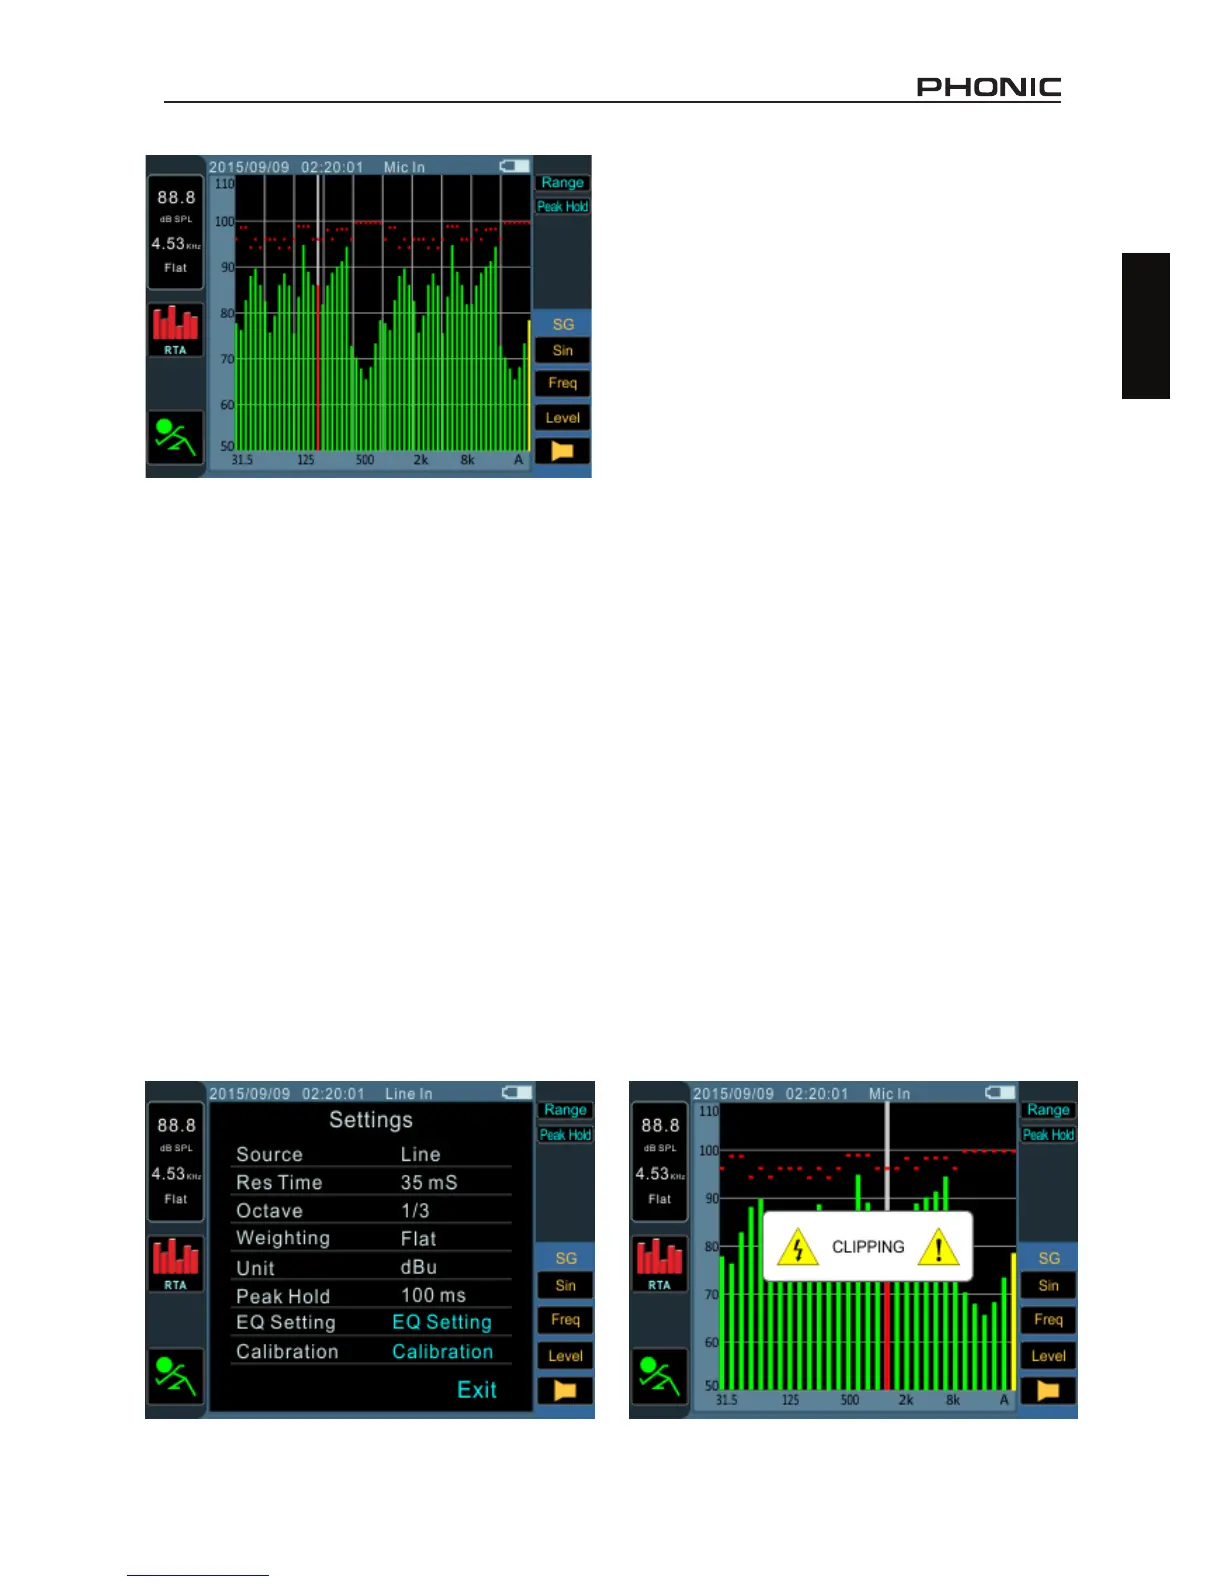
3. Also on the Settings screen (displayed below),
set the appropriate weighting. The most com-
mon weighting used for acoustical analysis is
perhaps A-weighting, as it closely mimics the
conditions of human hearing. Phonic have
also included B, C and at weighting.
4. Adjust response time (Res Time) and peak
hold properties as needed.
5. Exit the Settings screen by selecting “Exit.”
6. Scroll to the onscreen “RUN/STOP” icon and
hit enter. The RTA will begin.
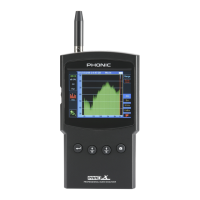
7. Scroll to the RTA screen and press enter to
select an individual band to view the dB SPL
in real time for center frequencies of that
particular band. The rightmost bar is the ALL
frequency level. To the left of the screen you
will nd a boxes with signal properties listed.
The top value will be the dB SPL results for
the currently selected band, below which you
will nd the center frequency of the currently
selected band (if the all frequency bar is cho-
sen, this value will read ALL). The currently
selected weighting will be visible below this.
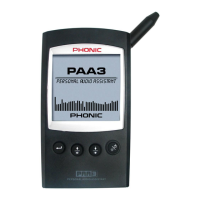
8. A 60 dB range can be seen on the RTA screen
at any one time. The total range viewable is
30 dB to 130 dB. If you nd the RTA is clip-
ping constantly (as shown below), selecting
“Range” to the right of the screen will allow
users to scroll up (in 5 dB increments).
9. When monitoring signals as high as 70 dB
to 130 dB SPL, you can still view the lower
levels by pausing the RTA (select “RUN/
STOP”) and adjusting the “Range” to see
the lower levels.
10. Take a snapshot of the screen at any time
by hitting the snapshot button. These will be
saved to an inserted FAT-32 formatted SD
card.
1/6th Octave RTA
1/3th Octave RTA (Clipping Status)