Battery Auto Power O: The auto power o
function will turn the PAA3X o after a pre-
determined period of time if the user does not
use the PAA3X. When set to “OFF”, the PAA3X
will not automatically power o.
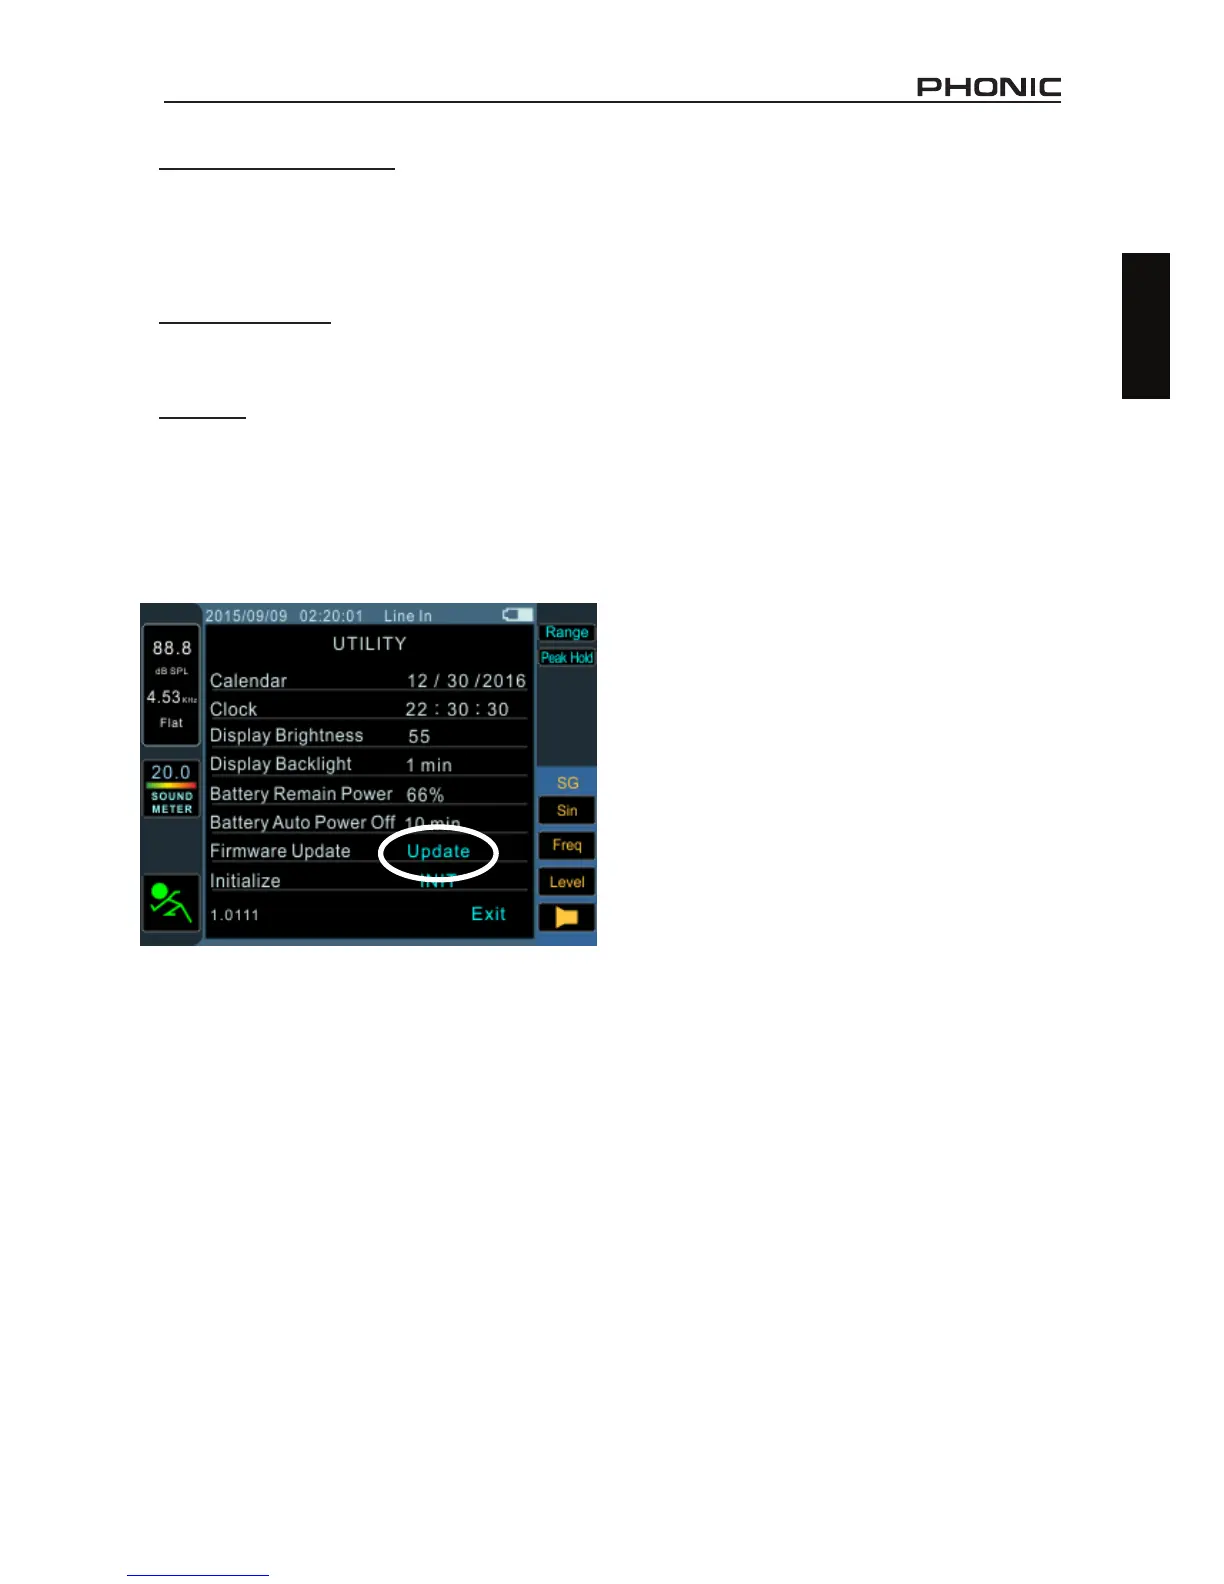
Firmware Update: The PAA3X’s rmware can
be updated by selecting this option. Check the
Firmware Update section for more information.
Initialize: Restore to factory default settings.
FIRMWARE UPDATE
The PAA3X allows for rmware updates which
will be periodically available through Phonic’s
website (www.phonic.com).
OPERATING TIPS
● If you feel a function is not working, rst make
sure you’ve selected the correct Input Source
in the Settings menu. Throwing the PAA3X
at the wall solves nothing.
● Capture your readings quickly using the
screen cap button. The right-most button
will immediately save a screen shot to any
FAT-32 formatted SD card you have inserted.
● If the signal clips, adjust the display range.
A higher display range will prevent the unit
from clipping when signals go higher than
the current display ceiling.
● It is not recommended that you continue us-
ing PAA3X for any measurements when the
battery is low. Always ensure you have the
charger on hand, just in case.
● Push and hold the power button for 3 seconds
to turn the unit on and o. In the unlikely event
that the PAA3X crashes, push and hold the
power button for 10 seconds to turn it o.
● Using the jog wheel is the fastest way to
control the PAA3X. Getting familiar with it
will save you a lot of time in the long run.
● If you will be reading measurements o the
PAA3X over a long period of time, be sure to
turn the system’s sleep mode ‘o’, otherwise
the screen will go dark after a few minutes.
This is done through the Utility menu found
in the Main menu.
● When testing sound pressure, the MAX
(maximum sound pressure level) eld can
be reset by simply scrolling to it and hitting
enter when it’s highlighted.
● The PAA3X can only be charged through the
USB connector. This may be done using the
included adapter.
● When the PAA3X is charging, the power
LED on the side will ash. This LED will stop
ashing when the battery is fully charged.
To perform a rmware update:
1. Power on the PAA3X.
2. Place an SD card with the latest rmware le
in the SD card slot.
3. Enter the Main Menu and select Utility.
4. At the bottom of the page, nd the Firmware
update option and select “Update”. The
update will begin immediately.
5. The rmware update can take a few minutes
so please be patient.
6. Once the rmware update is complete, us-
ers will be prompted to turn the PAA3X o.
Please do so by holding the power button for
3 seconds.
7. Turn the unit back on.