“ASSEMBLE INSTRUCTIONS”
STEP 1 –
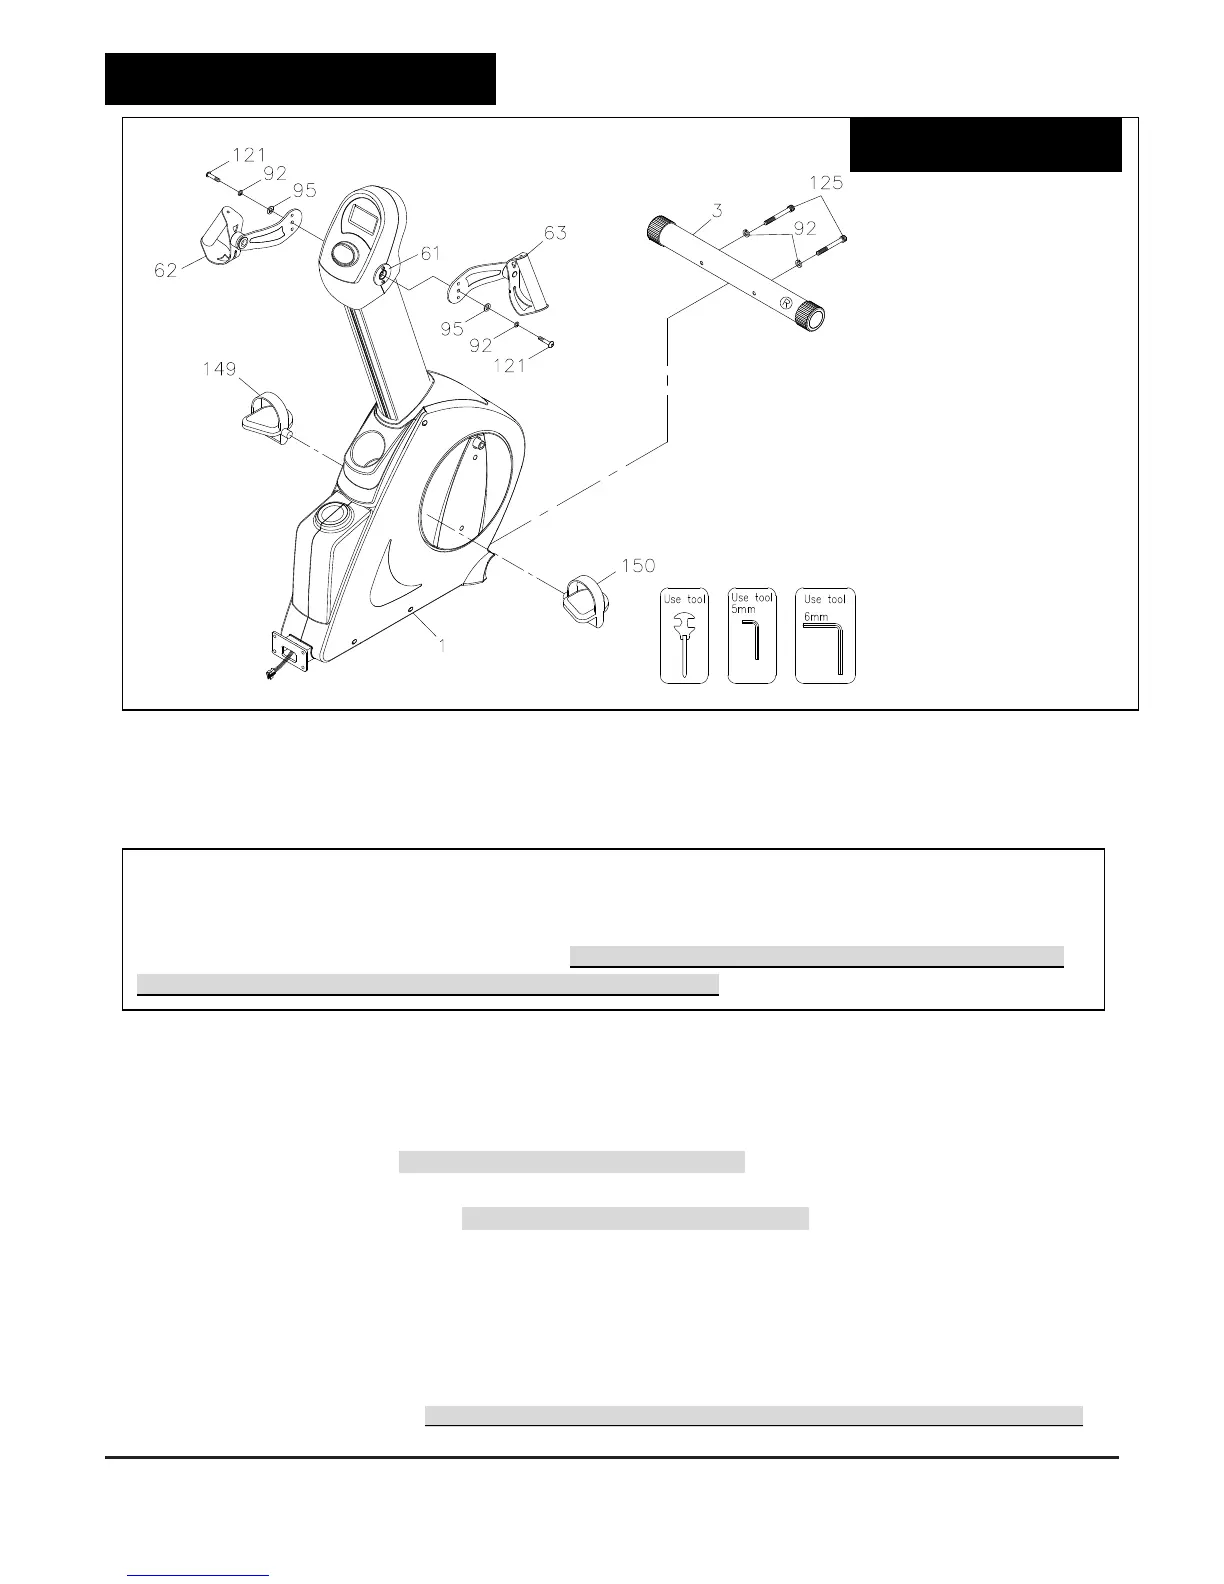
Front Stabilizer Assembly
a. Identify the correct direction of the Front Stabilizer (3), there is an “R” decal on the right side of the Front Stabilizer
(3).
b. Attach the Front Stabilizer (3) to the Main Frame (1)
c. Fully secure two Lock Washers (M8)(92) and two Bolts, Socket Head (M8xp1.25x70mm)(125) that attach to the
Front Stabilizer (3) to the Main Frame (1).
STEP 2 –
Pedal Assembly
a. Thread the Right Pedal (150) into the right crank area of the Main Frame (1). Firmly tighten the Right Pedal (150)
clockwise into the right crank. Tighten the Pedal as firmly as possible
b. Thread the Left Pedal (149) into the left crank area of the Main Frame (1). Firmly tighten the Left Pedal (149)
counter-clockwise into the left crank. Tighten the Pedal as firmly as possible
STEP 3 –
Handlebar Assembly
a. Attach the Right Upper Handlebar Assembly (63) onto the Fixed Mounting Bracket (61) and secure with one
Washer (8x23x2.0t), one Lock Washer (M8)(92) and one Bolt, Socket Head (M8xp1.25x30mm) (121).
b. Repeat the above same procedure on the left side
**Make sure the above parts are tightened before moving on to the next page**
NOTE: “Small Tip: Attach screws and bolts to the assembly parts first before secure”
To assemble the Front Stabilizer (3) to the Main Frame (1) with more efficient and easy way, it is suggested to
attach two Lock Washers (M8)(92) and two Bolts, Socket Head (M8xp1.25x70mm)(125) to the Front Stabilizer
(3) and the Main Frame (1) first before fully secure. **Please do not secure the bolts unless you make sure
Bolts all go into screw holes of Front Stabilizer and Main Frame**
 Loading...