wlan
21
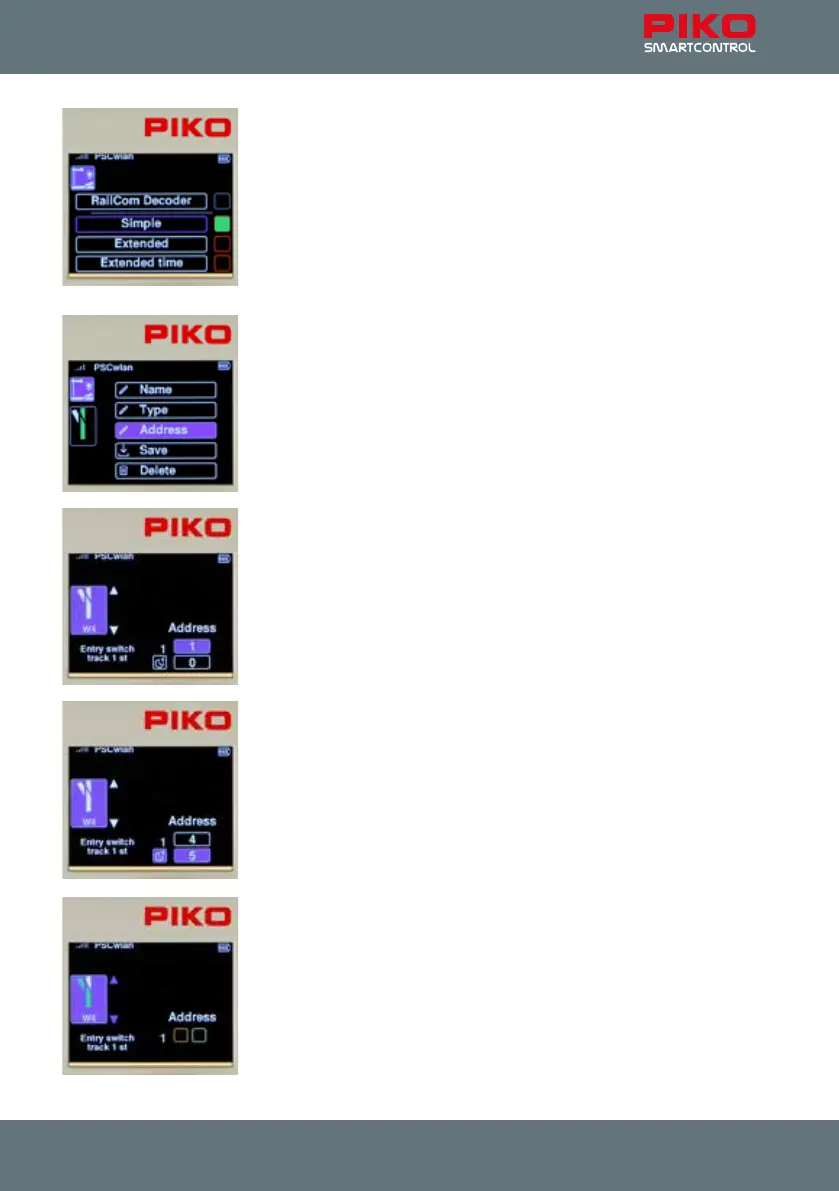
The "Simple" entry is certainly the most common type and also the factory
default setting. The desired decoder type is selected with the "up" or "down"
button and conrmed with the OK button. The corresponding eld is then
highlighted in green.
The top, still grey entry "RailCom Decoder" can be used in the future for
RailCom®-equipped accessory decoders.
The entries "Extended" and "Extended time" can be used for accessory
decoders, which can be named according to the RCN standard 213. More
information can be found in the instructions for the particular accessory
decoder.
Use the "back" button and then press the "down" button to scroll to the
"Address" entry and select it with the OK button.
To ensure that the correct accessory decoder is addressed when activated
later, the desired switching address must be entered in this submenu. The
address eld is highlighted using the "right" navigation key and activated
with the OK button. Now the desired address (here "4") can be entered and
conrmed with the OK button.
Now, use the "down" button to select the lower eld for entering a desired
"activation time" and highlight the entry with the OK button.
The activation time is entered in 100ms increments and determines the
length of time the accessory is activated after receiving a command from the
control panel. (pulse duration).
Conrm the activation time with the OK button and then press the "left"
navigation button.
The two arrows next to the turnout symbol now appear in blue.
You can now use the "up" or "down" button to scroll to both directions for the
two turnout positions.
The turnout position (here it is straight) to be set here "green / straight" or
"red / diverging" is shown in green in the turnout symbol.
The selection is now activated with the “right” navigation key. This can be
seen from the switching address now shown in blue.