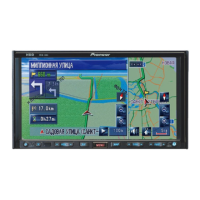
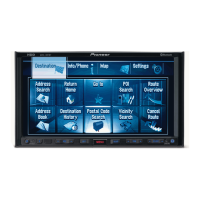
Do you have a question about the Pioneer AVIC-HD3 II and is the answer not in the manual?
Explains installation and refers to operation/hardware manuals for system use.
Provides critical warnings regarding self-installation, safe operation, and legal compliance.
Highlights risks of DIY installation, electric shock, and potential damage not covered by warranty.
Advises on securing wiring with clamps/tape, avoiding exposed wires, and routing cables away from moving parts.
Guides on routing wires away from high temperatures and preventing damage, short circuits, or malfunctions.
Specifies vehicle requirements (12V battery, negative earthing) and the need to disconnect the battery cable.
Details proper connector handling, ACC position, fuse replacement, and insulating unused speaker leads.
Lists the navigation unit, power cord, and connectors included in the package.
Identifies the GPS aerial, extension leads, RCA connectors, and microphone provided.
Illustrates connections for GPS, TV tuner, microphone, and Bluetooth to the navigation unit.
Shows how to connect an iPod via IP-BUS cable and adapter for music playback.
Warns against non-navigation use while driving and improper placement of rear displays.
Explains power cord connections, including back-up, accessory, ignition, and lighting terminals.
Details ISO connector use and speaker lead polarity, including subwoofer output configuration.
Describes connecting the MUTE lead and setting auto antenna retraction/turn-off timing.
Explains connecting the speed detection circuit for navigation accuracy and interlock.
Details connecting the light green lead to the handbrake switch for parking status detection.
Covers connecting the reverse gear signal and the 'Guide ON' lead for audio muting.
Shows how to connect RCA outputs (subwoofer, rear, front) to a separately sold power amplifier.
Illustrates connecting the system remote control and speaker outputs through the amplifier.
Details connecting the rear camera input and provides warnings on image reversal and proper usage.
Explains connecting an external video component via RCA, requiring 'Video' System Settings.
Details connecting a Pioneer external unit via IP-BUS, requiring 'EXT' System Settings.
Shows connecting the rear display to the monitor outputs for passenger viewing.
Warns against driver viewing and notes potential differences in rear display image quality.
Prohibits installation in unsafe locations or where it may impede vehicle operation or safety features.
Advises on drilling safety, screw usage, using supplied parts, and routing wires to prevent shorts.
Details restrictions on placement near airbags, between seats, or where visibility or controls are obstructed.
Recommends distancing antennas and cables from the unit to minimize interference and location errors.
Suggests consulting dealers, performing temporary wiring tests, and ensuring LCD panel clearance.
Guides on avoiding extreme temperatures/humidity, ensuring secure mounting, and maintaining horizontal installation.
Instructs not to obstruct heat dissipation areas and to avoid installing near heat sources for laser safety.
Lists the navigation unit, binding screws, flush surface screws, and frame for installation.
Explains aligning and fastening the navigation unit to the factory radio bracket using supplied screws.
Warns against modifying the GPS aerial cable to prevent short circuits or damage.
Recommends level surfaces, roof/boot lid placement, and careful handling of the powerful magnet.
Details affixing the metal sheet on a level surface and placing the GPS aerial on it.
Guides on placing the GPS aerial on the roof/boot lid and routing the lead to prevent water ingress.
Advises optimal microphone placement for voice pickup and connecting with the system powered off.
Details attaching the microphone clip to the sun visor in its upright position for effective voice capture.
Explains mounting the microphone clip on the steering column, away from the wheel, and routing the cord.
Describes how to adjust the microphone's angle by moving the clip forward or backward.
Guides on reconnecting the battery, starting the engine, and pressing the reset button.
Instructs on adjusting installation angles, regional settings, and testing the system in a safe location.
| Touchscreen | Yes |
|---|---|
| GPS Navigation | Yes |
| DVD Player | Yes |
| SD Card Slot | Yes |
| Power Output | 50W x 4 |
| Display Size | 7 inch |
| iPod Control | Yes |
| Audio Formats | MP3, WMA |
| Video Formats | DivX |
| Dimensions | 178 mm x 100 mm x 200 mm (7" x 3.9" x 7.9") |