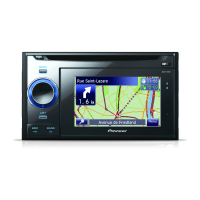
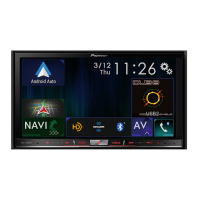
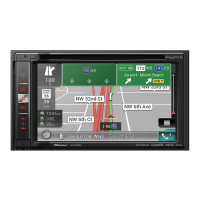
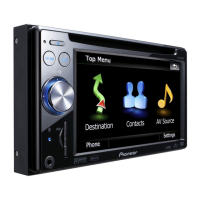
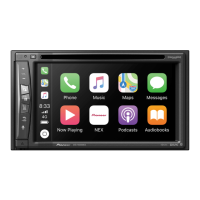
The Pioneer AVIC-W8500NEX and AVIC-W6500NEX are multimedia navigation receivers designed for in-vehicle use, offering a range of features for entertainment, navigation, and connectivity.
Function Description:
These devices serve as multimedia navigation receivers, providing GPS navigation, multimedia playback, and connectivity options for smartphones and external video components. They are designed to be integrated into a vehicle's dashboard, offering a comprehensive in-car infotainment experience. The navigation system assists drivers with directions, while multimedia capabilities allow for audio and video playback from various sources. Connectivity features include USB ports for iPod/iPhone and Android devices, as well as inputs for rear-view cameras and external video displays.
Important Technical Specifications:
- Power Supply: 12 V DC, negative ground.
- Speaker Output: 50 W maximum power output, 4 Ω to 8 Ω impedance. Not suitable for 1 Ω to 3 Ω speakers.
- GPS Antenna: Requires proper installation for optimal signal reception.
- USB Ports: Two USB ports (USB 1 and USB 2) for connecting various devices.
- Audio/Video Inputs/Outputs:
- Rear audio output (R. AUDIO OUT).
- Rear monitor output (YELLOW (REAR MONITOR OUTPUT)) 30 cm (11-7/8 in.).
- Audio input (RED, WHITE (AUDIO INPUT)) 23 cm (9 in.).
- Video input (YELLOW (VIDEO INPUT)) 23 cm (9 in.).
- HDMI input for external HDMI devices.
- AUX input (AUX IN) 15 cm (5-7/8 in.) via mini-jack AV cable.
- Rear view camera input (BROWN (REAR VIEW CAMERA IN)) 23 cm (9 in.).
- Fuses: 10 A.
- Dimensions: Installation requires sufficient space behind the rear panel for heat dissipation (at least 5 cm).
- Operating Temperature: Avoid installation in places subject to high temperatures or humidity.
- GPS Antenna Cable: Do not cut or extend the GPS antenna cable.
Usage Features:
- Navigation: Provides GPS navigation with location display. The accuracy of the display can be affected by improper installation or electromagnetic interference. It is recommended to connect the speed pulse wire for better navigation precision and efficiency.
- Multimedia Playback: Supports various multimedia sources. The rear video output allows connection to a display for rear-seat passengers to watch video.
- Smartphone Connectivity:
- iPod/iPhone: Connects via USB port 1 using a 1.5 m USB cable and an optional USB interface cable (CD-IU52).
- Android Phone: Connects via USB port 2 using a USB cable (supplied with CD-MU200) and a USB-micro USB cable (Type USB A - micro USB B, also supplied with CD-MU200).
- Identification labels (Apple CarPlay for USB 1, Android Auto for USB 2) are provided for proper cable connection.
- Rear View Camera: Automatically switches to the rear view image when the shift lever is moved to REVERSE (R). A Camera View mode is also available. Only reverse or mirror image rear view cameras should be connected. Objects in the rear view may appear closer or more distant than in reality.
- External Video Component: Can be connected via AV input (Red, White for audio; Yellow for video) or HDMI input. Proper settings are required for external video components.
- Microphone: Can be mounted on the sun visor or steering column. The microphone lead should be fitted into a groove, and the microphone clip attached. The angle of the microphone can be adjusted. Ensure the microphone is installed in a position that allows it to pick up the driver's voice easily.
- Speaker Leads: Connections for front, rear, and subwoofer speakers are provided. When connecting a subwoofer instead of a rear speaker, the rear output setting must be changed in the initial settings, and the subwoofer output is monaural.
- Power Amp (Sold Separately): If a power amplifier is used, the speaker leads from the receiver are not used. RCA cables are used for connection.
- Blue/White Lead: This lead sends a control signal when the ignition switch is in the ACC ON position. It should be connected to the system remote control terminal of a power amplifier, the relay control terminal of an auto-antenna, or the power control terminal of an antenna amplifier (max. 300 mA, 12 V DC). This lead should not be used as a power supply for external power amplifiers or auto-antennas, as it could cause excessive current draw or malfunction.
- Parking Brake Interlock: The light green lead must be connected to the power supply side of the parking brake switch to enable certain functions. Do not attempt to alter or disable this safety feature.
- Speed Pulse Wire: The pink lead (SPEED SIGNAL INPUT) connects to detect vehicle travel distance. Connecting this wire is highly recommended for improved navigation accuracy.
- Illumination Wire: The orange/white lead connects to the vehicle's illumination switch terminal.
- Reverse Gear Signal Input: The violet/white lead connects to the wire whose voltage changes when the shift lever is put into reverse. This allows the product to detect forward/backward movement.
Maintenance Features:
- Installation: Pioneer strongly recommends professional installation by authorized service personnel with special training and experience in mobile electronics. Self-installation or maintenance is not recommended due to potential risks of electric shock, damage, or voiding the warranty.
- Pre-installation Check: Before final installation, temporarily connect the wiring to confirm correct connections and system functionality.
- Reset Button: After installation, press the RESET button on the product using a pointed object (e.g., a pen tip). Some settings and recorded content will not be reset.
- Post-installation Check: After installation, drive on an unobstructed road until the GPS receives a signal normally. Check that the vehicle is performing normally in a safe place.
- Fuse Replacement: When replacing a fuse, use only a fuse of the specified rating for this product.
- Cable Disconnection: When disconnecting a connector, pull the connector itself, not the cable, to avoid damage.
- Cable Management: Ensure cables are secured with clamps or electrical tape and do not interfere with vehicle operation (steering column, shift lever, doors, sliding seats). Avoid routing cables near high-temperature areas.
- Heat Dissipation: Ensure ample space (at least 5 cm) behind the rear panel and bundle loose cables to avoid blocking vents, allowing amplifiers and the navigation mechanism to dissipate heat. Do not cover the designated heat dissipation area.
- Electromagnetic Interference: To prevent interference, keep FM/AM and GPS antennas and their leads as far as possible from the product and other cables. Do not bind, lay, or route them together, or cross them.
- GPS Antenna Placement: Install the GPS antenna on a level surface where radio waves are least blocked. Do not install it over sensors or air vents on the dashboard. If installing inside the vehicle, use the supplied metal sheet for optimal reception. Do not paint the GPS antenna.
- Microphone Installation: Ensure the microphone is installed in a location that allows it to pick up the driver's voice easily and does not obstruct the driver's view or vehicle operation.
- LCD Panel Obstruction (AVIC-W8500NEX only): Do not install the product in a position where the LCD panel opening is obstructed by obstacles like the shift lever. Ensure sufficient space for the LCD panel to open fully without interference.
- HDMI Cable Securing: When connecting an external HDMI device, use the provided lock tie to secure the High Speed HDMI™ Cable to the hook above the HDMI port. Do not overtighten the lock tie.