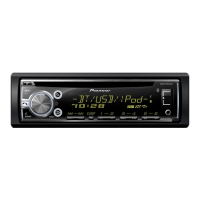
H
Heather TuckerAug 15, 2025
What to do if my Pioneer DEH-1600UBA disc is dirty?
- MMichelle AndersonAug 15, 2025
If the disc in your Pioneer Receiver is dirty, clean the disc.
What to do if my Pioneer DEH-1600UBA disc is dirty?
If the disc in your Pioneer Receiver is dirty, clean the disc.
What to do if my Pioneer DEH-1600UBA Receiver disc is scratched?
If the disc in your Pioneer Receiver is scratched, replace the disc.
What to do if my Pioneer DEH-1600UBA Receiver inserted disc is blank?
If the inserted disc in your Pioneer Receiver is blank, replace the disc.
What to do if my Pioneer DEH-1600UBA Receiver has unsupported CD format?
If your Pioneer Receiver displays 'Unsupported CD format', replace the disc.
What to do if my Pioneer DEH-1600UBA says AMP ERROR?
If your Pioneer Receiver displays 'AMP ERROR', it indicates an incorrect speaker connection or activation of the protective circuit. Check the speaker connections. If the error persists after switching the engine off and on, seek assistance from your dealer or an authorized Pioneer Service Station.
What to do if my Pioneer DEH-1600UBA shows ERROR-07, 10, 11, 12, 15, 17, 30, A0?
If your Pioneer Receiver displays ERROR-07, 10, 11, 12, 15, 17, 30, A0, it signifies an electrical or mechanical error. Try turning the ignition switch off and then back on. Alternatively, switch to a different source and then back to the CD player.
Why is a subfolder not playing back on my Pioneer DEH-1600UBA Receiver?
A subfolder might not play back on your Pioneer Receiver because subfolders cannot be played when FLD (folder repeat) is selected. Select another repeat play range.
How to fix 'NO XXXX' appearing on Pioneer Receiver when display is changed?
If 'NO XXXX' (e.g., NO TITLE) appears on your Pioneer Receiver when a display is changed, it means there is no embedded text information. Switch the display or play another track/file.
How to stop the repeat play range from changing unexpectedly on my Pioneer Receiver?
If the repeat play range changes unexpectedly on your Pioneer Receiver, select the repeat play range again.
Classifies the product as a Class 1 laser product according to IEC safety standards.
Advises contacting a dealer or authorized service station if the unit fails to operate correctly.
Guides through the initial setup process for language, clock, and FM tuning step settings.
Covers fundamental operations like turning the unit on/off and selecting audio sources.
Covers basic radio functions including selecting bands, manual tuning, seeking, and preset stations.
Covers connecting USB devices, playing CDs and USB media, and managing playback display.
Details audio settings like fader, balance, EQ, loudness, subwoofer, bass boost, and high pass filter.
Details important connection points, wiring precautions, and ACC/no ACC position considerations.
Explains power cord wiring and connecting optional power amplifiers for enhanced audio.