Do you have a question about the Pioneer DMH-C5500NEX and is the answer not in the manual?
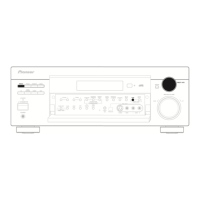
Details of buttons and displays on the main receiver unit.
Explanation of the buttons and functions of the remote control.
Steps to restore factory settings and clear data.
Instructions for setting up the remote control, including battery replacement.
Step-by-step guide to establishing a Bluetooth connection.
Configuration options for Bluetooth functionality.
Procedures for initiating phone calls.
How to answer or reject incoming calls.
Using Siri Eyes Free Mode with an iPhone.
List of all audio and video sources the product can play.
How to access and navigate the AV source selection screen.
Selecting a source from the initial AV selection screen.
Selecting a source from the main AV source list.
Customizing the order of AV source icons and keys.
Overview of HD Radio stations and their offerings.
Steps to begin using the HD Radio function.
How to navigate and use the HD Radio screen.
Procedures for connecting and removing USB drives.
Steps to start playing files from a USB device.
Steps to connect an iPod via USB or Bluetooth.
How to navigate and control playback from an iPod.
General guidelines for operating smartphone apps on the unit.
Steps to launch and connect WebLink.
General guidance on using Apple CarPlay features.
Optimizing CarPlay usability based on vehicle's driving position.
Steps to connect and activate Apple CarPlay.
General guidance on using Android Auto features.
Optimizing Android Auto usability based on vehicle's driving position.
Steps to connect and activate Android Auto.
Guide to connecting and starting Pandora playback.
Controls for Pandora playback, including track skipping and thumbs up/down.
Steps to connect and start Spotify playback.
Controls for Spotify playback, including track skipping and radio mode.
Procedures for activating the SiriusXM service and finding the Radio ID.
How to tune in and operate SiriusXM channels.
Controls for live broadcast mode, including channel selection and presets.
Steps to connect and display the AUX input source.
Controls and display for the AUX screen.
Steps to connect and select AV or camera input.
Overview of iDatalink features and compatibility.
Steps to prepare and activate the iDatalink Maestro adapter.
Connecting the iDatalink adapter and starting its functions.
How to navigate to the main settings menu.
Core system configurations like AV sources and beep tones.
Setting the wallpaper for the screen.
Customizing screen and button illumination colors.
Selecting the style for the clock display.
Customizing the equalizer curve and frequency adjustments.
Adjusting the balance between front/rear and left/right speakers.
Setting volume levels for navigation guidance.
Prerequisites and preparation for Auto EQ measurement.
Step-by-step process for measuring and applying Auto EQ.
Setting the interval for photo slideshows.
Selecting appropriate video signal standards.
Steps to add menu items to the favorite menu.
How to access items from the favorite menu.
Steps to delete items from the favorite menu.
Adjusting the current time and date settings.
Setting screen aspect ratios for AV and image files.
A guide to resolving common issues and error messages.