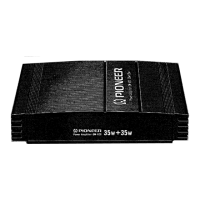
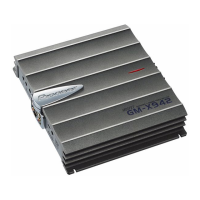
The Pioneer GM-920 is a power amplifier designed for car audio systems, offering enhanced sound output and flexible connectivity options. This owner's manual provides essential information regarding its installation, operation, and maintenance.
Function Description:
The GM-920 serves as a power amplifier, boosting the audio signal from a car stereo to drive speakers with greater power and clarity. It is designed to integrate seamlessly into various car audio setups, whether connected via RCA pin jacks or DIN sockets. The amplifier features a power indicator to confirm operation and an RCA input level control for adjusting the input signal. A unique Beat Frequency Control (BFC) switch is included to mitigate beating noise when listening to AM radio stations, enhancing the overall listening experience. The amplifier's protection circuitry is designed to prevent damage in case of malfunction, ensuring longevity and reliable performance.
Important Technical Specifications:
- Power Source: 14.4 V DC (allowable range: 10.8 - 15.6 V)
- Grounding System: Negative type
- Current Consumption: 7 A (at continuous power, 4Ω)
- Average Current Drawn: 2.2 A (4Ω), 3.3 A (2Ω)
- Fuse: 10 A
- Dimensions (W x H x D): 160 mm x 41 mm x 190 mm
- Weight: 1.6 kg (excluding wiring leads)
- Maximum Power Output: 55 W x 2 (EIAJ)
- Continuous Power Output:
- 25 W x 2 (at 4Ω, 20 - 20,000 Hz, 0.5% THD)
- 35 W x 2 (at 2Ω, 20 - 20,000 Hz, 0.5% THD)
- Load Impedance: 2Ω to 8Ω (allowable)
- Frequency Response: 10 - 50,000 Hz (+0 dB, -1 dB)
- Signal-to-Noise Ratio: 94 dB (IEC - A network)
- Distortion: 0.015% (at 10 W, 1 kHz)
- Separation: 60 dB (1 kHz)
- Input Level:
- RCA: 0.2 - 2 V / 8 kΩ
- DIN: 100 mV / 22 kΩ
The average current drawn specification is particularly useful for calculating the total current draw when multiple power amplifiers are used in a system. The recommended speaker impedance is between 2 and 8 ohms, and speakers should have a maximum rating of 55 W or higher, or a nominal rating of 25 W or higher, to prevent damage at high volumes.
Usage Features:
- Power Indicator: A visual cue that lights up when the amplifier is powered on, allowing for quick status checks.
- RCA Input Level Control: This control allows users to adjust the input level from the car stereo. For Pioneer car components with RCA pin jacks, the STD position is recommended. For non-Pioneer car stereos, the input level should be adjusted according to the provided diagram (Fig. 1), which indicates 0.5 V at the STD position, with options for 2V and 200mV. If connected to a Pioneer car stereo with DIN sockets, this control is not used.
- Beat Frequency Control (BFC) Switch: Located on the bottom of the amplifier, this switch can be adjusted with a small flat-bladed screwdriver to eliminate beating noise that may occur when listening to AM radio stations.
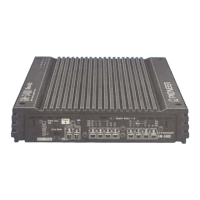
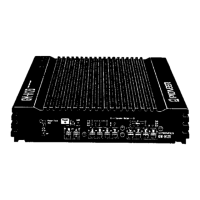
- Flexible Connectivity: The amplifier supports connection to car stereos with either RCA pin jacks or DIN sockets, offering versatility for different head unit configurations. Specific wiring diagrams are provided for both scenarios, detailing connections for power, ground, accessory power, system control, and speakers.
Maintenance Features:
- Fuse Replacement: In case of a blown fuse, it is crucial to replace it with one of the correct rating (10 A). Using an incorrect fuse or a piece of wire can lead to damage or fire.
- Protection Circuitry: The amplifier is equipped with protection circuitry that will automatically shut off the unit if a malfunction occurs. If this happens, users are advised to disconnect power, check the wiring for the cause of the problem, correct it, and then reconnect power.
- General Care:
- Avoid operating the amplifier at high volume for extended periods with the engine off or idling, as this can drain the car battery.
- Ensure the volume is not so high that external warning sounds (e.g., police sirens) cannot be heard.
- For any operational issues, users are directed to contact their dealer or an authorized Pioneer service station.
Installation Guidelines:
The manual provides comprehensive instructions for safe and effective installation:
- Safety First: Always disconnect the negative lead of the battery before installation to prevent short circuits.
- Secure Mounting: The amplifier must be securely fixed, especially if installed in the passenger compartment, to prevent it from breaking free during vehicle movement and causing injury.
- Location Considerations:
- Avoid locations where the amplifier can get wet to prevent electric shock.
- Do not install under carpet or floor mats, as this impedes air circulation and can lead to overheating.
- Keep away from heater outlets to prevent overheating.
- Ensure it does not obstruct seat movement if installed under a front seat.
- Do not install in a location that interferes with driving.
- Wiring Practices:
- Route leads and cords carefully, securing them with cable retainers and electrician's tape.
- Protect insulation from sharp edges.
- Keep wiring away from hot surfaces to prevent short circuits.
- Keep amplifier power leads away from signal cords, speaker leads, and antenna cords to prevent noise problems.
- Connect amplifier ground leads to a solid metal part of the vehicle body, sanding away paint if necessary for good contact.
- Ensure continuous power supply (orange) and accessory power (red) leads are connected correctly for proper operation of both the amplifier and car stereo.
- Mounting Methods:
- Velcro Tapes: Attach Velcro tape to the bottom of the unit and the car mat for a simple mounting solution.
- Brackets: For a more secure installation, brackets can be attached to the bottom of the amplifier using four screws. The unit can then be inserted onto the car mat or chassis using supplied tapping screws (4x12 mm), requiring 3-mm diameter holes to be drilled.
- Professional Consultation: It is recommended to consult a dealer before drilling any holes in the car.
- Part Usage: Only use the supplied parts for installation to ensure security and prevent damage to internal components.
The Pioneer GM-920 is a robust and user-friendly power amplifier designed to enhance the in-car audio experience with its reliable performance and thoughtful features.