EasyManua.ls Logo

Pioneer PD-S801 User Manual

Pioneer PD-S801
22 pages
To Next Page IconTo Next Page
Page #1 background imageLoading...
Page #1 background image
Operating
Instructions
POWER
<
IAS
7
Ee
i
eee
COMPACT
DISC
PLAYER
P60)
Poo
/O1
COMPACT
DIGITAL
AUDIO
POWER
ol
DEMO
MODE
@
Demo
mode
allows
you
to
see
variation
of
the
display
To
enter
the
demo
mode,
press
POWER
and
then
Ke
within
1
second
without
inserting
the
disc.
To
exit
the
demo
mode,
press
any
buttons
on
the
front
panel.
Thank
you
for
buying
this
Pioneer
product.
Please
read
through
these
operating
instructions
so
you
will
know
how
to
operate
your
model
properly.
After
you
have
finished
reading
the
instructions,
put
them
away
in
a
safe
place
for
future
reference.
In
some
countries
or
regions,
the
shape
of
the
power
plug
and
power
outlet
may
sometimes
differ
from
that
shown
in
the
explanatory
drawings.
However,
the
method
of
connecting
and
operating
the
unit
is
the
same.
WARNING:
7o
PREVENT
FIRE
OR
SHOCK
HAZARD,
DO
NOT
EXPOSE
THIS
APPLIANCE
TO
RAIN
OR
MOISTURE.
IMPORTANT
NOTICE
{For
U.S.
and
Canadian
models]
The
serial
number
for
this
equipment
is
located
on
the
rear
panel.
Please
write
this
serial
number
on
your
enclosed
warranty
card
and
keep
it
in
a
secure
area.
This
is
for
your
security.
[For
Canadian
model]
CAUTION:
To
PREVENT
ELECTRIC
SHOCK
DO
NOT
USE
THIS
(POLARIZED)
PLUG
WITH
AN
EXTENSION
CORD,
RECEPTACLE
OR
OTHER
OUTLET
UNLESS
THE
BLADES
CAN
BE
FULLY
INSERTED
TO
PREVENT
SLADE
EXPOSURE.
ATTENTION:
pour
PREVENIR
LES
CHOCS
ELECTRIQUES
NE
PAS
UTILISER
CETTE
FICHE
POLARISEE
AVEC
UN
PROLONGATEUR,
UNE
PRISE
DE
COURANT
OU
UNE
AUTRE
SORTIE
DE
COURANT,
SAUF
SI
LES
LAMES
PEUVENT
ETRE
INSEREES
A
FOND
SANS
EN
LAISSER
AUCUNE
PARTIE
A
DECOUVERT.
TWO
VOLTAGE
SELECTOR
SWITCHES
Only
multi-voitage
models
are
provided
with
these
switches.
U.S.,
Canadian,
European,
U.K.,
and
Australian
models
are
not
provided
with
these
switches.
Mains
voltages
in
Saudi
Arabia
are
127V
and
220V
only.
Never
use
this
model
with
a
110V
setting
in
Saudi
Arabia.
The
line
voltage
selector
switches
are
on
the
reat
panel.
Be-
fore
your
model
is
shipped
from
the
factory,
these
switches
are
set
to
the
power
requirements
of
the
destination,
Check
that
they
are
set
properly
before
plugging
the
power
cord
into
the
household
wali
socket.
If
the
voltage
is
not
proper-
ly
set
or
if
you
move
to
an
area
where
the
voltage
require-
ments
differ,
adjust
the
selector
switches
as
follows.
1.
Use
a
medium-size
screwdriver.
2.
First,
insert
a
screwdriver
in
the
groove
of
the
voltage
selector
at
the
right,
and
adjust
so
that
the
arrow
points
to
the
voltage
value
of
your
area.
3.
Next,
insert
a
screwdriver
in
the
groove
of
the
voltage
selector
at
the
left
and
adjust
until
the
voltage
is
the
same
as
at
the
right.
VOLTAGE
SELECTOR
VOLTAGE
SELECTOR
“This
product
complies
with
the
Radio
Interference
require-
ments
of
the
EC
(European
Community)
Directive
87/308/EEC,"
dQ
PIONEER’
The
Art
of
Entertainment
Question and Answer IconNeed help?

Do you have a question about the Pioneer PD-S801 and is the answer not in the manual?

Pioneer PD-S801 Specifications

General IconGeneral
BrandPioneer
ModelPD-S801
CategoryCD Player
LanguageEnglish

Summary

Two Voltage Selector Switches

Demo Mode Operation

Explains how to enter and exit the demo mode for display variation.

Voltage Selector Switches Functionality

Details the function and adjustment of dual voltage selector switches for different regions.

Safety Instructions

Electrical Safety

Covers risks of electric shock, uninsulated voltage, and opening the unit.

Appliance Usage and Placement

Lists instructions for safe operation, including water exposure, ventilation, and heat sources.

Antenna Grounding Requirements

Explains the importance and method of grounding outdoor antennas for surge protection.

UK Mains Lead Wiring

Details the wire colour coding for mains lead connection in the UK.

Product Cautions and User Information

Laser Product Safety

Warns about laser diode class and avoiding exposure by not removing covers.

FCC Compliance and Interference

Provides information on RF energy, FCC rules, and resolving radio-TV interference.

Safe Listening Practices

Advises on setting safe volume levels to prevent hearing damage.

Power Cord Safety

Offers crucial safety advice on handling power cords to prevent shock or fire.

Operating Instructions Overview

About These Instructions

Clarifies differences between PD-S801 and PD-S701 models.

AC Power Cord Functions

Explains how AC power cord connection affects certain player functions.

Handling, Placement, and Cleaning

Details safe handling, installation, cleaning, and disc storage.

Condensation and Lens Care

Advises on handling condensation and cleaning the CD lens.

System Connections

Output Cable Connections

Explains how to connect LINE OUT jacks to amplifier inputs, specifying fixed/variable options.

Optical Fiber Cable Connection

Details connecting to an amplifier's optical digital jack and cable precautions.

CD-Deck Synchro and Remote Control

Describes synchro recording and system remote control via amplifier.

Power Cord Connection

Instructs on connecting the power cord to a wall outlet or amplifier.

Accessories and Remote Operation

Supplied Accessories Check

Lists items included with the player for verification.

Remote Control Battery Installation

Guides on inserting batteries into the remote control unit correctly.

Remote Control Operation Guide

Explains how to operate the remote control effectively, including range and angles.

Parts and Controls Identification

Front Panel Controls

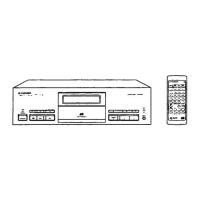
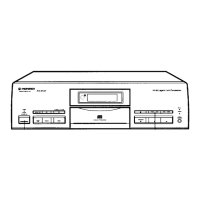
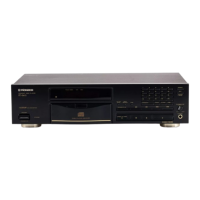
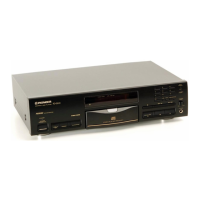
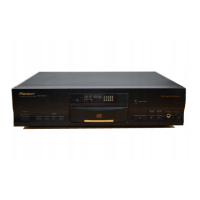
Identifies and explains the functions of buttons and indicators on the player's front panel.

Remote Control Buttons

Details the functions of each button on the remote control unit.

Basic Playback Operations

Playing a Compact Disc

Step-by-step instructions for inserting a disc and starting playback.

Playback Control Functions

Explains how to pause, stop, and remove a disc during playback.

Timer Playback Setup

Describes how to set up automatic playback using an external audio timer.

Display Off Function

Details how to turn off the player's display to reduce power consumption.

Playback Features and Settings

Digital vs. Analog Output Selection

Explains how to switch between digital and analog audio outputs on the PD-S801.

Time Display Modes

Describes the different ways to view elapsed, remaining, and total playback time.

Headphone Volume Adjustment

Details how to adjust headphone volume using the player's controls or remote.

Track Playing Time Display

Explains how to view the playing time of individual tracks during stop mode.

Advanced Playback Functions

Direct Track Selection

How to play a specific track by entering its number.

Track Search Function

Navigating to the beginning of tracks forward or backward.

Manual Search for Passages

Fast-forwarding or rewinding to a specific point within a track.

Specialized Playback Modes

Index Number Search (PD-S801)

Locating specific sections within a track using index numbers.

Hi-Lite Scan Playback (PD-S701)

Playing short segments of tracks for quick previewing.

Playback from Specific Time

Starting playback at a user-defined elapsed time within a track.

Random Track Playback

Playing all tracks on a disc in a random sequence.

Playback Controls and Volume

Repeat Playback Functions

How to repeat a single track or all tracks on the disc.

Peak Search for Recording Level

Finding the peak volume level on a CD for optimal recording setup.

Sound Volume Adjustment (PD-S701)

Adjusting headphone or variable line output volume levels.

Programmable Playback Features

Storing Operation Patterns (PD-S701)

Saving preferred playback modes and disc tray actions for quick recall.

Track Programming

Program Track Sequencing

Setting up a custom playback order of selected tracks from a disc.

Managing Playback Programs

Programming Playback Pauses

Inserting pauses into programmed playback sequences, useful for recording.

Checking Programmed Tracks

Verifying the sequence and details of programmed tracks.

Modifying and Erasing Programs

Steps to change programmed track numbers or clear the entire program.

Track Exclusion Programming

Selecting Tracks for Deletion

Marking specific tracks to be excluded from playback.

Clearing Delete Programs

Removing all previously selected tracks for deletion.

Recording Support Functions

Compu Program Edit

Automatically rearranges tracks to fit a specified tape length.

Auto Program Edit

Selects tracks sequentially to fit a designated tape duration.

Confirming Recording Programs

Confirming Programmed Results

Displays programmed track results for tape sides A and B.

Time Fade Recording Edit

Time Fade Edit Function

Selects recording time, tracks fade out, and memorizes settings.

Managing Time Fade Settings

Clearing Time Fade Settings

Resets or clears the programmed time fade contents.

Auto Space for Cassette Recording

Inserts 3-second intervals between tracks for easier cassette recording.

Troubleshooting Common Problems

Product Specifications

Related product manuals