EasyManua.ls Logo

Pioneer PL-120 User Manual

Pioneer PL-120
17 pages
To Next Page IconTo Next Page
Page #1 background imageLoading...
Page #1 background image
Te,
Setvice
PALEY
ET
REPAIR
&
ADJUSTMENTS
ORDER
NO.
ART-713-0
STEREO
TURNTABLE
L-2_
PL-120
MODEL
PL-2
COMES
IN
SIX
VERSIONS
DISTINGUISHED
AS
FOLLOWS:
Voltage
Remarks
120V
only
U.S.A.
model
(Without
cartridge)
120V
only
Canada
model
(Without
cartridge)
WE
220V
240V
Europe
model
220V
240V
United
kingdom
model
220V
240V
Oceania
model
110V—120V/220V—240V
(Switchable)
General
export
model
MODEL
PL-120(which
is
minor
change
in
design
from
PL-2)
COMES
IN
FOUR
VERSIONS
DISTINGUISHED
AS
FOLLOWS:
220V
240V
Europe
mode!
220V
240V
United
kingdom
model
220V
240V
Oceania
model
110V—120V/220V—240V
(Switchable)
General
export
model
=
This
is
the
service
manual
for
model
PL-2/KUT.
For
servicing
of
the
other
types,
please
refer
to
the
additional
service
manual.
=
Ce
manuel
d‘instruction
se
refére
au
mode
de
réglage,
en
francais.
=
Estemanual
de
servicio
trata
del
método
de
ajuste
escrito
en
espanol.
PIONEER
ELECTRONIC
CORPORATION!
4-1.
Meguro
1-Chome,
Meguro-ku,
Tokyo
153,
Japan
U.S.
PIONEER
ELECTRONICS
CORPORATION
6&5
Oxford
Orive,
Moonachie,
New
Jersey
07074,
U.S.A.
PIONEER
ELECTRONIC
(EUROPE)
N.V.
Luithagen-Haven
9,
2030
Antwerp,
Belgium
PIONEER
ELECTRONICS
AUSTRALIA
PTY.
LTD.
178-184
Boundary
Road,
Braeside,
Victoria
3195,
Australia
FU
©
APR.
1981
Pint
sed
in
Japan
Question and Answer IconNeed help?

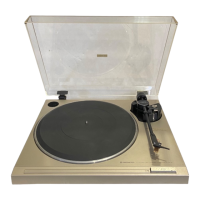
Do you have a question about the Pioneer PL-120 and is the answer not in the manual?

Pioneer PL-120 Specifications

General IconGeneral
Weight6.5kg
Drive SystemBelt Drive
Platter Size300mm
PlatterAluminum Die-Cast
Tonearm TypeS-shaped pipe arm

Summary

1. Specifications

2. Front Panel Facilities

3. Disassembly

3.1 Panel and Base

Procedure for removing the main panel and base components.

3.2 Tonearm

Steps for disconnecting and removing the tonearm assembly.

3.3 Tonearm Section

Detailed steps for removing the tonearm section.

3.4 Control Mechanism Section

Instructions for removing the control mechanism.

3.5 Panel and Base Reassembly

Guidance for reassembling the panel and base.

4. Troubleshooting

5. Precautions for Reassembly

5.1 Areas That Require Lubrication

Specific areas and lubricants required during reassembly.

5.2 Precautions for Attachment of Parts and Reassembly

Key steps and warnings for attaching parts during reassembly.

6. Electrical Parts List

7. P.C. Board Connection Diagram

8. Schematic Diagram

9. Packing

10. Exploded Views

10.1 Exterior

Exploded views of the external components of the turntable.

10.2 Mechanism Assembly

Exploded views of the internal mechanism components.

11. Adjustments

11.1 Auto-Return Adjustment

Procedure for adjusting the automatic return function of the tonearm.

11.2 Arm-Elevation Adjustment

Steps to adjust the height of the arm elevation mechanism.

11.3 Motor Adjustment

Procedure for adjusting the motor speed using VR1 and VR2.
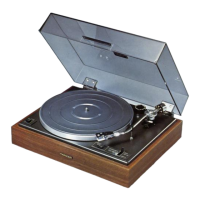
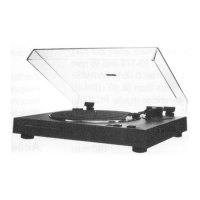
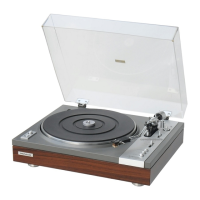
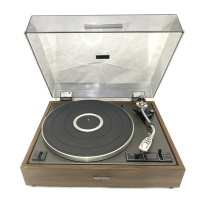
Related product manuals