EasyManua.ls Logo

Pioneer PL-J500 User Manual

Pioneer PL-J500
35 pages
To Next Page IconTo Next Page
Page #1 background imageLoading...
Page #1 background image
Y
PIONEER
The
Art
of
Entertainment
TUNER
CONTROL
AMPLIFIER
AMPLIFICATEUR
DE
COMMANDE
TUNER
PRT
DE
TR
Operating
Instructions
Mode
d’emploi
CX-J300/CX-J400*/CxX-J500**
STEREO
POWER
AMPLIFIER
AMPLIFICATEUR
DE
PUISSANCE
STEREO
Mi-
J200/M-J300
SOUND
IMAGE
CONTROLLER
CONTROLEUR
D‘IMAGE
SONORE
GR-J300/GR-J400
STEREO
DOUBLE
CASSETTE
TAPE
DECK
DOUBLE
PLATINE
CASSETTE
STEREO
CT-J200WR/CT-J3Z00WR
.
AUTO-RETURN
STEREO
TURNTABLE
TABLE
DE
LECTURE
STEREO
A
RETOUR
AUTOMATIQUE
PL-J400/PL-J500
*
The
CX-J400
is
for
Europe
only.
**
The
CX-J500
is
sold
outside
U.K.,
Europe,
and
Australia.
WARNING:
To
PREVENT
FIRE
OR
SHOCK
HAZARD,
DO
NOT
EXPOSE
THIS
APPLIANCE
TO
RAIN
OR
MOISTURE.
FM/AM
CHANNEL
SWITCH
This
switch
is
not
provided
on
models
for
Europe,
U.K.
or
Australia.
switch
at
the
rear
panel
on
the
tuner
contro!
amplifier.
The
CHANNEL
STEP
switch
is
located
on
the
rear
panel
of
the
tuner
control
arnolifier.
Before
the
tuner
contro!
amplifier
leaves
the
factory,
this
switch
is
set
to
the
channel
step
standard
of
the
area
where
the
tuner
control
amplifier
is
sold.
Depending
on
the
position
of
this
switch,
each
time
TUNING
button
is
pressed,
the
frequency
display
changes
by
the
following
amount:
1100
kHz/10
kHz]
position
For
areas
with
channel
step
of
100
kHz
for
FM
and
10
kHz
for
AM.
{50
kH2z/9
kHz}
position
For
areas
with
channel
step
of
50
kHz
for
FM
and
9
kHz
for
AM.
NOTE:
If
the
switch
is
set
to
the
wrong
position,
correct
tuning
may
not
be
possible.
Consult
your
dealer
if
you
are
not
sure
about
the
radio
channel
step
standard
in
your
area.
Adjustment
is
only
necessary
when
there
is
a
CHANNEL
STEP
j
English
Francais
*
Le
modéle
CX-J400
n‘est
destiné
qu’a
Europe.
**
Le
modéle
CX-J500
est
vendu
a
I’extérieur
du
Royaume-Uni,
de
Europe
et
de
I'Ausiralie.
(For
tuner
control
amplifier
and
stereo
power
amplifier)
LINE
VOLTAGE
SELECTOR
SWITCH
Only
multi
voltage
models
are
provided
with
this
switch.
European,
U.K.,
and
Australian
models
are
not
provided
with
this
switch.
Mains
voltages
in
Saudi
Arabia
are
127
V
and
220
V
only,
Never
use
this
model
with
110
V
setting
in
Saudi
Arabia.
Before
your
model
is
shipped
from
the
factory,
this
switch
is
set
to
the
power
requirements
of
the
destination;
nevertheless,
you
should
check
that
it
is
set
properly
before
plugging
the
power
cord
into
the
AC
outlet.
1.
Disconnect
the
power
cord.
2.
Use
a
medium-size
screwdriver.
3.
Insert
the
screwdriver
into
the
groove
on
the
voltage
selector
and
adjust
so
that
the
voltage
value
of
your
area.
20v
zaov
Ov
120v—1270
Question and Answer IconNeed help?

Do you have a question about the Pioneer PL-J500 and is the answer not in the manual?

Pioneer PL-J500 Specifications

General IconGeneral
BrandPioneer
ModelPL-J500
CategoryAmplifier
LanguageEnglish

Summary

Safety Precautions

Fire and Shock Hazard Warning

Do not expose appliance to rain or moisture to prevent fire or shock hazard.

System Connections

Basic Connections Diagram

Illustrates how to connect the main components of the audio system.

Surround Sound System Features

Understanding Surround Sound

Explanation of surround sound effects and its reproduction.

Turntable Setup Procedures

Setting Up the PL-J400/PL-J500 Turntable

Step-by-step guide for assembling and preparing the turntable.

Rear Panel Layout and Connections

Rear Panel Component Jacks

Details on AC outlets, tape deck, sound controller, and power cord connections.

Speaker Terminal Connections

Instructions for connecting speakers to the power amplifier.

Additional Front Panel Functions

Sound Field and EQ Controls

Using Memory, Smart EQ, and Effect buttons for sound customization.

Preset Tuning and Manual Operation

Recording Operations

Auto Synchro Editing System (A.S.E.S.)

Using Normal Edit Mode

Guide for creating edited recordings using the A.S.E.S. system.

Linked A.S.E.S. Editing

Instructions for continuing A.S.E.S. recording with multiple CDs.

Fine Editing with A.S.E.S.

Using Fine Edit Mode

Steps for setting recording time and performing fine editing with A.S.E.S.

Sound Image Control Features

Sound Image and EQ Operation

How to use EFFECT, SFC MODE, image effect buttons, and REC MODE.

Memorizing and Recalling Sound Images

Smart Equalizer and Surround/Stereo Wide

Timer Playback Setup

Timer Recording Setup

Maintenance Procedures

Cleaning the Head Section

Regular cleaning of heads, capstan, and pinch roller for optimal sound.

Demagnetizing the Head

Procedure to demagnetize heads to prevent noise and treble loss.

Technical Specifications

Power Amplifier Specifications

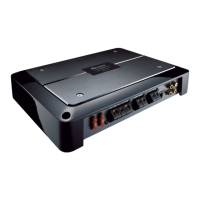
Technical details for the M-J200/M-J300 power amplifier.

Tuner Control Amplifier Specifications

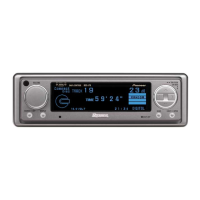
Technical details for the CX-J500 tuner control amplifier.

FM/AM Tuner Specifications

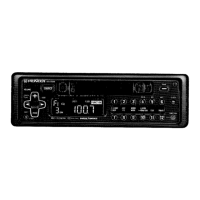
Technical details for the CX-J300/CX-J400 tuner sections.

Power Cord Safety

Power Cord Handling Guidelines

Important guidelines for handling and maintaining the power cord.

Related product manuals