EasyManua.ls Logo

Pioneer TX-555Z User Manual

Pioneer TX-555Z
20 pages
To Next Page IconTo Next Page
Page #1 background imageLoading...
Page #1 background image
Operating
Instructions
STEREO
DOUBLE
CASSETTE
TAPE
DECK
AMPLIFIER
DC-X55Z/DC-555Z
STEREO
CASSETTE
TAPE DECK
AMPLIFIER
DC-X33Z/DC-333Z
FM/AM
DIGITAL
SYNTHESIZER
TUNER
F-X552Z/F-X55ZL/TX-555Z/TX-555ZL
AM/FM
STEREO
TUNER
F-X33Z/F-X33ZL
/
TX-333Z/TX-333ZL
STEREO
TURNTABLE
PL-X55Z/PL-X33Z/PL-555Z/
PL-333Z
Thank
you
for
buying
this
Pioneer
product.
?lease
read
through
these
operating
instructions
so
you
will
snow
how
to
operate
your
model
properly.
After
you
have
‘inished
reading
the
instructions,
.put
them
away
in
a
safe
alace
for
future
reference,
rn
some
countries
or
regions,
the
shape
of
the
power
plug
and
jower
outlet
may
sometimes
differ
from
that
shown
in
the
ex-
slanatory
drawings.
However,
the
method
of
connecting
and
operating
the
unit
is
the
same.
WARNING:
to
prevent
FIRE
OR
SHOCK
HAZARD,
0
NOT
EXPOSE
THIS
APPLIANCE
TO
RAIN
OR
MOISTURE.
MPORTANT
NOTICE
‘For
U.S,
and
Canadian
models]
The
serial
number
for
this
equipment
is
located
on
the
rear
yanel.
Please
write
this
serial
number
on
your
enclosed
war-
‘anty
card
and
keep
in
a
secure
area.
This
is
for
your
security.
‘For
Canadian
model]
CAUTION:
to
prevent
ELECTRIC
SHOCK
DO
NOT
JSE
THIS
(POLARIZED)
PLUG WITH
AN
EXTENSION
CORD,
ECEPTACLE
OR
OTHER
OUTLET UNLESS
THE
BLADES
CAN
38
FULLY
INSERTED
TO
PREVENT
BLADE
EXPOSURE.
ATTENTION:
pour
prevenir
tes
cHocs
ELEC-
TRIQUES
NE
PAS
UTILISER
CETTE
FICHE
POLARISEE
AVEC
UN
PROLONGATEUR
UNE
PRISE
DE
COURANT
OU
UNE
AUTRE
SORTIE
DE
COURANT,
SAUF
SI
LES
LAMES
PEUVENT
ETRE
INSEREES
A
FOND
SANS
EN
LAISSER
AUCUNE
PARTIE
4
DECOUVERT.
——
CONTENTS
———_---
Initial
Tarmatilel
Set
Up
scsecwenriencivemrnvecrceunaeen
ce
3
Connections
3
Antenna
Connection
4
|
AM/FM
Channel
Step
Switch
.
5
Front
Panel
Facilities
.
5
|
Graphic
Equalizer
Controis
8
Cassette
Tapes
..
8
Basic
Operations
-
10
|
Tape
Dubbing
(Editing)
.
12
L
Copying
Tapes
........
LINE
VOLTAGE
SELECTOR
SWITCH
Only
muiti-voltage
models
are
provided
with
this
switch.
U.S.,
Canadian,
European,
U.K.,
and
Australian
models
are
not
provided
with
this
switch.
Before
your
model
is
shipped
from
the
factory,
the
switch
is
set
to
the
power
requirements
of
the
destination;
nevertheless,
you
should
check
that
it
is
set
properly
before
plugging
the
power
cord
into
the
AC
outlet.
1.
Disconnect
the
power
cord.
2.
Use
a
medium
size
screwdriver,
3.
Insert
the
screwdriver
into
the
groove
on
the
voltage
selector
and
adjust
to
the
voltage
value
of
your
area.
a
10-120
Volts
\
Screwdriver
~
These
operating
instructions
cover
all
the
models
above.
Refer
to
the
items
corresponding
to
your
model,
“This
product
is
manufactured
ta
‘comply
with
the
radio
in-
terference
requirements
of
EEC
Directive
76/889/EEC
and
82/499/EEC.”
Relay
Playback
...
Mic
Mixing
for
Singing
Along
witi
Accompaniment
Music
Search
........
Surround
System
Recording
and
Playback
Using
the
Audio
Timer
Maintenance
......
Troubleshooting
.
Specifications
....
Question and Answer IconNeed help?

Do you have a question about the Pioneer TX-555Z and is the answer not in the manual?

Pioneer TX-555Z Specifications

General IconGeneral
BrandPioneer
ModelTX-555Z
CategoryStereo System
LanguageEnglish

Summary

Line Voltage Selector Switch Operation

Adjusting Voltage Selector

Instructions on how to adjust the voltage selector switch for different regions.

Safety Instructions and Precautions

General Safety Guidelines

Covers essential safety measures for appliance operation and environment.

Antenna Grounding and Safety

Details on outdoor antenna grounding for surge protection and safety.

Initial Turntable Setup and Connections

Turntable Assembly Procedure

Step-by-step guide for setting up the turntable components.

System Component Connections

Instructions for connecting speakers, turntable, and tuner to the amplifier.

Antenna Installation and Connection

Front Panel Controls: Cassette Deck Amplifier

Advanced Cassette Deck Functions

Copy Speed and Synchronized Copying

How to use copy speed settings and synchronized dubbing features.

Noise Reduction and Muting Features

Using Dolby NR and REC MUTE for tape recording and playback.

Basic Deck Amplifier Operations

Standard Cassette Playback Modes

Playing tapes in forward, reverse, and continuous playback modes.

Cassette Recording Procedures

Steps for recording in forward and reverse directions, including pause and stop.

Turntable Basic Operations and Stylus Care

Turntable Auto-Play Adjustment

Adjusting stylus descent position for accurate auto-play on specific models.

Tuner Operations and Tape Dubbing Basics

Cassette Tape Dubbing (Editing) Procedure

Step-by-step guide for copying and editing audio from one tape to another.

Advanced Tape Dubbing Techniques

Relay Playback and Microphone Mixing

Music Search and Surround Sound Systems

Audio Timer Operations and Maintenance

Troubleshooting Common Issues

Cassette Deck and Amplifier Problems

Solutions for common issues like no sound, tape errors, and poor recording.

Tuner and Turntable Malfunctions

Troubleshooting steps for reception problems and turntable operation failures.
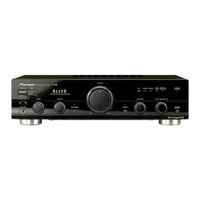
Related product manuals