EasyManua.ls Logo

Pioneer WYS Series - User Manual

Pioneer WYS Series
16 pages
Print Icon
To Next Page IconTo Next Page
Loading...
Maintenance and
Disassembly
Page 1
1. Disassembly
1.1 Indoor unit
1. Front Panel
Procedure Illustration
1) Hold the front panel by the tabs on
the both sides and lift it (see Figure 1).
2) Push up the bottom of an air
filter (step 1), and then pull it out
downwards (step 2) (see Figure 2).
Figure 1
Figure 2
Note: This section is for reference only. Actual unit appearance may vary.
Front Panel
Tab
Filter
Disassembly Guide for WYS Series Pioneer Mini Split Indoor Air Handler
Applies to Models with Nomenclature of “WSxxxxMFIxxHLD”.
Question and Answer IconNeed help?

Do you have a question about the Pioneer WYS Series and is the answer not in the manual?

Overview

This document outlines the disassembly procedures for the WYS Series Pioneer Mini Split Indoor Air Handler, specifically for models with the nomenclature "WSxxxxMFIxxHLD". It serves as a comprehensive guide for technicians or users needing to access internal components for maintenance, repair, or replacement. The manual is structured to provide step-by-step instructions for disassembling various parts of the indoor unit, accompanied by illustrative figures to aid in visual understanding.

Function Description

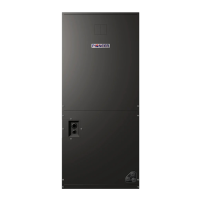
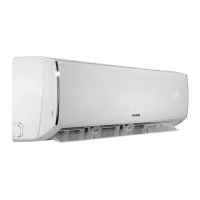
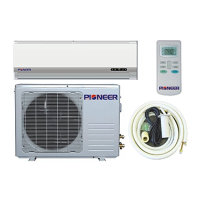
The Pioneer Mini Split Indoor Air Handler is a component of a mini-split air conditioning system, designed to regulate indoor temperature by circulating conditioned air. It typically includes a front panel for aesthetic appeal and user interaction, an air filter for purifying incoming air, a horizontal louver for directing airflow, an electrical control box housing the main circuit board and other electrical components, an evaporator coil for heat exchange, a fan motor and fan assembly for air circulation, and a step motor for louver control. The unit's primary function is to draw in room air, filter it, condition it (cool or heat, depending on the system's mode), and then redistribute it back into the room.

Usage Features

The indoor unit is designed for user-friendly operation and maintenance. The front panel, which can be easily lifted by its tabs, provides access to the air filter. The air filter itself is designed for simple removal and reinstallation, allowing for regular cleaning or replacement to maintain air quality and system efficiency. The horizontal louver, which directs the airflow, can be opened by pushing a hook towards the left, providing access to internal components for servicing. The electrical cover is designed to be pried open with a screwdriver and rotated for removal, granting access to the display board connector. The overall design emphasizes accessibility for routine maintenance tasks such as filter cleaning and more complex repairs requiring access to internal electrical and mechanical parts.

Maintenance Features

The disassembly guide highlights several features that facilitate maintenance:

  • Front Panel Removal: The front panel is designed for easy removal by lifting it from its tabs, providing immediate access to the air filter and other initial components.
  • Air Filter Removal: The air filter can be easily pushed up from the bottom and then pulled out downwards, making routine cleaning or replacement straightforward. This is crucial for maintaining indoor air quality and preventing dust buildup on the evaporator coil, which can reduce efficiency.
  • Horizontal Louver Removal: The horizontal louver can be opened by pushing a hook and then removed by bending it lightly to loosen its hooks. This allows for cleaning of the louver itself and provides better access to the evaporator and fan assembly.
  • Electrical Cover and Display Board Access: The electrical cover can be pried open and rotated, allowing access to the display board connector. The display board itself is secured by a single screw and can be rotated for removal, enabling troubleshooting or replacement of the display interface.
  • Electrical Parts Disassembly: The guide details the removal of the electrical control box, including disconnecting various connectors such as those for the fan motor, step motor, and T2 sensor. This allows for inspection, repair, or replacement of the main circuit board and other electrical components. The electrical main board is secured by a screw and clips, designed for guided removal.
  • Evaporator Disassembly: The evaporator coil, a critical heat exchange component, can be accessed after removing the front panel and electrical parts. Its disassembly involves removing a pipe holder and a screw, and then releasing a hook before pulling the evaporator out. This process is essential for deep cleaning of the coil, which can accumulate dirt and mold over time, affecting performance and air quality.
  • Fan Motor and Fan Blade Disassembly: The fan motor and fan assembly are accessible after removing the evaporator. The fan motor is secured by screws, and the bearing sleeve can be removed to facilitate the extraction of the fan assembly. This allows for cleaning of the fan blades, which can accumulate dust and debris, or replacement of the fan motor if it malfunctions.
  • Step Motor Disassembly: The step motor, responsible for controlling the louver's movement, is also accessible for removal by unscrewing it. This allows for replacement if the louver mechanism fails to operate correctly.
  • Drain Hose Disassembly: The drain hose, which removes condensate from the unit, can be disassembled by rotating a fixed wire and then pulling the hose out. This is important for clearing blockages or replacing a damaged hose to prevent water leaks.

The manual emphasizes that the provided information is for reference only and that the actual unit appearance may vary, suggesting that while the general procedures apply, minor differences might exist across specific models within the WYS Series. The detailed illustrations accompanying each step are a key feature, ensuring that users can visually confirm each stage of the disassembly process, minimizing errors and facilitating efficient maintenance. The sequential nature of the guide, starting from the most external components and moving inward, ensures a logical and systematic approach to servicing the indoor air handler.

Pioneer WYS Series Specifications

General IconGeneral
BrandPioneer
ModelWYS Series
CategoryAir Handlers
LanguageEnglish

Related product manuals