Do you have a question about the Pittsburgh 57047 and is the answer not in the manual?
Study, understand, and follow all instructions before operating the device, and heed all safety warnings.
Understand the meaning of safety alert symbols, DANGER, WARNING, CAUTION, and NOTICE to avoid potential hazards.
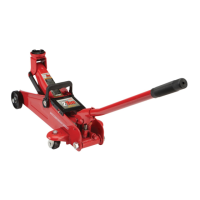
Identifies key components of the floor jack, including the saddle, lifting arm, handle, and hydraulic unit.
Instructions for attaching the handle and preparing the jack for operation, including bleeding and adding oil.
Step-by-step guide on how to safely lift a vehicle using the floor jack, including vehicle preparation and jack positioning.
Instructions for safely lowering a vehicle from the jack, including the use of jack stands and proper lowering procedures.
Procedures for cleaning, maintaining, and lubricating the jack to ensure proper operation and longevity.
Guides users on identifying and resolving common jack malfunctions like failure to lift or slow lowering.
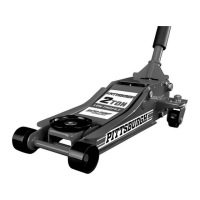
This manual describes the PITTSBURGH 2 TON LOW PROFILE FLOOR JACK, a hydraulic lifting device designed for vehicle maintenance and repair. It is intended for use on hard, level surfaces and is specifically for lifting, not for supporting or moving a vehicle.
The floor jack is a hydraulic lifting device that utilizes a handle to pump hydraulic fluid, raising a saddle that lifts a vehicle. Once the vehicle is lifted, it must immediately be supported by appropriate means, such as jack stands, as the floor jack is not designed for prolonged support. The jack features a low-profile design, allowing it to fit under vehicles with lower ground clearance. The handle can be turned counterclockwise to open the release valve and lower the vehicle slowly. The hydraulic system can be bled to remove air and topped off with high-grade hydraulic oil for proper operation.
| Brand | Pittsburgh |
|---|---|
| Model | 57047 |
| Category | Jacks |
| Language | English |