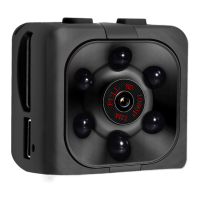
Press 1x the «on/off» button to turn the camera on (standby) - the blue led will light up.
Press the «mode» button 2x to put the cam into photo mode. The red led will turn on. To
take a photo, press the «on/off» button 1x - the red led flashes once, the photo is saved.
The resolution of the pictures is 4032x3024 (12mp)
Connect the mini video camera (equipped with SD card) to your computer with the
supplied cable. A .txt file is automatically created by the camera with the name
"TIMEREST.txt". If it is not there, you can create it yourself in the main folder of the
memory card of the device with content yyyymmddttttss Y = year, month, day, minutes,
seconds. (Or you change the Y to N if you do not want to see the date)
Example: October 5, 2021, 12:00 pm, 30 seconds = 20211005120030
After you save the file, disconnect the video camera from the computer and turn it on.
(Date and time are not automatically adjusted per recording)
Connect the camcorder to the laptop/computer when turned off. After a few seconds, it is
automatically recognized as a removable disk.
The blue indicator indicates the transfer of information, and the red indicator indicates the
charging function of the built-in battery. When battery is fully charged, the red led lights
up constantly.
 Loading...