2
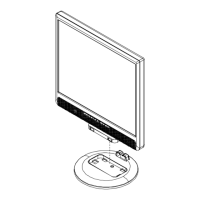
Connecting the LCD Monitor and Base
When you open the box to take the base and put on the desk first. Then
connect the LCD Monitor and base.
Viewing Angle Adjustment
The LCD Monitor is designed to allow users to have a
comfortable viewing angle. The viewing angle can be adjusted
from -5°to +25°.
Warning: Do not force the LCD Monitor over its maximum viewing angle settings as stated above. Attempting this will result in damaging
the Monitor and Monitor stand.
Connecting the Display to your Computer
1. Power off your computer.
2. Connect one end of the signal cable to the LCD Monitor’s VGA port
or DVI port.
3. Connect the other end of the signal cable to the VGA port or DVI port
on your PC.
4. Make sure the connections are secure.
Connecting the AC Power
1. Connect the power cord to the AC socket.
2. Connect the power cord to an AC power source.
Connecting the Audio Cable
1. Connect the audio cable to the "LINE OUT " jack on your PC's
audio card or to the front panel's “AUDIO OUT” jack of your CD
ROM drive.
2. Connect the other end of the audio cable to the LCD Monitor's
"LINE IN" jack.