6
Start Your Installation
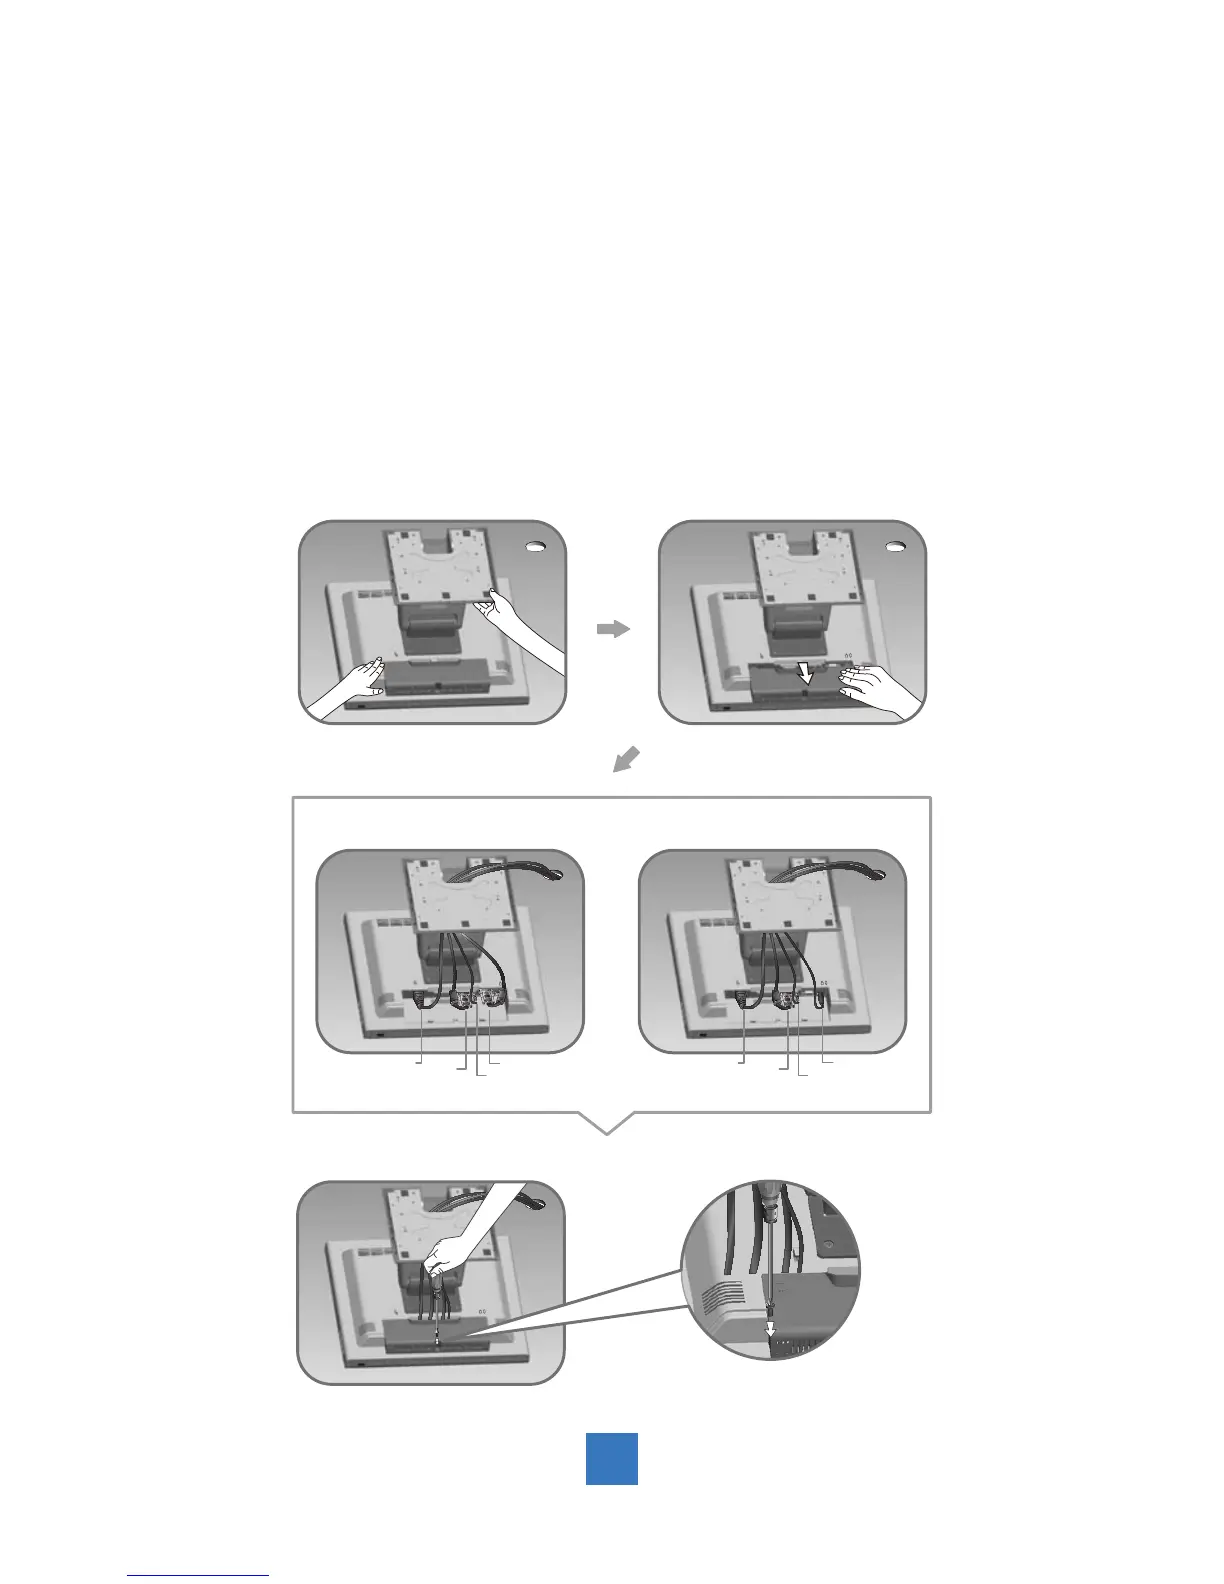
Please follow these instructions so that you can hookup the cables to associated connector.
1. Lay the display fl at on an even surface.
2. Move the stand into position as seen in the step 2 diagram.
3. Remove the cable cover as seen in the step 3 diagram.
4. Connect the cables to the appropriate connectors as seen in the step 4 diagram. Use
step 4-1 diagram if using the RS-232 serial connector. Use the step 4-2 diagram if using
the USB connector.
5. Position all cables under the cover lip as seen in the step 5 diagram.
6. Re-attach the cable cover . Remove the screw (CBM M3x6) from the accessory box, and
insert the screw into the cable cover and monitor as seen in the step 5 diagram.