Do you have a question about the Planika Faro KF 22 and is the answer not in the manual?
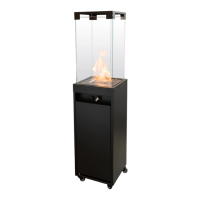
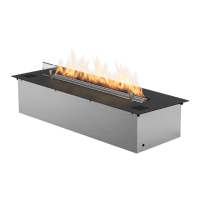
The Planika KF 22 Faro is a decorative fuel-effect gas appliance designed exclusively for outdoor or amply ventilated area use. It functions as a patio heater, providing warmth and ambiance.
The KF 22 Faro operates with various gas types and pressures, falling under appliance categories I3P, I3B/P, and I3+. For G31 gas (I3P and I3+ categories), the inlet pressures can be 30, 37 (recommended), or 50 mbar. For G30 gas (I3B/P and I3+ categories), the inlet pressures can be 30, 37 (recommended), or 50 mbar, and for I3+ specifically, 28-30 mbar and 37 mbar. The injector diameter for all configurations is 1.2 mm. Gas consumption varies with pressure:
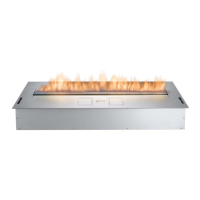
The FARO fireplace features a control valve with a built-in ignition for the main burner, eliminating the need for a pilot flame. The flame height can be adjusted by turning a knob, and an electric ignition button (powered by an AAA battery) is located next to it. The control panel is conveniently placed on the front, just above the gas cylinder compartment door.
To start the device, ensure the knob is in the "OFF" position (fully clockwise). Open the gas cylinder valve, then press and turn the knob counter-clockwise from position (1) to position (2) while keeping it pressed. While still holding the knob, ignite the flame by pressing the ignition button. A spark will ignite the main burner at minimum flame height. If the flame doesn't ignite, repeat 2-3 times, especially after replacing the gas cylinder or if the fireplace hasn't been used for a long time (air needs to be released from the gas linkage). Once the flame is ignited, hold the knob for about 5 seconds to allow the thermocouple to warm up and keep the main valve open. You can then release the knob. If the flame extinguishes, repeat the process until a stable flame is achieved. After 2-3 unsuccessful attempts, stop, check connections, and try again in 10 minutes.
Flame size can be regulated by turning the knob clockwise for a lower flame ("Lo" position) or counter-clockwise for a higher flame ("Hi" position).
To shut down the device, simultaneously press and turn the knob fully clockwise to the "OFF" position. This will cut off the gas supply and extinguish the flame. Always close the valve on the gas cylinder as well.
The FARO is equipped with an anti-tilt valve that automatically cuts off the gas supply and extinguishes the flame if the fireplace is tilted or collapses. It is crucial to ensure this valve is always installed in an upward position.
Regular maintenance is essential for safe and efficient operation. Before restarting the device after winter storage, it is recommended to clean the ignitor, thermocouple, and main burner.
Replacing the battery: The electric ignitor is powered by an AAA battery located in the control panel next to the flame regulation knob. To replace it, unscrew the ignition button, remove the old battery, insert a new one with correct polarization, and screw the cover back on. Only replace the battery when the appliance is completely switched off to avoid irreparable damage to the ignitor.
Glass screens cleaning: Most smudges can be wiped with a dry cloth. For more stubborn stains, use liquids suitable for ceramic tiles or windows. Always dry the glass screen thoroughly to prevent irreversible damp patches. Avoid leaving fingerprints on the glass, as they can embed and become difficult to remove.
| Brand | Planika |
|---|---|
| Model | Faro KF 22 |
| Category | Indoor Fireplace |
| Language | English |