english 5english4
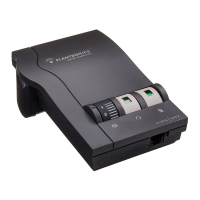
INSTALLATION STEPS
1. Put on headset.
2. Lift the phone’s handset off the cradle
and place it on your desk.
3. If you don’t hear a dial tone, adjust the
Telephone/Amplifier Compatibility
Switch as indicated below:
1. Remove the Telephone Compatibility
Switch Access Door by placing two fin-
gers or thumbs on the raised bumps and
pushing down.
2. Remove the flat, plastic screwdriver
from the bottom of the amplifier by slid-
ing it through the braces holding it in
place.
3. Make sure the amplifier is in the default
settings, and your telephone handset is
off of its cradle.
4. Using the screwdriver, slide the
Compatibility Switch until you hear a
clear dial tone. Experimenting with vari-
ous switch settings will not harm the
amplifier or your telephone.
STEP
4
set telephone/amplifier
Compatibility Switch
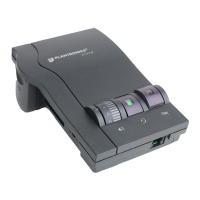
INSTALLATION STEPS
These are the default settings for
headset use.
1. Headset /Handset Selector is depressed
(colored indicator showing).
2. Mute Switch is released (no colored
indicator showing).
3. Incoming Volume Thumbwheel is set to 4.
4. The Outgoing volume has been pre-set. You
can adjust it when you place your first call
(see page 6).
STEP
3
set default
settings