1
GETTING STARTED
Included in this package
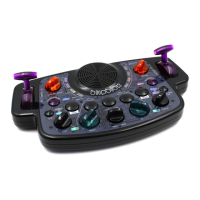
• Blipblox
• USB to 5.5 mm/2.1 mm 5 Volt DC Barrel Jack Power Cable
• Three (3) AA batteries
Compatible 3rd Party Components
• MIDI cord
• External MIDI keyboard
• External MIDI sequencer
WARNING: Audio Out jack not intended for headphone use. Like a real synthesizer, the Blipblox
produces dynamic sounds that can suddenly change volume. Because of this, using the Blipblox with
headphones is not recommended. The mono Audio Out jack is designed to be used with professional
recording equipment or an external speaker.
Getting the Blipblox ready to play
1. Peel the protective plastic lm from the faceplate.
2. Install batteries. The battery compartment is on the underside of the Blipblox. Use a Phillips screwdriver
to open the battery cover. Place batteries in the order indicated. Note: The Blipblox checks the status of
the batteries every time it is powered on. If the top left LED ashes yellow your batteries are running low.
Replace them soon. If the top left LED ashes red, your batteries are too low for the Blipblox to function.
Replace them, or switch to USB-DC adapter (see Step 3).
Battery warnings:
8 Dierent types of batteries or new and used batteries are not to be mixed.
8 Non-rechargeable batteries are not to be recharged.
8 Rechargeable batteries are to be removed from the toy before being charged.
8 Rechargeable batteries are only to be charged under adult supervision.
8 Batteries are to be inserted with the correct polarity.
8 Exhausted batteries are to be removed from the toy.
8 The supply terminals are not to be short-circuited.