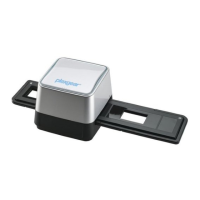
The Plexgear Pixaver Expo is a digital image copier designed to scan and digitize film negatives and slides. It connects to a computer via USB and uses specialized software for image capture and editing.
Function Description
The primary function of the Pixaver Expo is to convert physical film negatives and slides into digital images. It acts as a film and slide scanner, capturing images from 36 x 24 mm slides and negatives. Once digitized, the images can be edited using the included ArcSoft MediaImpression software, which offers a range of tools for enhancement, retouching, and cropping.
Important Technical Specifications
- Image Sensor: 1/3.2" 5 megapixels CMOS
- Lens: F = 2.8, f=4.76 mm
- Focus: Fixed
- Exposure Control: Automatic
- Color Balance: Automatic
- Scan Resolution: 1800 dpi
- Image Resolution: 2592 x 1728 pixels (3:2)
- Light Source: LED
- PC Interface: USB 2.0
- Image Size: Slide and negative (36 x 24)
- Power Source: USB from computer
- Included Software: ArcSoft MediaImpression
- Dimensions (WxHxD): 95 x 75 x 100 mm
Usage Features
The device is designed for straightforward use, from setup to image editing.
Package Contents
The package includes:
- Digital image copier (the main scanner unit)
- CD (containing ArcSoft MediaImpression software, Adobe Reader, and the manual)
- Cleaning brush
- Slide holder
- Negative holder
Part Names
The main components of the scanner include:
- Power LED: Indicates when the device is powered on.
- USB Cable: Connects the scanner to the computer for power and data transfer.
- Film/Slide Holder Slot: Where the loaded film or slide holders are inserted.
- Slide Holder: A tray designed to hold slides for scanning.
- Negative Holder: A tray designed to hold film negatives for scanning.
- Cleaning Brush: Used for maintenance.
Software Installation (Windows)
The Plexgear Pixaver Expo does not require a separate driver installation; it is automatically installed when the scanner is connected to a computer. The included ArcSoft MediaImpression software is essential for capturing and editing pictures. To install the software, users need to insert the provided CD, select "ArcSoft software," and follow the on-screen installation guide.
Placing Film/Slides into the Holder
- Open the holder: The slide or negative holder needs to be opened first.
- Place the negative/slides: Carefully place the film negatives or slides into the designated slots within the holder, ensuring correct orientation.
- Close the holder: Securely close the holder. It's crucial to ensure the holder is correctly closed to prevent issues during scanning.
Connecting to a Computer
The scanner connects to a computer via a USB 2.0 port. Once the USB cable is plugged in, the Power LED light on the scanner will illuminate, indicating it's ready for use.
Inserting the Holder
After loading the film or slides into the appropriate holder, the holder is then inserted into the film/slide holder slot on the scanner. The holder should be inserted properly according to the signs on the device. The film holder can be moved in both directions within the slot to adjust the film's location for scanning. Users are cautioned that incorrect insertion of holders may damage the scanner.
Capture Process
- Start MediaImpression: Launch the ArcSoft MediaImpression software on the computer.
- Acquire from Film Scanner: Within the software, navigate to the "Acquire" option and select "Acquire from Film Scanner."
- Define Save Settings: A window will appear allowing users to define save settings, including:
- Format: Choose the desired file format (e.g., JPG).
- Quality: Select the image quality (e.g., Normal Quality).
- Save to this location: Specify the destination folder for the scanned images.
- Scan Options:
- Film Size: Select film size (e.g., 135, 110).
- Film Type: Choose between Slide, Negative, or B&W Negative.
- Color Depth: Select color depth (e.g., 24).
- DPI: Set the scanning resolution (e.g., 1800, 3600).
- Click 'OK': Confirm the settings.
- Click 'Capture': Initiate the scanning process to capture the image.
The ArcSoft MediaImpression software includes a comprehensive Photo Editing Tools module for enhancing, editing, and retouching digitized images. This module offers a large photo workspace and five distinct sets of controls.
Adjust
This section provides tools for basic image adjustments.
- 1.1 Enhance:
- Auto Enhance: A one-click solution to improve overall picture quality.
- Manual Fix: Allows precise control over image enhancement by adjusting sliders for brightness, contrast, and sharpness.
- To enhance manually: Adjust sliders for brightness, contrast, saturation, hue, and sharpness. Use the zoom slider for a closer look. Click "Apply" to save changes or "Cancel" to discard.
- 1.2 Color: Designed to correct unnatural colors, fix dark photos, and restore faded old prints.
- To fix color: Drag color balance sliders to adjust warmth (red/yellow) or coolness (blue/green). Use the Lighter/Darker slider to reveal details in dark photos or brighten faded ones. Click "Apply" or "Cancel."
- 1.3 Red-Eye: Simplifies the removal of red-eye from flash photography.
- Auto Fix: Automatically fixes all red-eyes with a single click.
- Manual Fix: For stubborn red-eyes, zoom in on the photo, navigate to the red-eye, and click directly on it. Repeat for all red-eyes. "Undo" is available for mistakes.
- 1.4 Crop: Trims photos for dramatic effect or to remove distracting elements.
- To use crop: Choose orientation (portrait/landscape) and fixed proportions (4:6, 5:7, 8:10) or "Custom." Resize and move the crop rectangle. Click "Crop" to apply or "Undo" to revert.
- 1.5 Straighten: Corrects tilted photos.
- To straighten: Move the slider or use rotate buttons until the photo appears straight, using grid lines as reference. Click "Apply" or "Cancel."
- 1.6 Blur Background: Creates a dramatic effect by blurring the background to make the main subject stand out.
- To use blur background: Trace a line around the subject. Adjust sliders to control the transition sharpness and the amount of blur. Click "Apply" or "Cancel."
Saving Your Results
After editing, users can click "Save as" to save the results, with options to overwrite the original file or save a new one. Click "Close" to exit the Photo Editing Module.
Retouch
This section offers tools for detailed image retouching.
- 2.1 Healing Brush: Used to fix dust, scratches, and skin blemishes.
- To use: Hold Shift and click on a source area with similar color/texture. Zoom in on the blemish, adjust brush size, and paint over the blemish. Click "Undo" if needed.
- 2.2 Clone: Removes unwanted elements or creates fun effects by cloning parts of an image.
- To use: Hold Shift and click on a source area (e.g., sky) to clone. Adjust brush size. Click and hold the mouse button to paint over the unwanted element (e.g., telephone pole) until it's concealed. Click "Undo" if needed.
- 2.3 Lighten/Darken: Adjusts the brightness or darkness of specific areas of a photo.
- 2.4 Smudge: Simulates the smearing of wet paint. Sliders control brush size and sharpness.
- 2.5 Sharpen: Sharpens blurry areas. Sliders control brush size and transparency.
- 2.6 Blur: Smooths out rough areas. Sliders control brush size and intensity.
- 2.7 Paint Brush: Allows "painting" on the image. Sliders control brush size and transparency.
- 2.8 Line: Draws straight lines in the photo. Sliders control line width and transparency.
- 2.9 Eraser: Simulates an eraser to remove painted elements. Sliders control eraser size and effect.
Clipboard
This feature allows clipping pictures using various selection tools: Rectangular, Elliptical, Freehand, Magic Wand, and Magnetic.
For more detailed information on software features, users can refer to the help section within the program.
Maintenance Features
- Cleaning Brush: The bundled cleaning brush is provided to periodically clean the glass of the Digital image scanner film holder slot. This helps ensure clear images.
- Clean Negatives/Slides: It is important to ensure that negatives and slides are clean before inserting them into the scanner, as dust or dirt will negatively affect the quality of the scanned images.