T H E P R O F E S S I O N A L M O N I T O R
C O M P A N Y
5
To assist in its use we have provided a step by step guide to termination and use of the
connector.
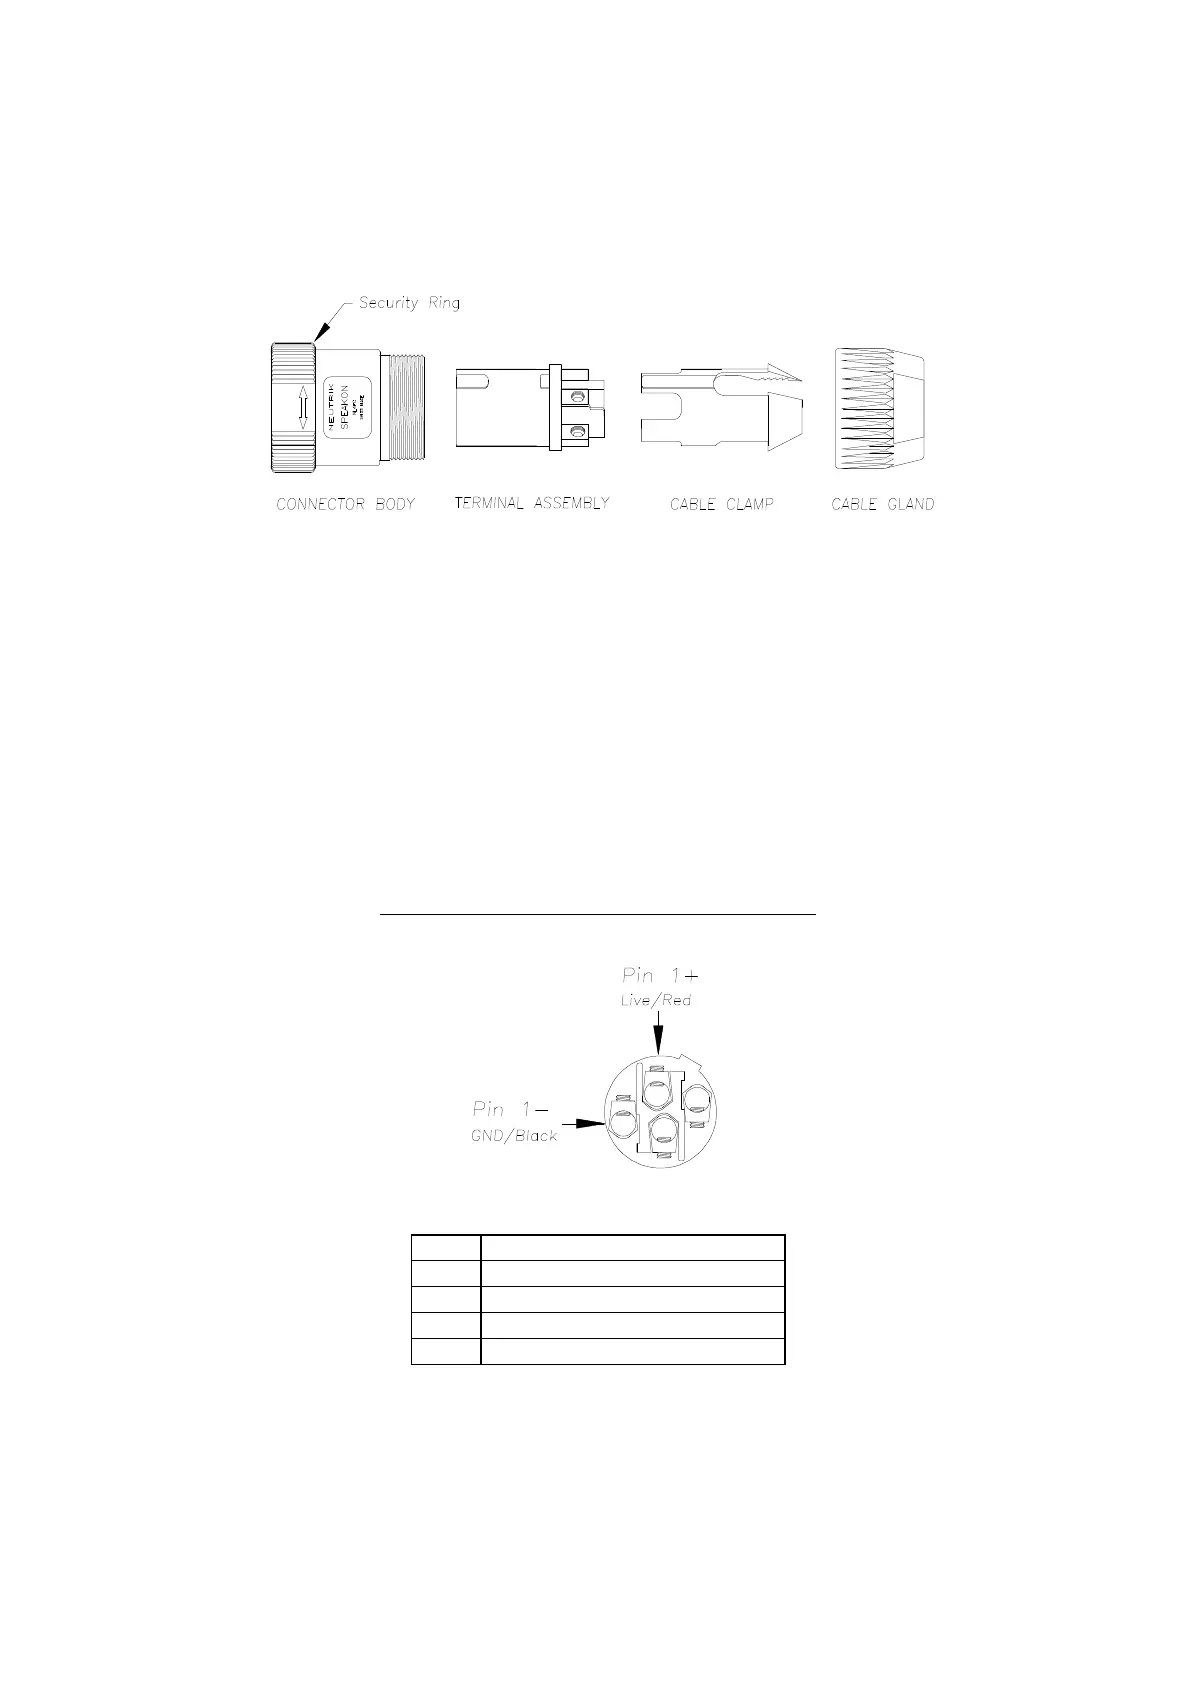
Figure 1: The Neutrik NL4FC - SPEAKON
To connect your cable to the Speakon, unscrew the blue cable gland and remove the black
cable clamp and terminal assembly from the connector body (see figure 1). Slide the cable
gland and clamp over the end of your cable. An alternative white clamp is supplied for
smaller diameter cables.
Use the supplied Allen key to undo and tighten the grub screws on the terminal assembly. If
you prefer the cables may be soldered in place.
The pins of the terminal assembly are numbered and identified as detailed in the following
diagram and table.
Neutrik NL4FC "SPEAKON" Connection
PIN CONNECT TO
1+ Amplifier output (+)
1- Amplifier output (-)
2+ No connection
2- No connection
Following the insertion of the cables, the connector may be re-assembled. Carefully insert the
terminal assembly making sure that the locating lug has engaged correctly in the connector
body. Now, slide the cable clamp into the connector body again making sure that the
locating lug is engaged. The cable gland may now be screwed firmly into place until the
cable is clamped.
Before you plug the connector into the loudspeaker ensure that the security ring is fully anti-
clockwise. Please note that once inserted the Speakon needs to be turned clockwise until it is
fully engaged. The security ring can then be turned to lock the connector in place.