EN
13
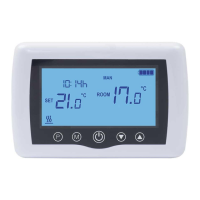
SET UP DAILY PROGRAMS
This setup n can also be done from smartphone app, wich we recommend.
With the on-screen display, press and hold the P button (6-7 seconds) to enter the PROGRAM settings. Days
of the week are xed from Monday to Sunday (1 ~ 7), each day has 4 time periods (1 ~ 4). Each press of the
P button can be performed in the next setting.
1). Press P and hold for 3 seconds, the “hour” display ashes, change the value with the + and - buttons.
2) Press the P button, the temperature blinks, change the desired temperature with the + and - buttons.
3). Press the P button for the next time.
4). Repeat the settings for the other days and periods similarly.
Period 1 2 3 4
Hour Temp Hour Temp Hour Temp Hour Temp
12345 (Mon-Fri) 7:00 22
°
C 8:30 19
°
C 17:00 22
°
C 22:00 19
°
C
6 (Sat.) 8:00 22
°
C 8:30 22
°
C 17:00 22
°
C 22:00 19
°
C
7 (Sun.) 8:00 22
°
C 8:30 22
°
C 17:00 22
°
C 22:00 19
°
C
ADVANCED PARAMETER SETTINGS
Turn the thermostat screen Off by pressing the On / Off button. With screen Off, press and hold in the
same time and buttond for parameters settings.
MENU Description Plaja valori Valoare implicita
01 Temp. calibration for internal sensor -8
°
C ~ 8
°
C 0
°
C
02 Set Point Max. 5
°
C ~ 35
°
C 35
°
C
03 Set Point Min. 5
°
C ~ 35
°
C 5
°
C
05 Frost Protection Temp. 5
°
C ~ 15
°
C 5
°
C
09 Histerezis ( Deadzone - 0.1
°
C step) 0.2
°
C ~ 3
°
C 0
°
C (Off)
11 Child protection 1: ON 0: Off 0
12 Open window detect function-OWD 1: ON 0: Off 0
13 OWD - Detect time 2 ~ 30 minutes 15 minutes
14 OWD - Drop temp. select ( within
detect time)
2,3,4
°
C 2
°
C
15 OWD - Delay time select
(Return to previous working status)
10 ~ 60 minutes 30 minutes
17 Factory reset 0 : No 0
1: Yes, and then press
On/off button for 5s, wait
until thermostat restart.
Software Version 5055-02
RECEIVER WIRING DIAGRAM
The operation of connecting the receiver unit with 230 V power supply and central heating system must be
performed only by qualied personnel and only after consulting the thermostat and boiler documentation.
The receiver unit has a relay type controls (NO and NC / Normal Open and Normal Closed) without
potential (non-energized) that executes the closing of a control circuit with a maximum current of 10 A, and

 Loading...