Do you have a question about the PNI House 1080p and is the answer not in the manual?
Describes live video monitoring via analog, VGA, or HDMI outputs.
Details HDD usage for energy saving and lifespan extension during recording.
Explains backing up data using the USB interface to external storage devices.
Covers real-time video recording and multi-channel playback modes with zoom.
Describes device control via mouse and quick settings copying between channels.
Steps for installing internal HDDs, including unscrewing, fixing, and connecting cables.
Instructions for connecting the power cord and automatic recording start.
Methods for shutting down the device via the menu or power supply.
Controlling the NVR via dedicated CMS software compatible with Windows.
Accessing the NVR through Internet Explorer, requiring ActiveX plug-in installation.
Managing the NVR remotely using the XMEye mobile application for iOS and Android.
Accessing recording operations, including configuration, playback, and backup.
Setting recording parameters for channels, including 24-hour continuous recording.
Setting up the backup process, including selecting channels, date, and time.
Viewing HDD information, status, capacity, and performing operations like formatting or partitioning.
Managing user accounts, groups, passwords, and permissions for system access.
Troubleshooting common problems related to the device not starting normally due to power or hardware faults.
Diagnosing reasons for automatic restarts or shutdowns after turning on the device.
Identifying issues when the system fails to detect storage devices, checking connections and hardware.
Checking firmware, brightness, and cable connections for no video signal on output.
Addressing problems with weak or absent video input signals, potentially due to faulty electronic parts.
Resolving issues where video files cannot be found, checking cables and recording status.
Checking image quality, cable integrity, and device electronics for unclear local video.
Diagnosing issues with no audio signal, checking microphone connections and audio cables.
Details on the processor, video compression, and coding capabilities of the NVR system.
Information on audio compression standards used by the NVR.
Overview of registration modes (manual, motion, scheduled) and playback channels supported.
Specifies supported backup types (Network, U-disk, SATA) and HDD capacity.
Lists available video/audio outputs, inputs, and network interface types.
Details on USB ports, power voltage, and device dimensions.
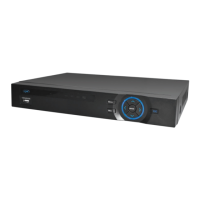
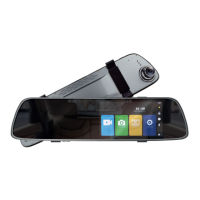
This document describes the NVR PNI House 1080p, a 16-channel full HD 1080P 2MP network video recorder, focusing on its functions, usage, and maintenance.
The NVR PNI House 1080p offers real-time surveillance capabilities, allowing users to monitor video feeds via analog output, VGA, or HDMI interfaces. A key feature is its storage management, where the Hard Disk Drive (HDD) operates only during recording, which helps conserve energy and prolong the HDD's lifespan. It's important to note that the HDD is not included in the package and must be installed separately. For backup purposes, the device supports USB storage devices, enabling users to save recorded data externally.
Playback functionality is robust, supporting real-time video recording and multiple playback modes, including simultaneous viewing of 1 or 16 channels on the screen. Users can also zoom in on specific areas of the image for detailed inspection. The NVR is designed for intelligent operation, primarily controlled via a mouse, and offers a convenient feature to quickly copy settings from one channel to another, streamlining configuration.
Before initial use, the storage unit needs to be installed. The NVR casing can accommodate two internal HDDs, each with a maximum capacity of 4TB. The installation process involves unscrewing the case, removing the NVR cover, fixing the HDD, connecting the data cables, re-fixing the NVR cover, and finally connecting the power cord.
To turn on the device, simply insert the power cord into the main power supply. If a preset recording schedule is active and the start time falls within it, recording will commence automatically. When turning off the NVR, there are two methods: either navigate to the main menu (right-click on the screen), select "Logout," and then "Shutdown," or simply turn off the power supply.
The device has a restart-after-voltage-drop feature, allowing it to back up its status and restart from that point if power is interrupted and then restored. Additionally, the manual advises replacing the mainboard battery annually. Before doing so, users must save system settings and turn off the power source, as the device's time and date will need to be reset afterward.
The NVR can be controlled remotely through several methods:
Upon powering on, users must log in. The default username is "admin" with a password of "1234." Incorrect password entry five consecutive times will block the account, which can be unlocked by restarting the device or waiting for half an hour. For system security, it is strongly recommended to change the default password after the first login.
The NVR supports displaying 1, 4, 8, 9, or 16 channels on the screen. Double-clicking a channel switches it to full-screen mode. In preview mode, right-clicking on the image brings up an on-screen menu, which includes options like Main menu, Guide, Quick set, Record Mode, Playback, PTZ Control, High Speed PTZ, Color setting, Output Adjust, Logout, and Full screen.
This section covers recording configuration, playback, and backup.
The alarm recording function is triggered by events such as motion detection, image loss, video loss, and other abnormalities.
This menu provides access to general system settings, encoding, network configuration, and other services.
This menu provides access to HDD management, user accounts, online users, video output settings, self-maintenance, factory default settings, updates, device information, and import/export options.
Provides detailed information on the storage device, BPS (Kb/s transfer stream and MB/h storage capacity in real-time), event history, and software version.
Used to exit the current account, shut down, or restart the system. This option is also available by right-clicking on the main screen.
This interface presents basic setup steps, including date, time, language, network settings, and links for downloading the XMEye application and QR code for the device's serial number.
The manual also includes a comprehensive troubleshooting section for common issues:
| Video Input | 4 channels |
|---|---|
| Recording Resolution | 1080p |
| Mobile App | Yes |
| Category | DVR |
| Video Output | HDMI, VGA |
| Hard Drive Support | 1 SATA HDD |