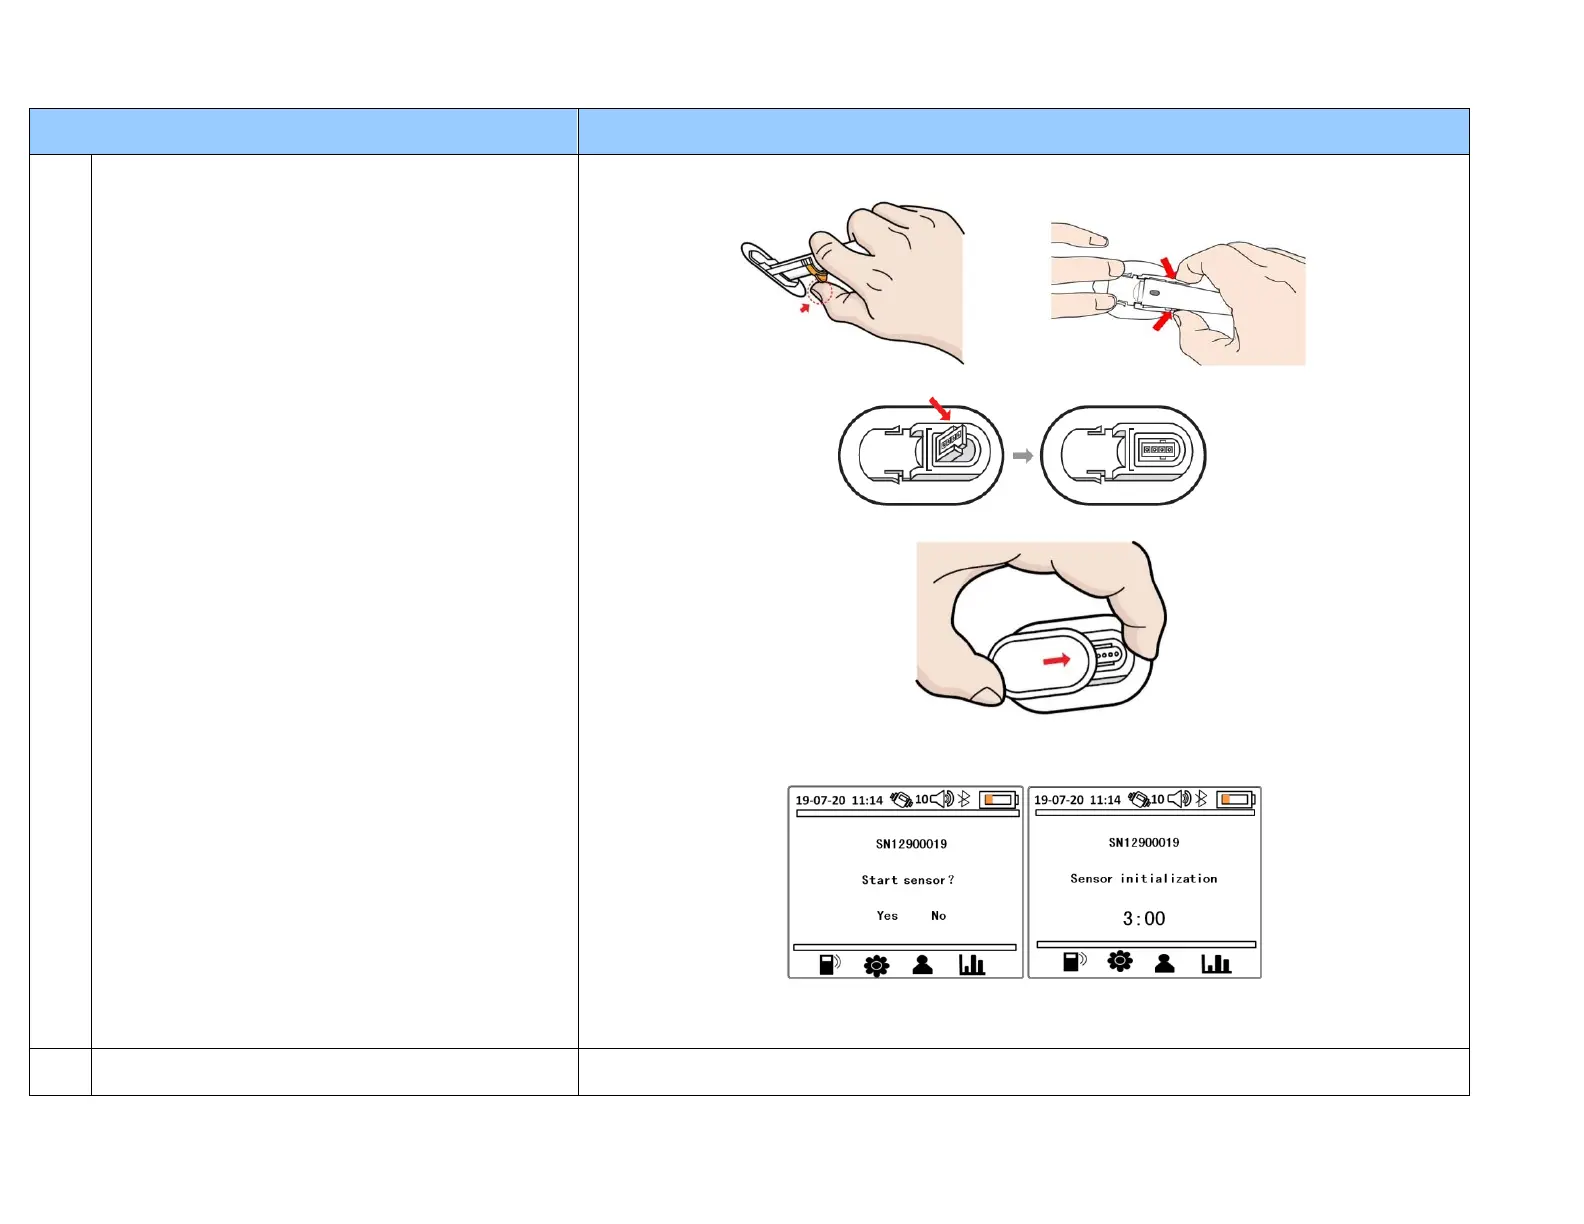
8. Now you can remove the inserter lock pin to separate the inserter from the sensor. Press the
arms on the sides of the inserter to disengage the sensor. Discard the inserter.
9. Press down the sensor connection block to lock it into the sensor base.
10.Then slide the transmitter onto the sensor base until it locks in place.
11. It is now time to initialize the sensor. On the Receiver screen you should see the transmitter
serial number and “Start sensor?” If you are now ready, select “Yes” to start the initialization
(warm-up) period which will last for 3 hours.
12. Your sensor is now started! If you like, you can now place medical adhesive tape (3x4inch) or
(7,6x10,2cm) to cover the entire Transmitter/sensor assembly for additional protection.
(Reference: User Guide)
Yes. The 1
st
and 2
nd
day of using a new sensor requires 2 finger stick calibrations. The remaining
days (3 -10) only requires 1 fasting BG calibration in the morning.
 Loading...