6
7
Getting started
1. Open the box and check you have
the following items:
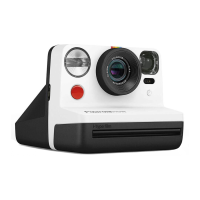
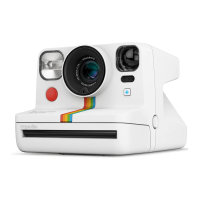
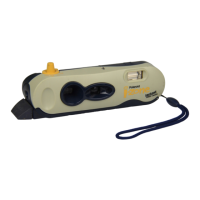
01 01PolaroidNow+camera
02 Micro USB charging cable
03 QuickStartGuide
04 Lenslterkit(5lters+1lenscover)
05 Neck strap
06 Safety & Compliance booklet
2. Charge the camera.
Forsafetransportation,thePolaroidNow+
won’tbefullychargedwhenyoureceiveit.
Tochargeit,plugthemicroUSBendofthe
chargingcableintothesideofthecamera,and
theUSB-AsideintoaUSBwallcharger(5V/1A).
Wedon’trecommendchargingviaalaptop.
ThebatterylevelindicatorLEDwillblink
whilethecameraispluggedinandcharging.
This LED will turn off once the camera is fully
charged.Afullchargethroughawallsocket
takesabout2hours.AfullychargedPolaroid
Now+ will have enough power to shoot 15
packsoflm,dependingonusage.Remember
to turn off the camera when you’re not using it
to save battery life.
3. Attach the neck strap.
01
02
03
04
4. Shop instant lm.
ThiscamerausesPolaroidi-Typeand600
instantlm.Youcanshopithere.
How to take
your rst photo
1. Turn on the Polaroid Now+ camera.
PresstheON|OFFbuttonuntilthelm
counterdisplaylightsup.Thisdisplaywillshow
howmanyphotosareleft.Itshouldbeat‘0’
becausethereisnolminthecamera.
2. Insert the lm pack.
Pressthelmdoorbuttonandpullthedoor
open.Holdthelmwiththedarkslidefacingup.
Slidethethinendofthecassetteinrstwith
thetabfacingtowardsyou.Pushthecassette
all the way into the camera until it clicks. Leave
thepulltabon,asyouwillneedthatlaterto
removetheemptylmpack.
Closethelmdooruntilitclicks.
T
hedarkslidecoveredbythelmshield
willeject.Donotpullonthelmshield.
Removethedarkslideandallowthelm
shieldtorollbackin.Thisretractableshield
isdesignedtoprotectphotosfromlight
astheydevelop,sodon’tremoveit.Ifthe
darkslidehasnotejected,removethelm
andreinsertit.
Toensurethecameradisplaysthecorrect
numberofphotos,alwaysnishthelm
beforeinsertingafreshpack.Ifyoudecide
toswitchthelmpackanyway,beawarethat
thiswillexposeallthephotostolight,and
they will be unusable.
You’renowreadytotakeyourrstphoto.
3. Aim the camera at your subject.
Make sure you are at least 45cm (1.47ft) away
from your subject.
ThePolaroidNow+usesaviewnderlocated
ontheleftsideofthelensbarrel.Toaimatyour
subject,alignyoureyewiththeviewnderbarrel
andusetheimageyouseetohelpcomposeyour
shot.Beawarethatyourphotowillnotreect
exactlywhatyouseethroughtheviewnder.For
subjectscloserthan1.2m(5.24ft),adjustyour
aimslightlyupandtotheleft.
It’spossibletofocusonyoursubject,andthen
recomposeyourframe.Todothis,half-pressthe
shutterbuttontolockfocusandexposure.Adjust
yourcomposition,andthenfullypresstheshutter
button to take the photo. Be careful not to cover
theashorthephotoejectslotwithyourngers.
4. Press the shutter button.
The photo will eject from the slot at the front
of the camera. You will see that the photo will
becoveredwithalmshieldtoprotectitfrom
light.Pleasedon’tpullonthelmshield.
5. Remove the photo.
Leaveyourphotounderthelmshieldfor
about5seconds.Gentlyliftthelmshieldsoit
rolls back into the camera. Remove the photo
andplaceitfacedowntocontinueshieldingit
fromlightasitdevelops.Andnomatterwhat
thatsongsays,don’tshakethephoto!Check
thebackofthelmpackagingforthecorrect
developingtimes.
6. Turn the camera off.
Press the ON | OFF button to turn off the
PolaroidNow+.
Connecting to the app
WiththePolaroidNow+,youcanunlock
extracreativetoolsinsidethePolaroidapp.
DownloadthePolaroidOriginalsapptoyour
mobile phone from the Apple App Store or
Google Play store. Switch on Bluetooth®
wirelesstechnology.Opentheappandtap
‘Now+’fromthemenu.Apermissionmessage
willpopup.Tap‘OK’toconrm.The+Button
onthecamerawillturnbluetoindicatethatit's
nowconnectedtoyourphone.Theconnection
ismadethroughtheapp,sothere’snoneedto
pair the camera with your phone. This means
thePolaroidNow+camerawillnotappearin
yourphone’slistofBluetooth®devices.
ThePolaroidNow+cameraisalwaysready
to connect to the mobile app. Check the
connection status with the +Button.
→
Camera is searching for
the mobile app.
→
Cameraisconnectedto
the mobile app.
→
Cameraisnotconnected
to the mobile app but is
searching for it.
Adding a lens lter
Addstars,contrast,orcolortoyour
photographywiththelenslterkit.Toadda
coloredlter,pressitoverthelens.Forthe
starburstandredvignettelters,turnthelter
until the small notch aligns with the light meter
atthebottomofthelens.Thelterwillthen
click into place.
 Loading...