Should you encounter any problems, contact Customer Service at (888) 919-0070 from 8 AM to 5 PM Mon. thru Fri.
EST. Extended operating days and hours during peak season requirements.
OWNER′S MANUAL
4
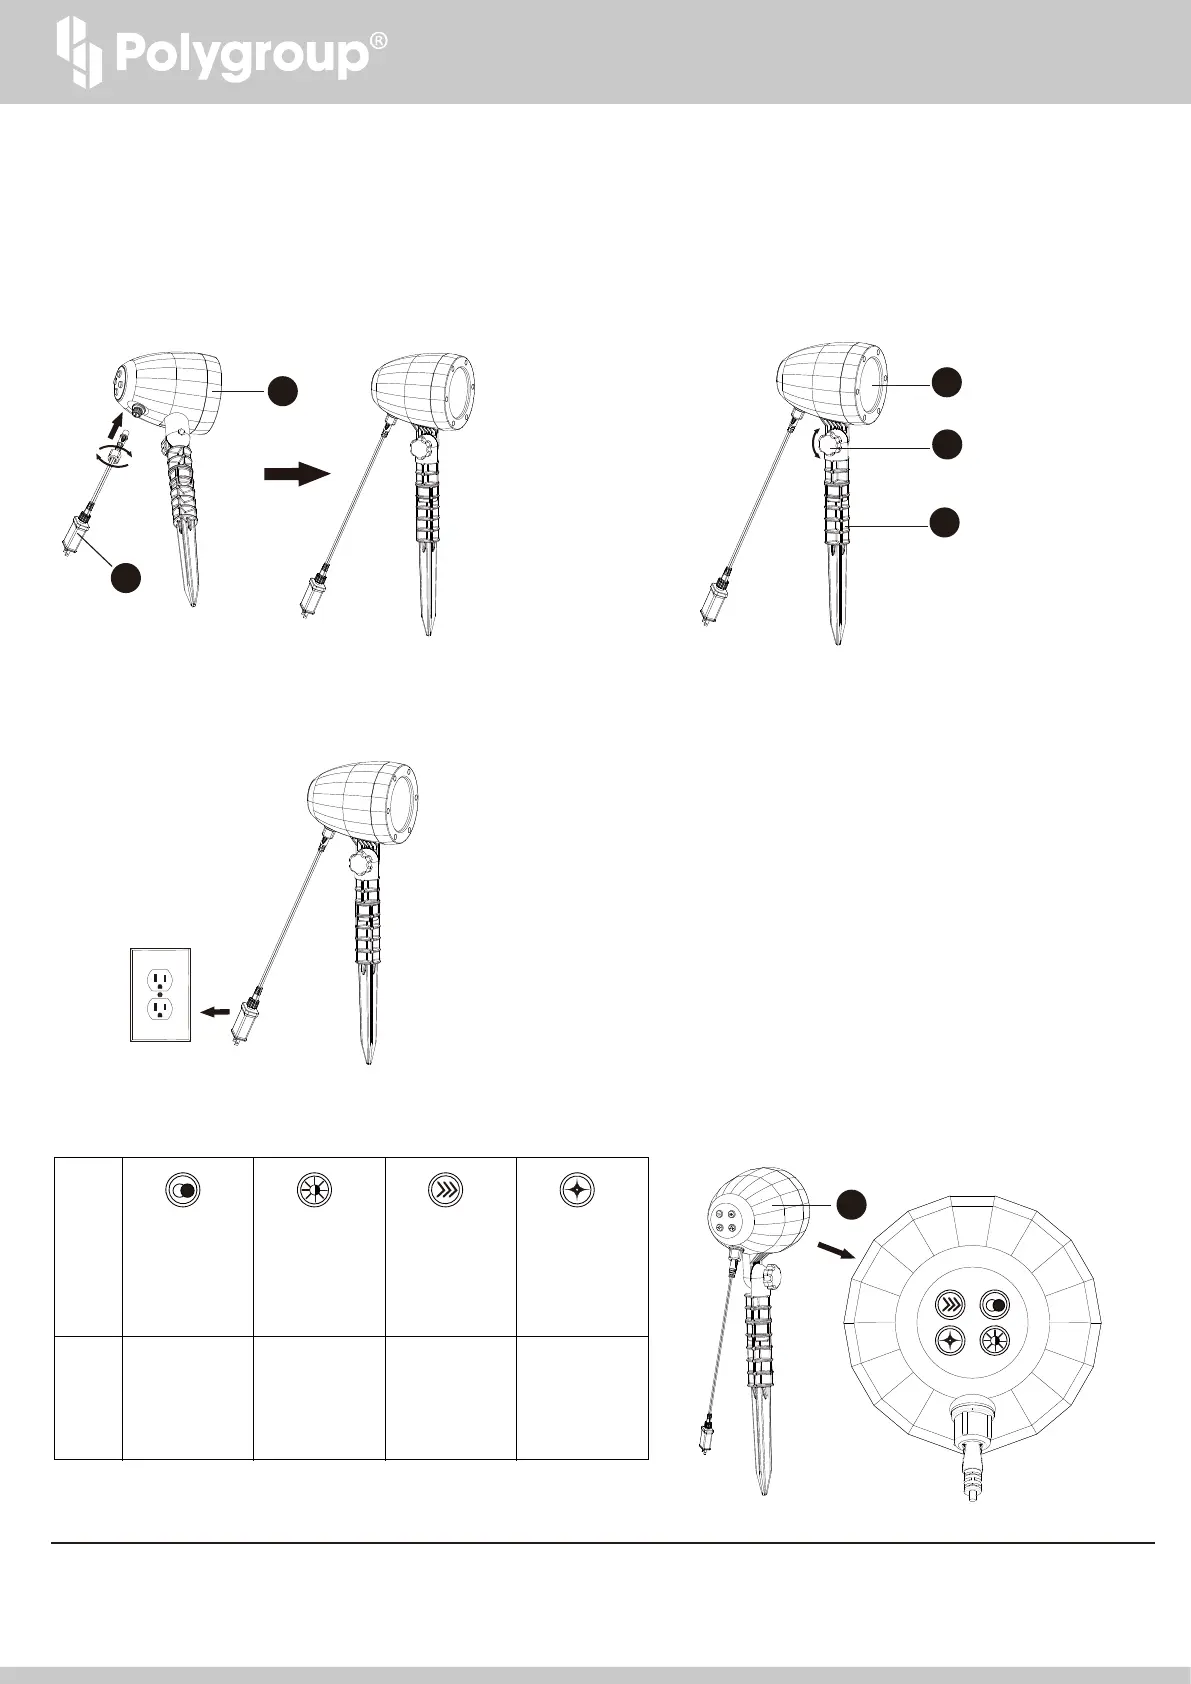
3. Connect the male plug of Power Supply 2 to the female socket on
Laser Show 1, and then turn the power cord lock nut clockwise to
tighten the power cord on the Power Supply 2 by hand.
4. Insert the Laser Show 1 with Ground Stake 3 into the ground in
the location intended. Loosen the Ground Stake Lock Screw 4 in
anti-clockwise by hand, and then adjust the angle of the Laser
Show 1 so it is pointing at your intended projection surface. Turn
the Ground Stake Lock Screw 4 in clockwise by hand to tighten
the Laser Show 1 with the Ground Stake 3.
5. Plug the Power Supply 2 into the outdoor electrical outlet and the
Laser Show 1 will light automatically.
6. The Laser Show has a timer to control ON/OFF automatically. The
timer is defaulted 6 hours ON and 18 hours OFF when the Laser
Show is connected with the electrical power. To reset the timer,
disconnect the Laser Show electrical power from outdoor electrical
outlet. And then, reconnect it.
7. To press the buttons on the Laser Show
1
select the different functions listed below.
1
2
1
1
4
3
Laser Light
Color Selection
i. Red
ii. Green
iii. Red & Green
iv. OFF
i. Brightest
ii. Bright
iii. Normal
iv. Dim
i. Fast
ii. Middle
iii. Slow
iv. OFF
i. Fast
ii. Middle
iii. Slow
iv. OFF
Laser Light
Brightness
Selection
Laser Light
Hologram
Motion Speed
Selection
Laser Light
Hologram
Twinkle Speed
Selection
Button
Function