12 5
DVD PLAYER SETUP INSTRUCTION
SETUP is used to adjust the player configuration. Consist of : GENERAL, AUDIO, VIDEO and PREFERENCE.
1. Press “SETUP” button to go to SETUP main menu.
2. Press “ / ” navigator button to select SETUP menu you want to set
(GENERAL / AUDIO / VIDEO / PREFERENCE).
3. Press navigator “ ” or “ / ” button to go to selected setup menu (ex :
GENERAL / AUDIO / VIDEO / PREFERENCE) and press “ / ” navigator
button to select item that you want to adjust (TV DISPLAY / ANGLE MARK
/ CAPTIONS / SCREEN SAVER).
4. Press navigator “ ” or “ / ” button to go to menu you want to set and press “ / ” navigator button
to select (PAN SCAN / LETTER BOX / WIDE), then press “ / ” button.
5. Press “SETUP” button again to exit from SETUP menu.
General
GENERAL SETUP menu is consist of : TV DISPLAY, ANGLE MARK, CAPTIONS and SCREEN SAVER.
TV Display
1. Pan Scan : Select this when connected to normal ratio (4:3) TV screen,
wide screen display will automatically be sliced on the left and right side.
2. Letter Box : Select this when connected to normal ratio (4:3) TV screen,
wide screen display will be displayed with the black border on the top and
bottom of the screen.
3. Wide : Select this when connected to wide screen TV (16:9).
Note : Picture display ratio depends on the disc recorded format. Not all disc can
displayed the picture on prefered ratio aspect (depend on the recorded format). You must set TV DISPLAY
setting right on your TV type.
Angle Mark : Only available when the disc is recorded in many camera angles. Select ON to show angle sign
at the right top corner of the screen. OFF to disable the Angle sign on the TV screen.
Captions : Select ON to displaying text on the TV screen. And select OFF to disable it.
Karaoke / sing a song (for certain model only)
Karaoke playing : Play the karaoke disc. Connect the Microphone to the MIC terminal. Turn on the Microphone.
Set the Volume and Mic Echo level :
1. Press “SETUP” to enter to SETUP main menu.
2. Press “ / ” navigator button to select AUDIO setup menu, then press “ ” navigator or “ / ” button
to enter to AUDIO menu, select MIC Setup by “ / ” navigator button then press “ / ” button. Select
MIC, press “ ” navigator or “ / ” button to enter to ON/OFF option, pilih ON dengan tombol “ / ”.
3. To change Mic Volume, on the MIC Setup submenu select MIC Volume by “ / ” navigator button then
press “ ” navigator or “ / ” button to enter to 0 - 10 volume level option.
4. To change Echo level, on the MIC Setup submenu select Echo Level by “ / ” navigator button then press
“ ” navigator or “ / ” button to enter to 0 - 10 echo level option.
5. Press “SETUP” button to exit from SETUP menu.
Channel Select : Ketika memainkan disc SVCD/VCD/CD/MP3/MPEG4, tekan tombol “L/R” untuk memilih
keluaran audio tanpa vokal (musik saja), pilihannya adalah MONO LEFT, MONO RIGHT, MIX-MONO dan
STEREO. Untuk disc DVD karaoke, anda dapat memilih keluaran tanpa vokal (musik saja) dengan menekan
tombol “AUDIO”.
Zoom
This function is used to enlarge the screen display while playing a disc. There
are 3 enlarging level, each time “ZOOM” button pressed the picture will enlarged
2 times, 3 times, 4 times. During ZOOM, you can use “ / / / ” navigator button to see the preferred picture
part . Press “ZOOM” button to back to normal screen size.
VIDEO IN
AUDIO IN
TV
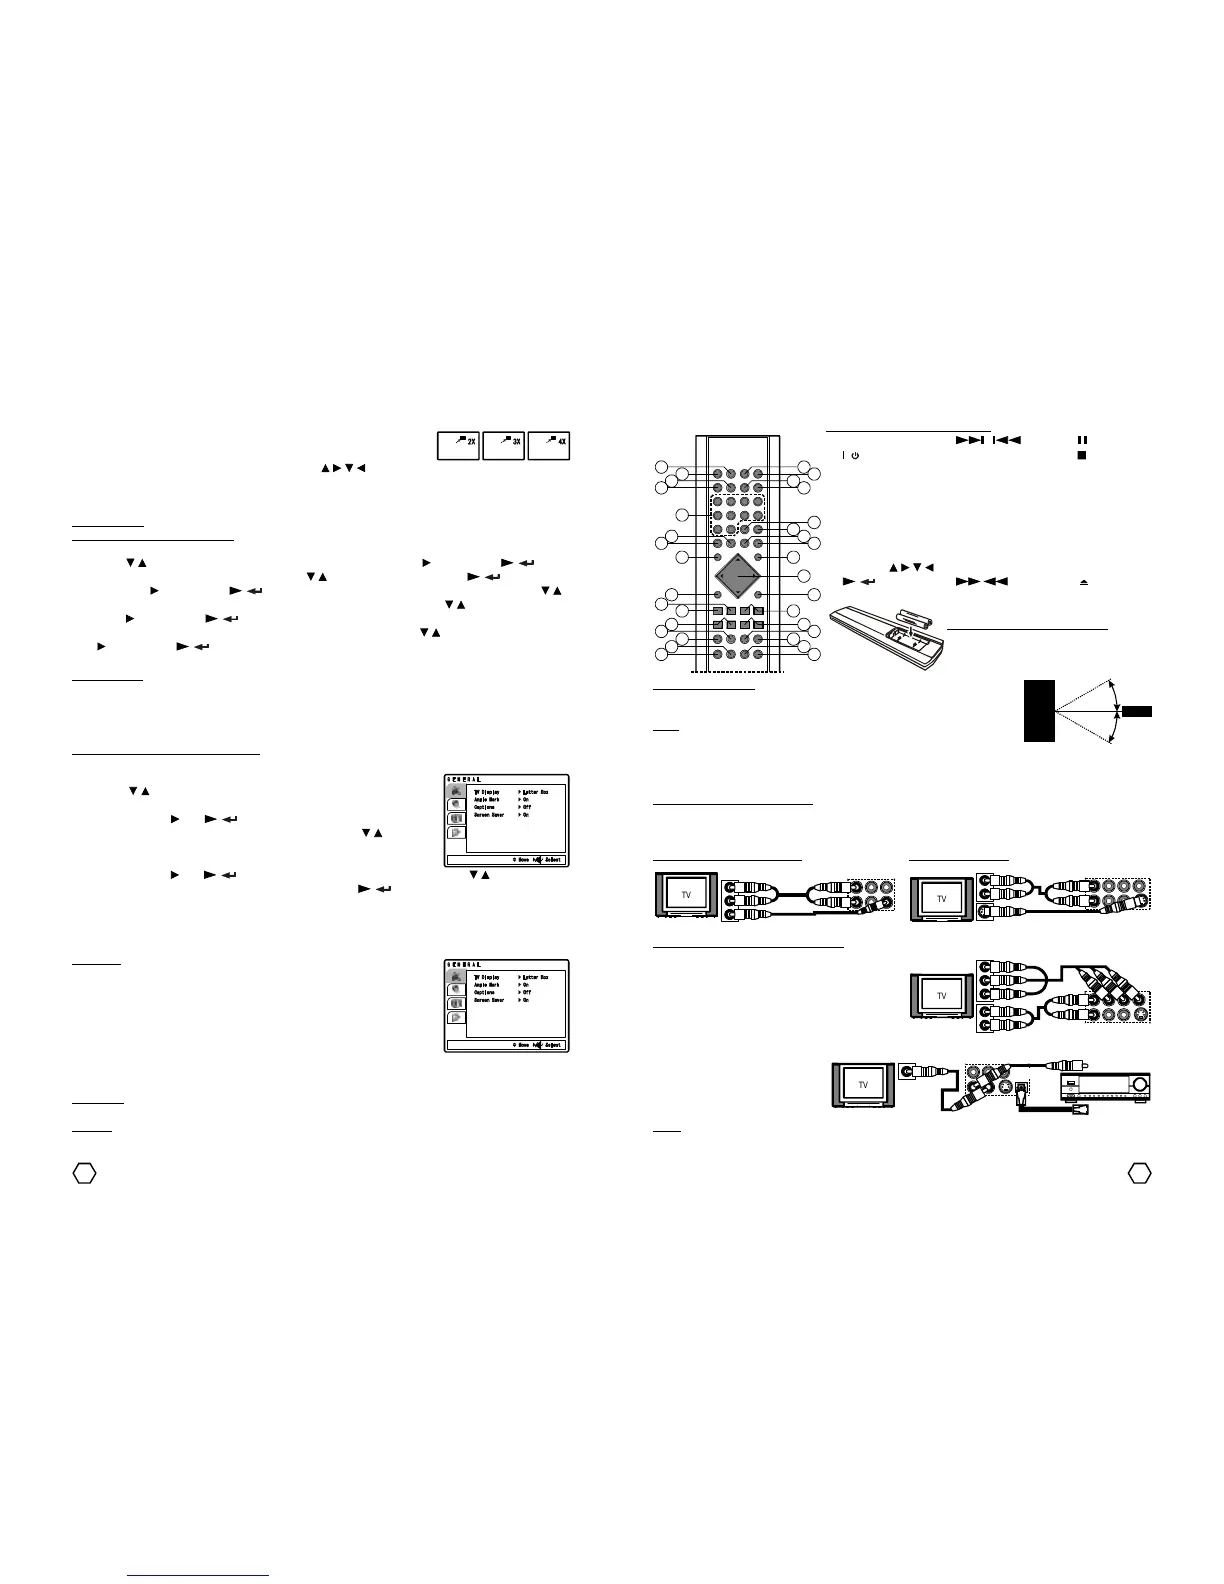
Remote Control
Remote Control Battery Installation
Insert the battery according to the polarity
(+) and ( - ), as shown on the battery
compartment.
Remote Control Range : Remote control reachs about 6 meter around the player
with visible range about 60
0
from front panel of the player (see the picture). The
range of the remote is effected by the lighting of a room/place.
Notes : Do not gleam on the remote sensor receiver with bright lights. Do not
place anything between remote control and remote sensor receiver on player
cause it would block the light to the remote control. Do not use this remote control with other remote control
in the same time.
Remote Control button description :
1.MUTE 13. / 23. (pause)
2. / (next/previous) 24. (stop)
3.ANGLE 14. SLOW 25. RETURN
4.AUDIO 15. STEP 26. MENU
5.CLEAR 16. FLASHRIP 27. OSD (on
6.PROG (program) 17. MULTIMEDIA screen display)
7.ZOOM 18. P/N / P.SCAN 28. GO TO
8.L/R (left/right) 19. VIDEO MODE 29. Angka 0-9
9.SETUP 20. REPEAT 30. TITLE
10. navigator / / / 21. A-B 31. SUB-T (subtitle)
11. / (play/enter) 22. / 32. (open/close)
12. -VOL+ (fast forward/reverse) 33. PBC (play
back control)
 Loading...