20 5
KARAOKE (sing along with a song)
Playing karaoke Cassette or Disc
Connect the microphone to MIC terminal and VFD screen displayed “ ” and AVC indicator. KARAOKE does
not work if the unit in TUNER function. Press “FUNCT” button on the remote control repeatedly or press “DVD/
M.MEDIA”/“TAPE” button on the front panel to select DVD/TAPE karaoke source. Adjust Volume and Equalizer
as needed. Play the disc or cassette as you prefer. Turn on the microphone and adjust MIC LEVEL at
sufficiently. Adjust ECHO LEVEL to add echo effect.
Press “KARAOKE” button on the front panel or remote control repeatedly to select the one of karaoke mode
below according to the played function.
- AVC : AVC indicator displayed on the VFD screen. If you are singing in front of mic, your voice
and accompanist music will comes out from the both speaker (L & R), whereas the original
singer voice will lost. Select this mode if the singer voices on the right channel of the karaoke
disc or cassette.
- MPX : MPX indicator displayed on the VFD screen. The unit will perform left channel sound only
on the both speaker, whereas right channel sound will lost.
Notes :
- The karaoke functions above only can be set if the microphone connected to the unit.
- When playing DVD karaoke disc, you can select audio output without vocal (music only) by pressing
“AUDIO” button in the remote control.
ANTENNA
REAR
PART OF
THE UNIT
LINE IN / MP3 IN OPERATING INSTRUCTION
Select LINE IN function by pressing “FUNCT” (function) button on the remote control
or “LINE IN/MP3 IN” button on the front panel of the unit repeatedly until LINE IN
displayed on the VFD screen. Connect your AUDIO / LINE OUT terminal of the external equipment to the unit
LINE IN terminal using RCA cable.
For MP3 IN function, connect the Line Out / Audio Out / Headphones of the MP3/MP4 player to the MP3 IN
terminal of the unit using 3.5 mm stereo jack.
Note : If you are using LINE IN and MP3 IN function simultaneously, the sound source can be selected by
pressing “LINE IN / MP3 IN” button on the front panel or “MULTIMEDIA” button on the remote control.
DOCKING OPERATING INSTRUCTION
Select DOCKING function by pressing “FUNCT” (function) button on the remote control repeatedly or press
“DOCKING” button on the front panel until DOCKING displayed on the VFD screen. Attach MP3/MP4 player to
the DOCKING terminal on the top panel of the unit. The unit will read the kind of the MP3/MP4 player that
attached to the unit and then display it on the VFD screen.
If you attach a POLYTRON eMotion MP3/MP4 player, the VFD screen will display the EMOTION character.
Whereas if you are attached the others MP3/MP4 player that compatible with this unit, VFD screen will display
character according to the MP3/MP4 player identity.
When in DOCKING function, you can operate MP3/MP4 player through the buttons on the front panel of the unit
or remote control, appropriate with button on the MP3/MP4 player.
The VFD screen will display EMPTY appearance while there is not attached equipment to the DOCKING
terminal.
Notes :
1. If you attached non POLYTRON MP3/MP4 player product to DOCKING terminal, so for play/pause function
use “ / STEP” (pause/step) button on the remote control.
2. DOCKING terminal can be used as CHARGER (battery charger), while ON/standby condition. (if you charging
the battery when the unit is ON, you should select function except the RADIO)
Select the Preset Radio Station
Select RADIO function. Select the preferred frequency band (AM or FM). Press “0-9” numeric buttons or press
“ ” / “ ” button on the remote control or on the front panel.
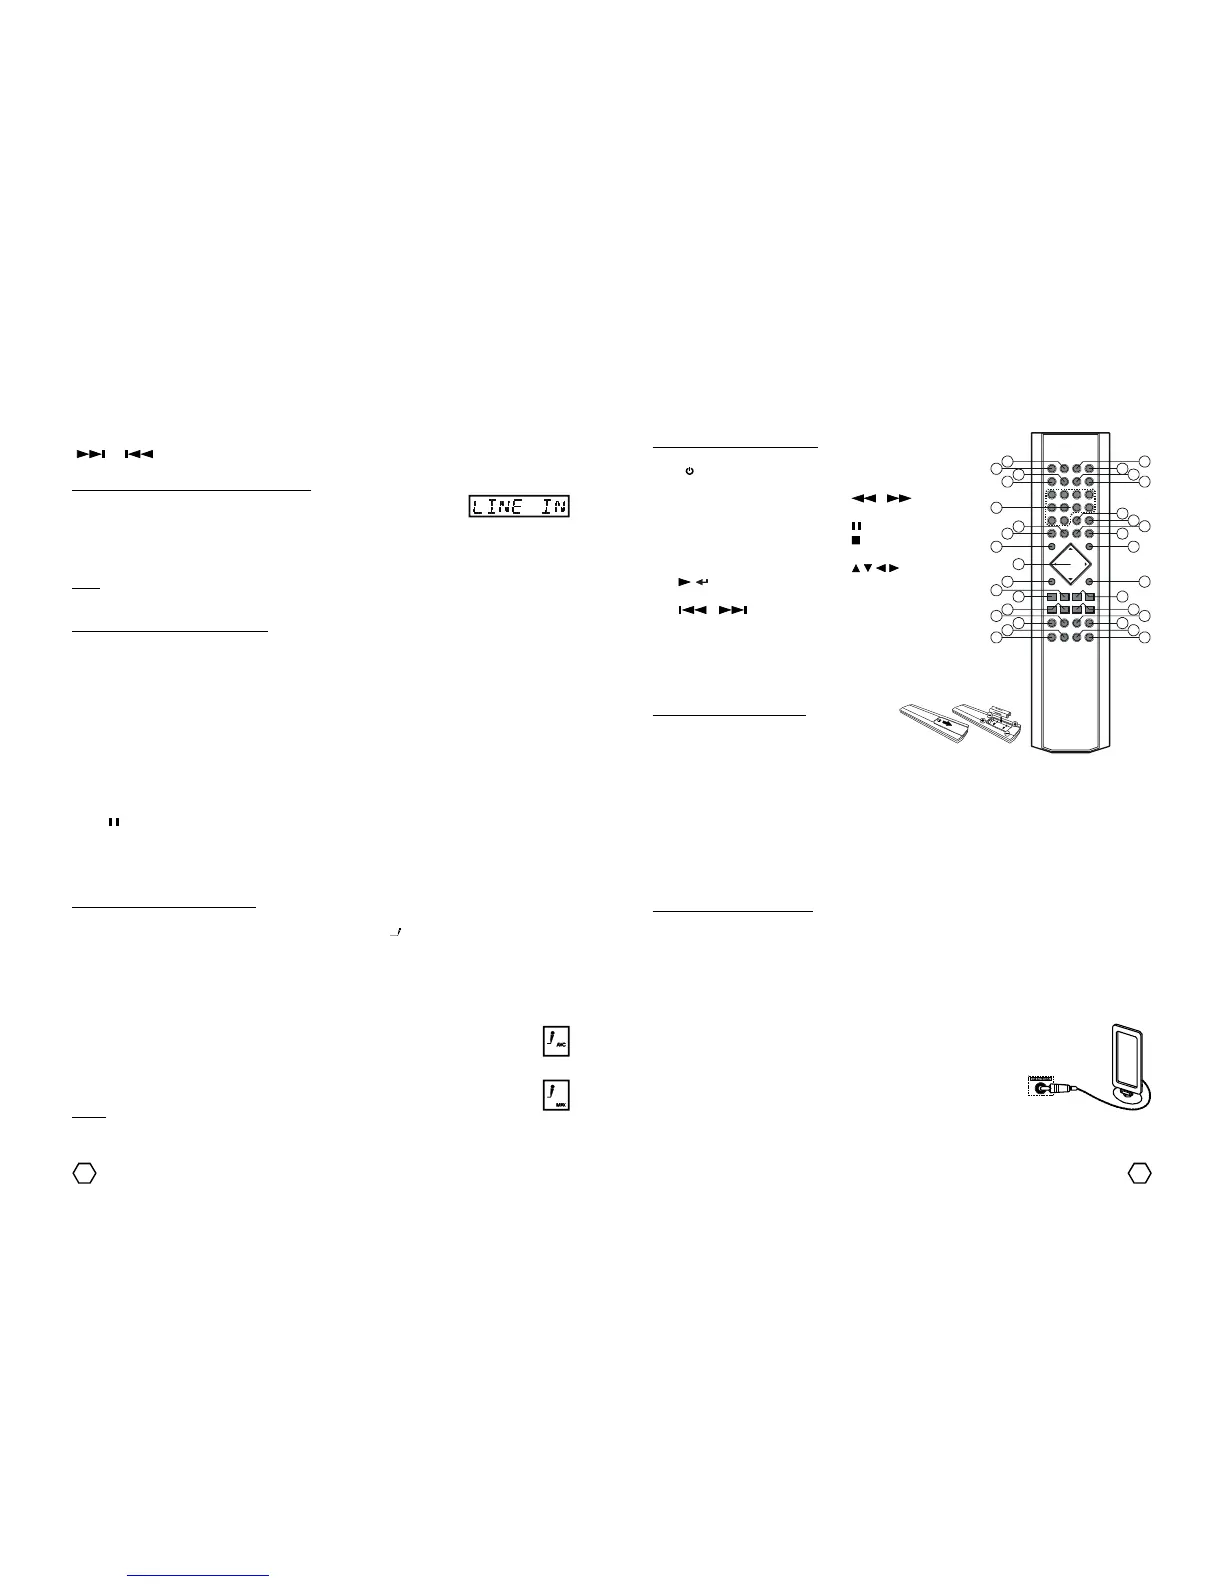
Remote Control
Remote Control button description :
1. “MUTE” 18. “PROG/MEM” (program/memory)
2. “I/ ” (on/standby) 19. “REPEAT”
3. “ANGLE” 20. “A-B”
4. “AUDIO” 21. “ ”/“ ”
5. “KARAOKE” (fast reverse/fast forward)
6. “EQ” (equalizer) 22. “ / STEP” (pause/step)
7. “SURR” (surround) 23. “ ” (stop)
8. “BAZZ” (bazzoke) 24. “RETURN”
9. “SETUP” 25. “ / / / ” (navigator)
10. “ / ” (play/enter) 26. “PBC/MENU”
11. “- VOL +” (volume) 27. “GO TO”
12. “ ”/“ ” (previous/next) 28. “ZOOM”
13. “OSD” (on screen display) 29. Angka “0”-“9”
14. “ECHO” (certain type only) 30. “TITLE”
15. “CLEAR/FM MODE” 31. “SUB-T” (subtitle)
16. “SLOW/AM/FM” 32. “FUNCT” (function)
17. “SLEEP” 33. “MULTIMEDIA”
Remote Control battery installation : Open the battery
cover and insert two batteries size “AAA/UM4/R-
03” or equivalent with the right polarity, as shown
on the battery place.
Effective operational distance of remote control is 6 metres. If operational distance is decrease, change the
batteries with the new ones.
- Do not use different kind batteries.
- Remove the batteries if remote control does not use for along time.
- Remote control will does not work well if :
* Between remote control and the remote sensor is blocked by something.
* There is bright lights like direct sunlight.
* You operate another remote near the remote.
INSTALLATION INSTRUCTION
Important !
Connect the speaker and other equipments first before you connecting the unit with the power source.
Speaker Installation
Connect the right speaker to the SPEAKER R terminal and left speaker to the SPEAKER L terminal. Make sure
you connected each speaker cable to the terminal correctly. Connect the red wire (+) with the red terminal and
connect the black wire (-) with the black terminal. Do not put speaker box near to the TV, this can cause picture
distortion.
AM loop antenna
Attach antenna loop AM to the AM ANTENNA terminal. Put and adjust AM loop
antenna position/direction to get the best AM reception. Keep the others electrical
equipment that affected AM reception such as neon, komputer, dll.
MIC (microphone) terminal
With attaching Microphone to MIC terminal, you can use the unit as MIC amplifier or for karaoke.
 Loading...