of 04
Posh Solus Polymarble Shower Base
Do not use “Liquid Nails” or similar rigid construction
type adhesive to install base.
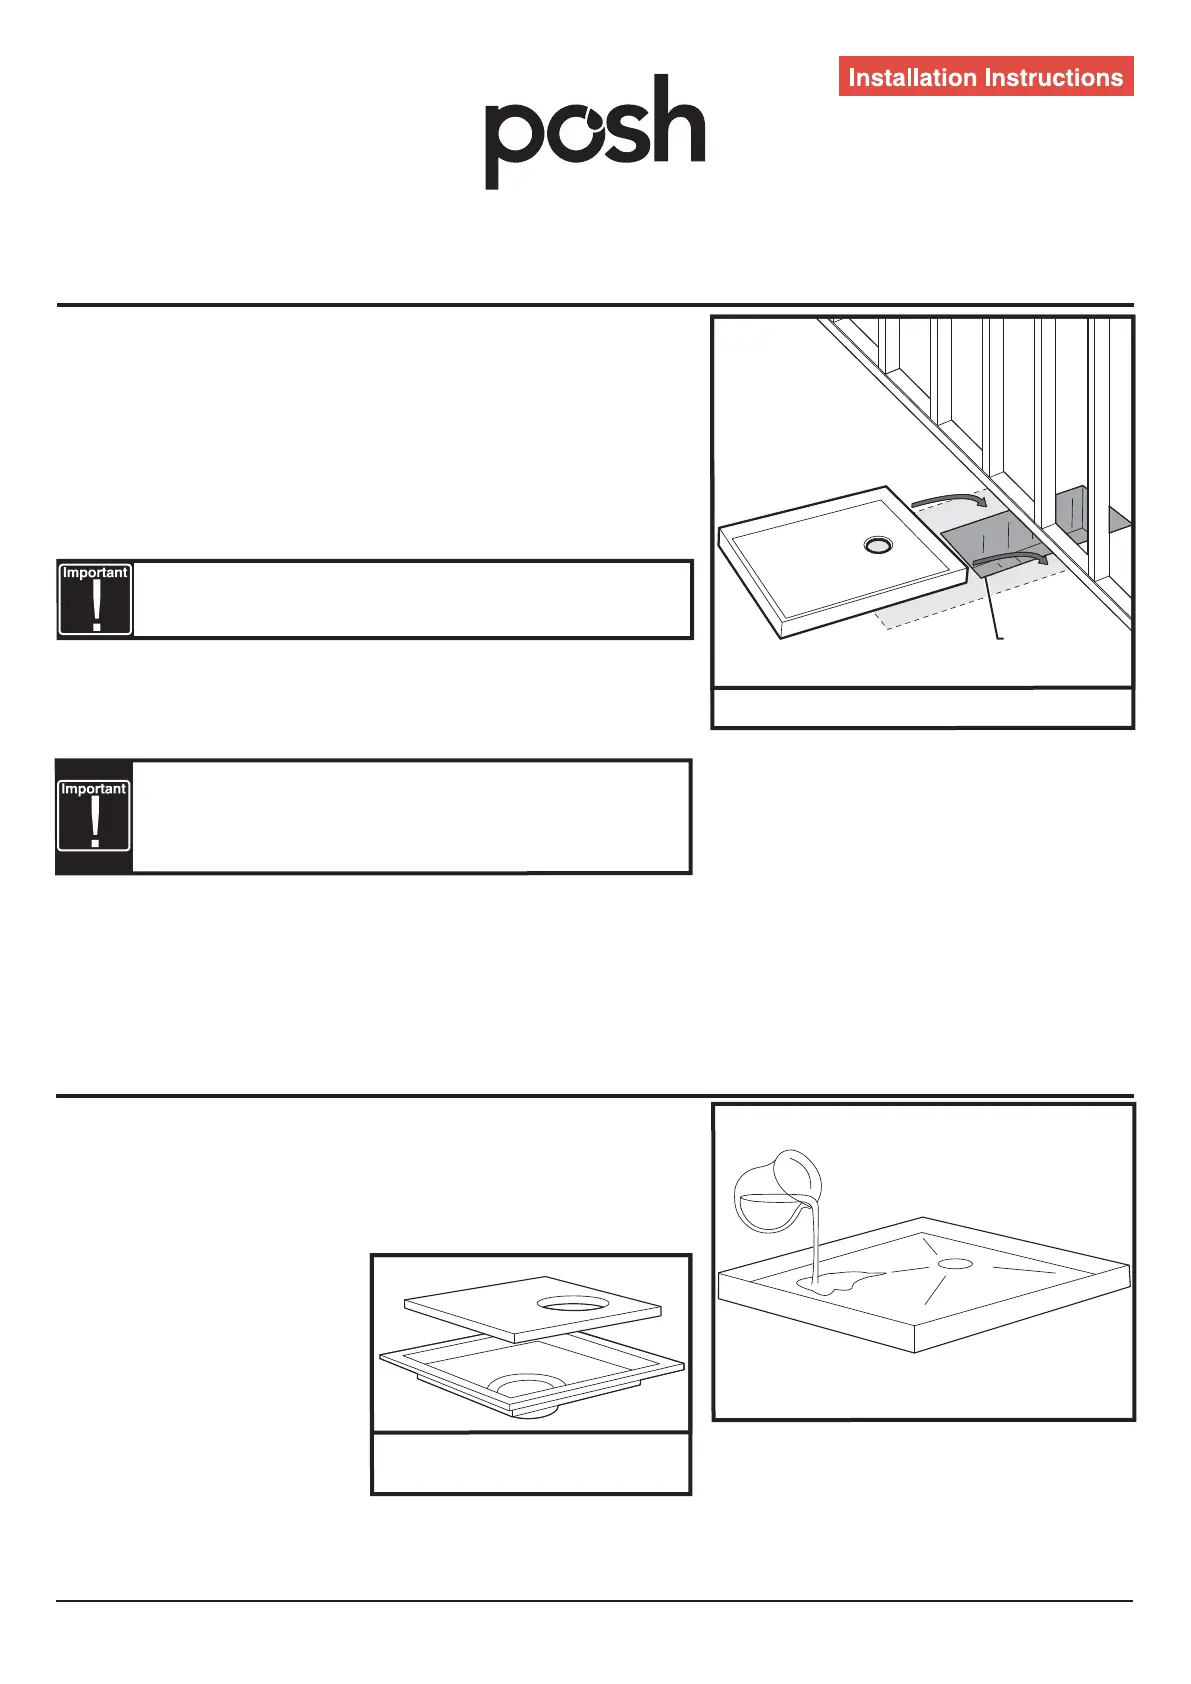
Concrete Slab
300x300mm
Max.
Test water drainage to waste.
Smartpan/Smartwaste
Smartpan/ Smartwaste fitting -
lid/cover must remain on.
At this point it is imperative to check that water drains to
the waste outlet prior to lining the shower walls (see
Smartpan/ Smartwaste). Failure to do so is a breach of
warranty.
Page 03
Ÿ Any boxed opening in the slab to accommodate the waste must not
exceed 300mm in width beneath the shower base.
Ÿ Shower base to be fixed to floor by spreading cement-based tile
adhesive on the floor using a 12mm notched trowel, or by use of
silicone sealant. Alternatively, where the floor is not perfectly level,
the base can be set into a mortar bed - spread a 10mm thick mortar
bed of 4:1 Washed Sand: Spread the mortar over the whole area
where base is to be installed then trowel off level.
Ÿ Lay the shower base on the prepared bed and use a spirit level to
adjust the base to ensure it is level along all sides and diagonally.
This will allow the base to drain properly as it has an inbuilt fall to the
waste outlet.
Ÿ Backfill the opening in the slab with a 4:1 Washed Sand: Cement mix
ensuring the mortar is packed tightly around the waste outlet and all
the way back into the boxed section of the slab and up to the
underside of the base to give maximum support.
Note: Where required by regulation plastic pipe and fittings may
need to be lagged prior to backfilling.
Ÿ When the installation uses these products as waste collectors,
ensure that the lid/cover is fitted to provide adequate support for the
base. Cut a hole in the lid/cover the same size as the waste.
 Loading...