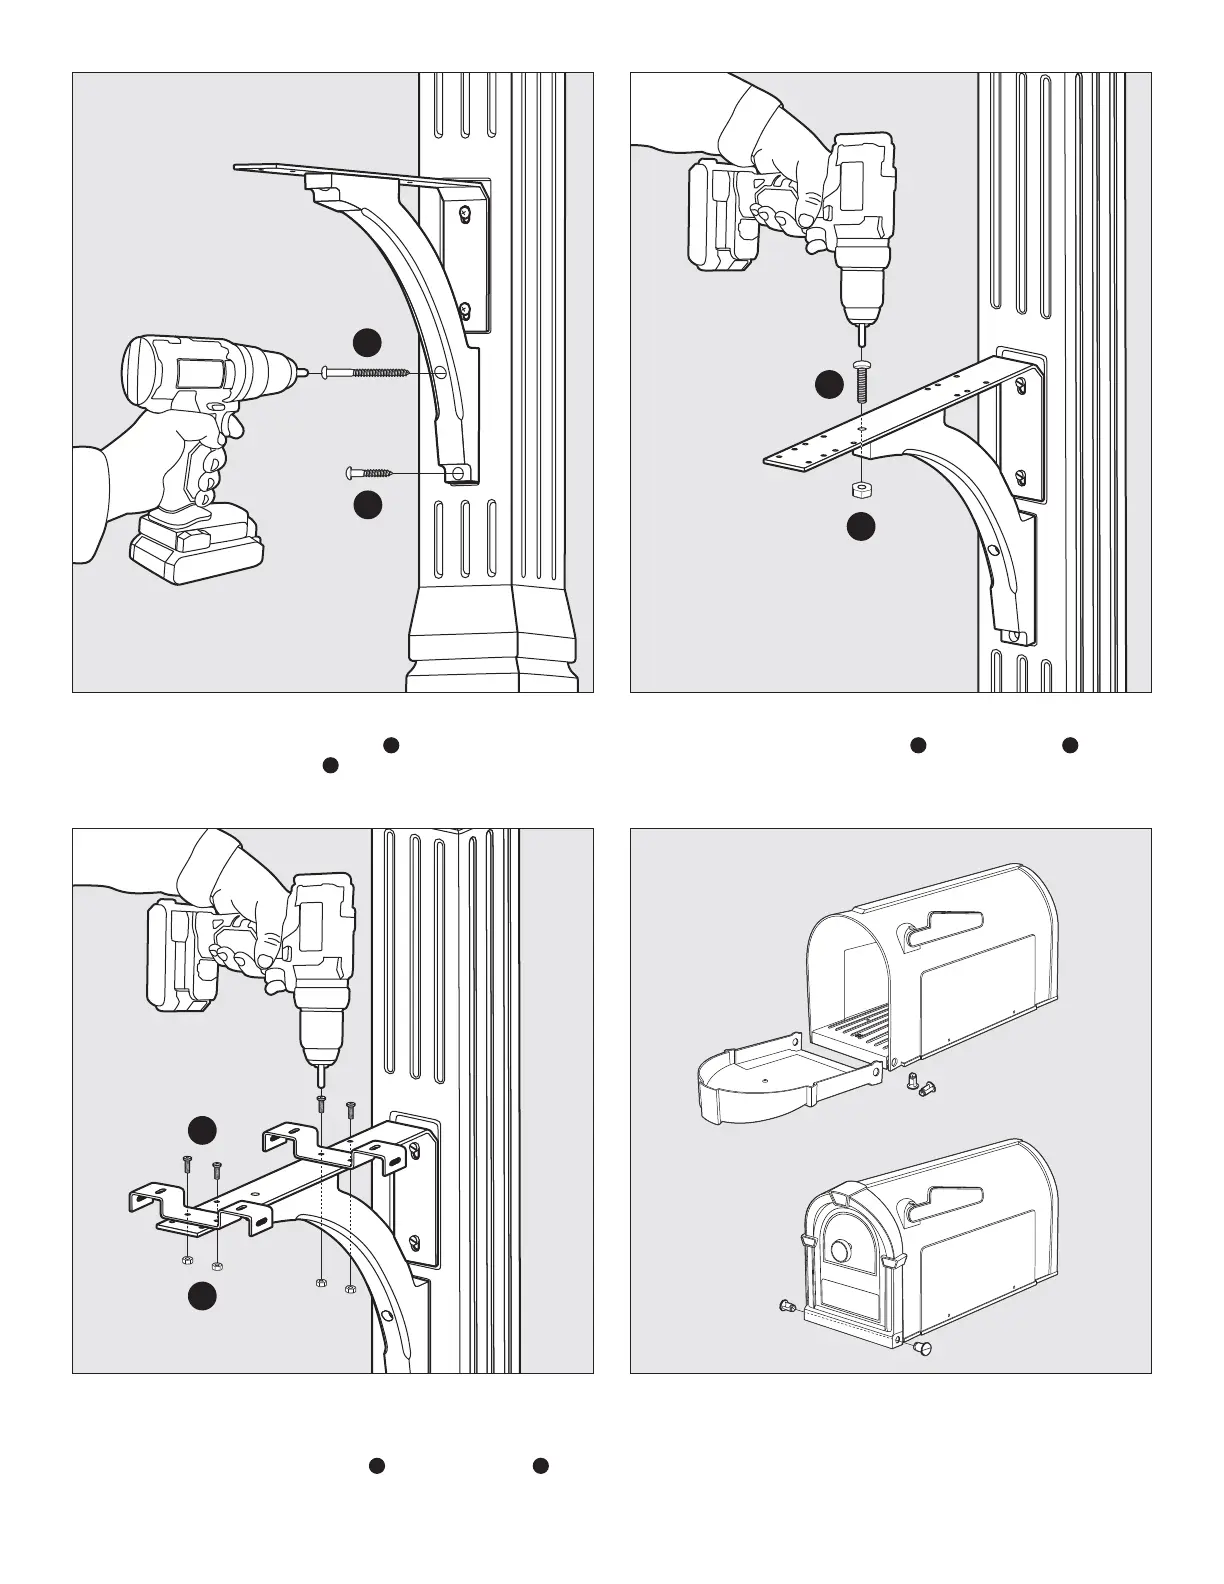
STEP 4 Attach the Decorative Support Piece to the Upper Post
Component using (1) #14 x 3" Pan Head Screw
G
in the upper hole and
using (1) #14 x 1-1/2" Pan Head Screw
F
in the lower hole. Both of these
screws are included in the kit.
STEP 6 The Steel L Bracket has numerous hole locations designed to
accommodate all standard mailboxes. Locate the holes on the Steel L
Bracket that correspond with the mounting holes on your mailbox. Use
the (4) #10 – 24 x 1/2" Phillips Machine Bolts
A
and (4) #10 – 24 Nuts
B
to attach the Mounting Brackets to the Steel L Bracket. These bolts and
nuts are included in the hardware kit.
STEP 7 Assemble your mailbox by using (2) pins to attach Mailbox Door
to holes in Mailbox Body. Pins can be snapped into place by pressing
rmly with thumb or tapped in using a rubber mallet.
TIP: Make sure the pins are fully snapped into place. If they are installed
correctly, you will not be able to remove the pins with your ngers.
STEP 5 Connect the Decorative Support Piece to the Steel L Bracket
using (1) 1/4 - 20 x 1" Phillips Machine Bolt
C
and (1) 1/4" – 20 Nut
D
.
This bolt and nut are included in the kit.
Fig. 4
Fig. 6 Fig. 7
4x
4x
Fig. 5
F
G
C
D
A
B