Do you have a question about the Poulan Pro BVM200VS and is the answer not in the manual?
Read and understand all warnings and safety rules before operating the unit; restrict unit to knowledgeable users.
Always wear eye protection, foot protection, and respirator/face mask when needed; secure hair and loose clothing.
Eliminate ignition sources, mix and pour fuel outdoors, do not smoke, ensure unit is assembled and in good condition.
Align rib on upper tube with groove in outlet, slide into place, loosen knob, secure by turning clockwise.
Align slots on nozzle with tabs on lower tube, slide on, turn clockwise until click to secure.
Open bag zipper, insert elbow tube, push small end through opening, close zipper securely.
Stop engine, remove vacuum inlet cover, align tabs with slots, push tube in, turn counterclockwise until click.
Remove elbow tube and vacuum bag, then vacuum tubes; close vacuum inlet cover, reinstall blower tubes.
Position unit with muffler away from body, pass strap over head to right shoulder, adjust until seam is between thumb and index finger.
Read manual and safety rules before operating; compare illustrations to unit to familiarize yourself with controls.
Used to stop the engine by pushing and holding in the STOP position until the engine stops.
Used to select the desired engine speed.
Removes air from carburetor and fuel lines, filling them with fuel for easier starting with fewer pulls.
Helps supply fuel for cold starting; move to FULL CHOKE, then HALF CHOKE, then RUN.
Hold unit with muffler side away from body and clothes.
Reduce hearing loss with protection, stop engine before installing/removing attachments, operate at reasonable hours.
Read fuel information in safety rules before fueling; if you don't understand, do not attempt to fuel.
Remove fuel cap slowly when refueling.
Engine requires minimum 87 octane clean gasoline; use Poulan PRO synthetic 2-cycle oil mixed at 40:1.
Release throttle trigger and push and hold STOP switch in STOP position until engine stops.
Ensure tubes are secure, fuel unit, move 10 ft away, hold unit as shown, directed away from people/objects.
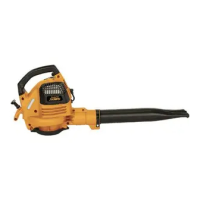
Illustration showing starting position for blower and vacuum.
Press primer 6 times, move choke to FULL CHOKE, squeeze throttle trigger and hold.
Warranty does not cover operator abuse/negligence; periodic adjustments are needed for proper maintenance.
Check muffler, spark plug boot, air filter, and housing screws for tightness.
Contact authorized dealer for replacement of damaged/worn parts like fuel tank or vacuum bag.
Inspect for loose/damaged parts after each use; clean unit and decals with a damp cloth.
Clean or replace air filter every 5 hours or yearly; wash in soap/water, dry, apply oil, then replace.
Ensure muffler mounting screws are tightened securely once each year to prevent damage.
Remove carbon deposits to avoid fire hazard or performance issues; replace screen every 50 hours or if damaged.
Replace spark plug yearly for easier starting and better running; set gap at 0.025 inch.
Drain unit, remove fuel cap/retainer, pull filter from tank, install new filter, reinstall parts.
Prepare for storage at season end or if unused for 30+ days; clean unit, store in clean dry area, oil metal surfaces.
Follow fueling instructions; fuel stabilizer minimizes gum deposits during storage.
Remove spark plug, pour oil through opening, pull rope to distribute oil, replace spark plug, clean air filter, check fasteners.
Do not store gasoline from one season to another; replace rusty gasoline cans.
| Brand | Poulan Pro |
|---|---|
| Model | BVM200VS |
| Category | Blower |
| Language | English |