POURSTEADY
©2019 — REV 4.0
INSTALLATION
onnt Pourtad
4
• Connect all ttings including drain tube, pump
control wire, power supply, USB Antenna. Run all
connections through the counter, making sure that
there are no kinks in the plumbing.
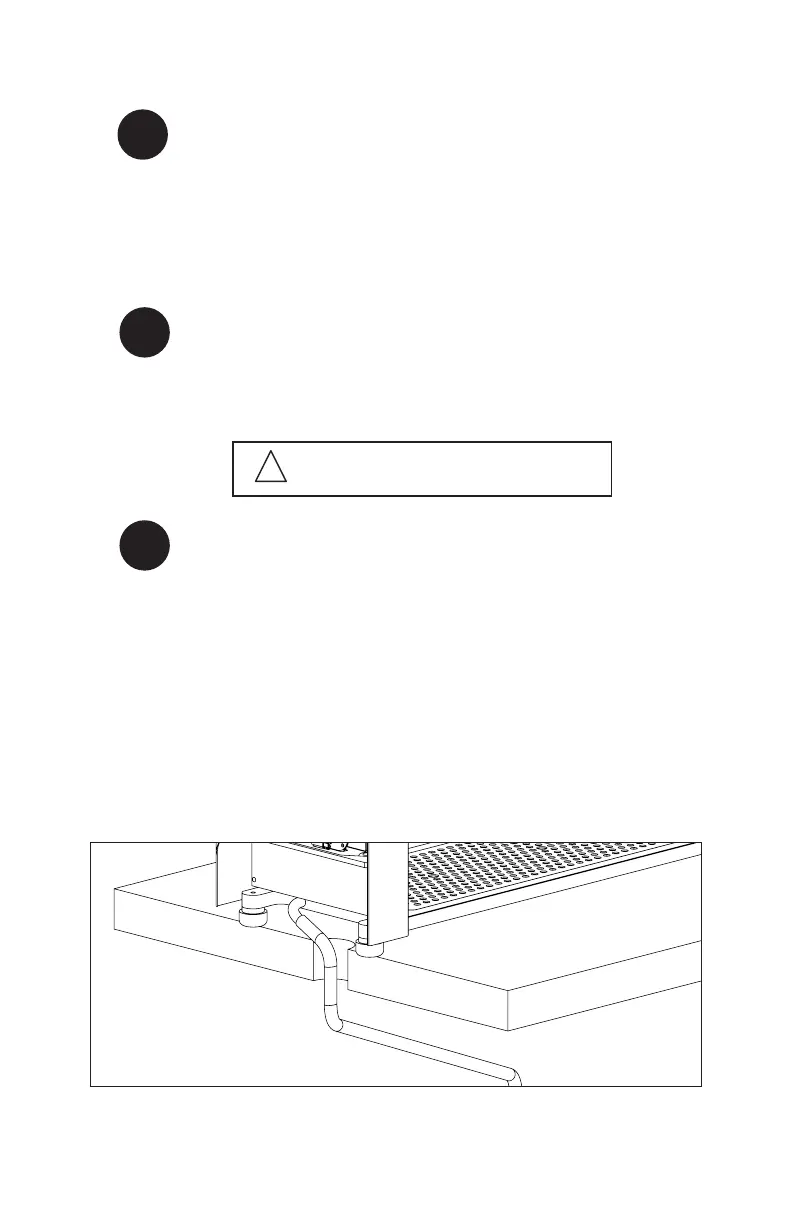
onnt drain tub
6
• The silicone tube tted to the outlet coming out
of the drip tray on the Poursteady (shown below)
should pass through the hole in the counter.
• Cut to length (if desired).
• Insert the loose end into the drain and secure. It
is very important that there are no kinks or high
spots in the line as it runs from the the machine
to the drain. These will result in poor drainage
and potential overow of the drip tray.
ur 24V por uppl
5
• The 24V power supply should be secured under the
counter close to both the Poursteady and the 110V
socket.
DO NOT PLUG INTO THE WALL
!