8
ASSEMBLY
5
Installing and Changing Saw Blades
WARNING: RISK OF PERSONAL INJURY.
Always disconnect tool from power source
before making any adjustment, installing or
changing accessories
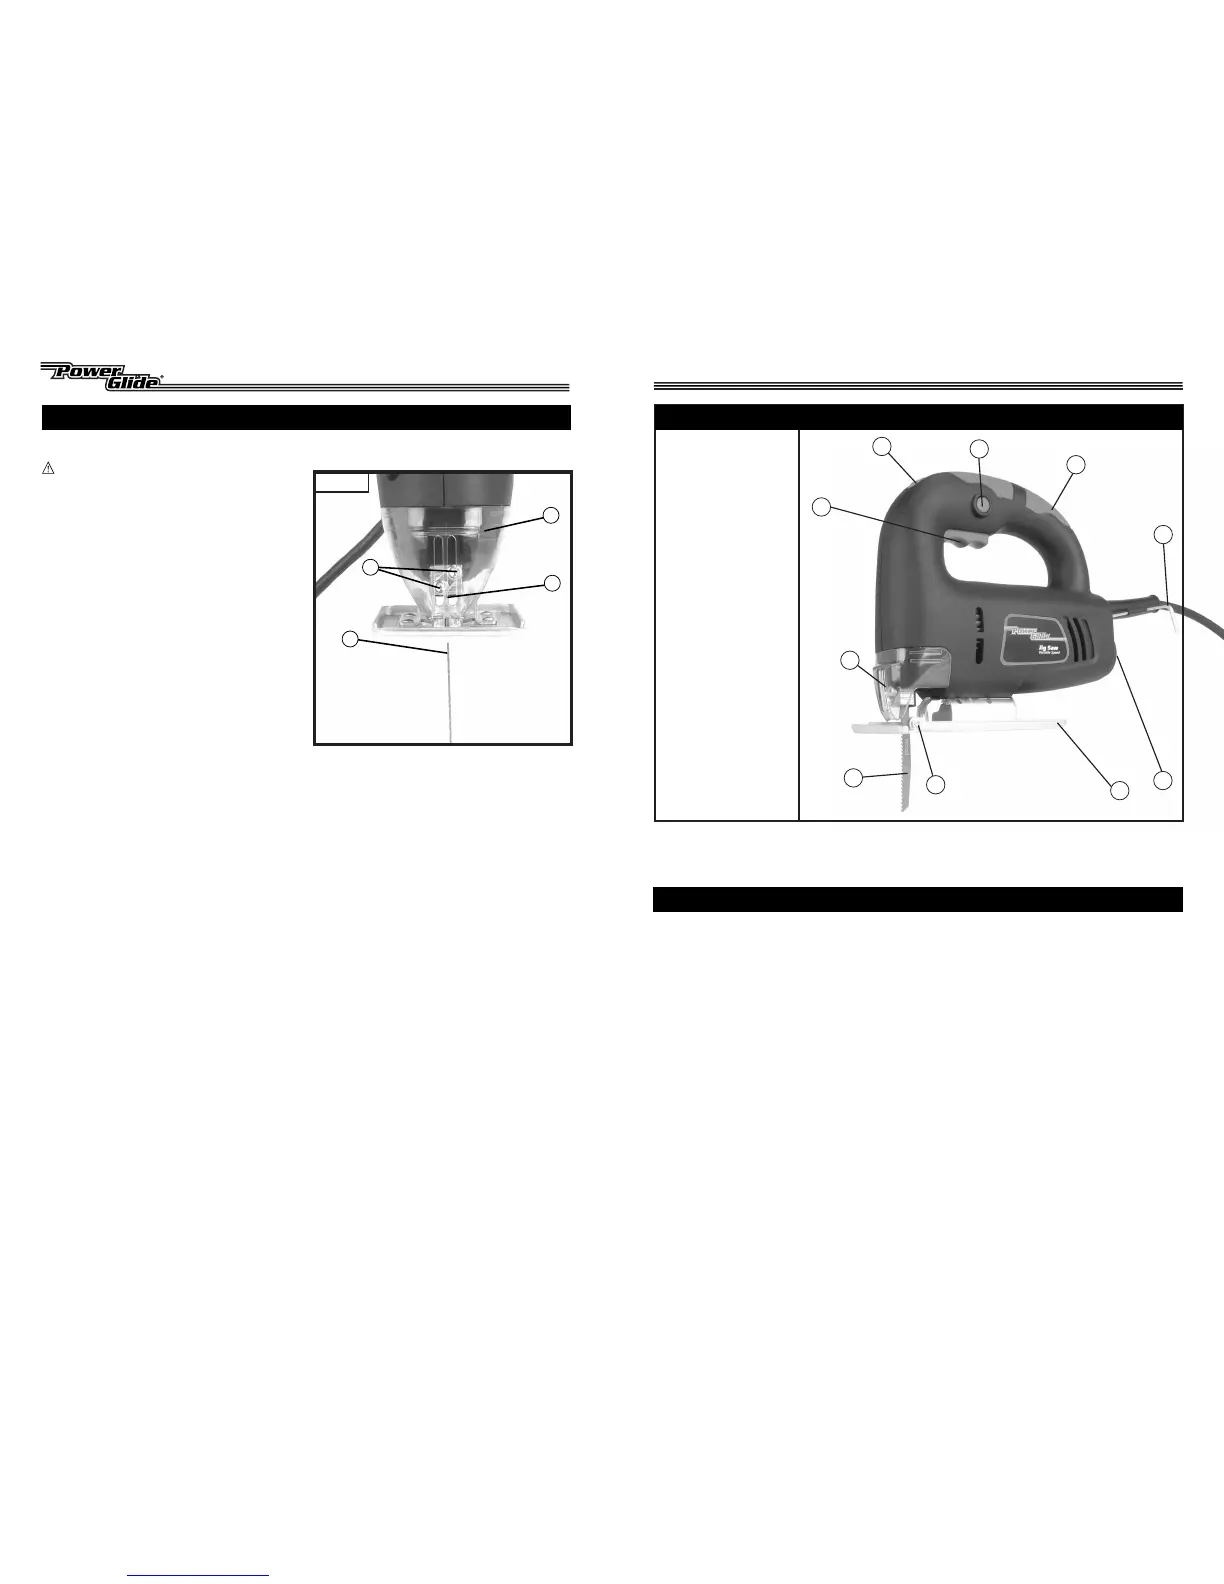
1. (SEE FIGURE 7) Slide the clear blade
guard (1) forward and remove to access the
blade retainer assembly.
2. Using the supplied hex key (stored on the
power cord strain relief at the rear of the
tool above the dust chute), loosen both
blade retaining screws (2). Note: it is not
necessary top completely remove the
screws or blade clip.
3. Insert a saw blade (3), teeth facing forward
and up, into the slot of the blade clip (4).
Push in firmly until fully seated against the
top of the blade clip. Tighten the blade
retaining screws to secure the blade.
NOTE: When tighten blade-retaining
screws, work slowly alternating between
left and right to avoid uneven pressure on
the blade clip.
4. Adjust saw blade ball support.
5. Slide the blade guard (1) back into position
until it locks into place on the base.
Figure 7
1
2
3
4
CONTENTS
1. Jig Saw
2. Hex Key
3. Saw Blades (2)
4. Instruction Manual
1. Grip
2. Hex Key
3. Dust Chute
4. Base
5. Blade Roller
6. Saw Blade
Red- Metal Cutting
Blue- Wood Cutting
7. Blade Guard
8. On/Off Trigger Switch
9. Variable Speed Control
10.Lock On Button
1
4
5
6
GETTING TO KNOW YOUR TOOL
7
2
Figure 1Figure 1
3
8
9
10


 To Next Page